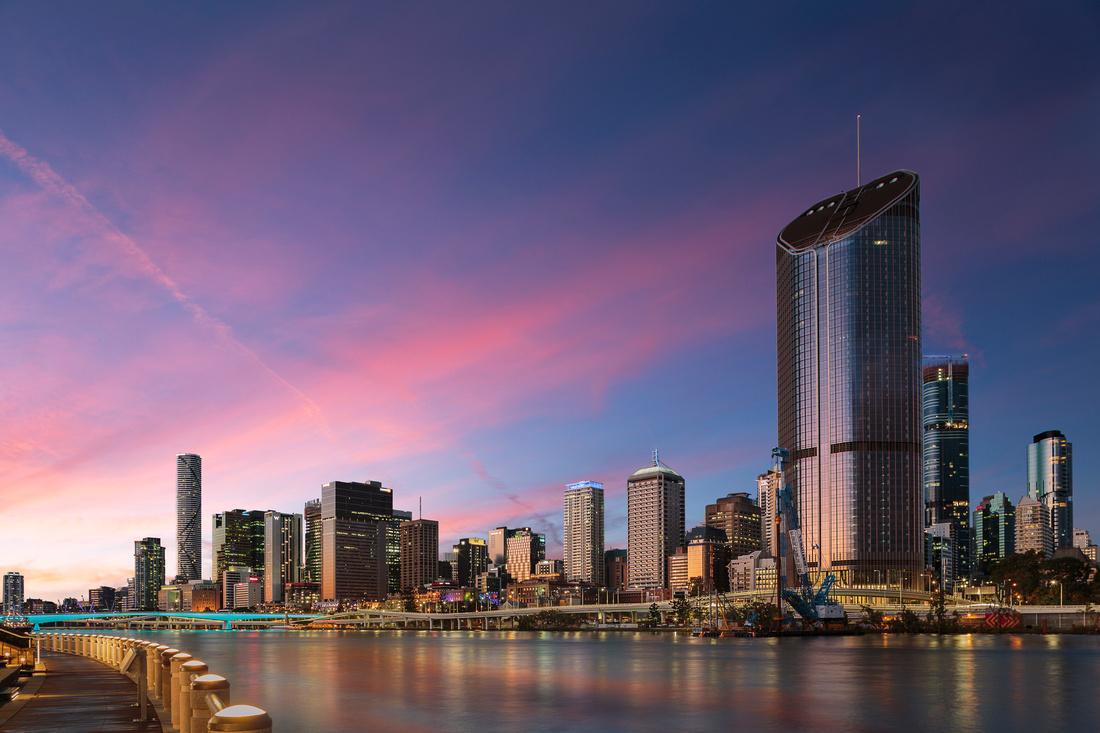
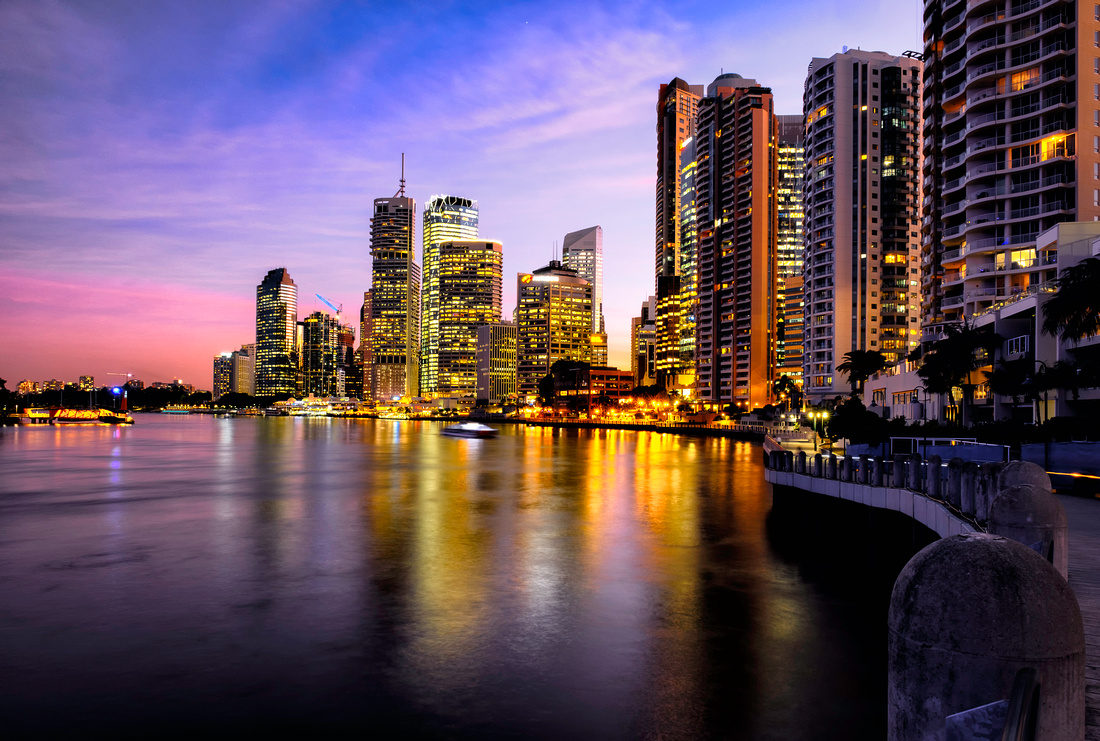
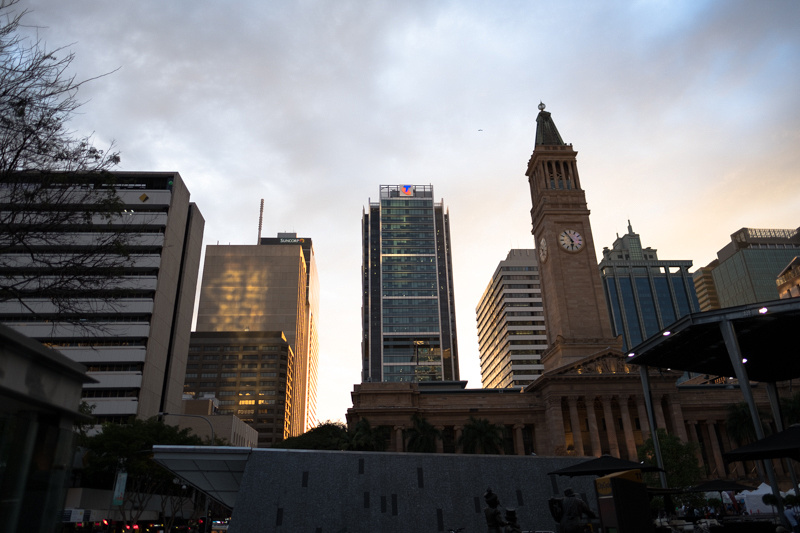
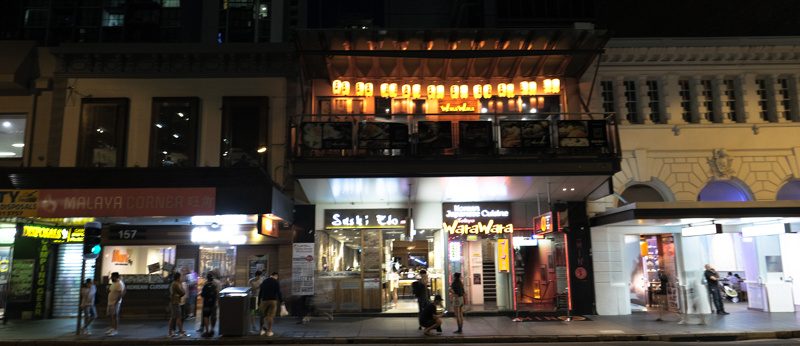
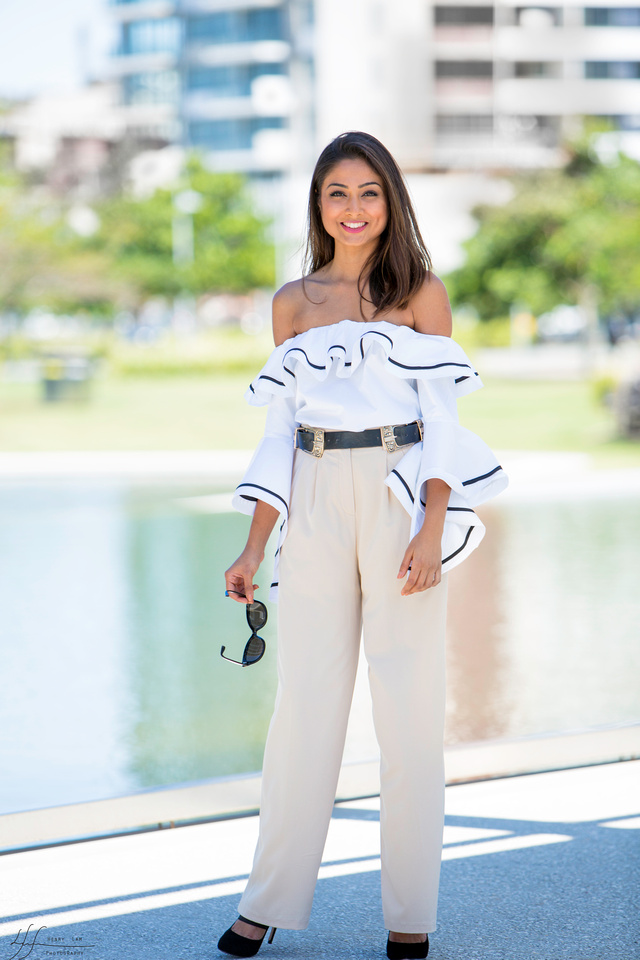
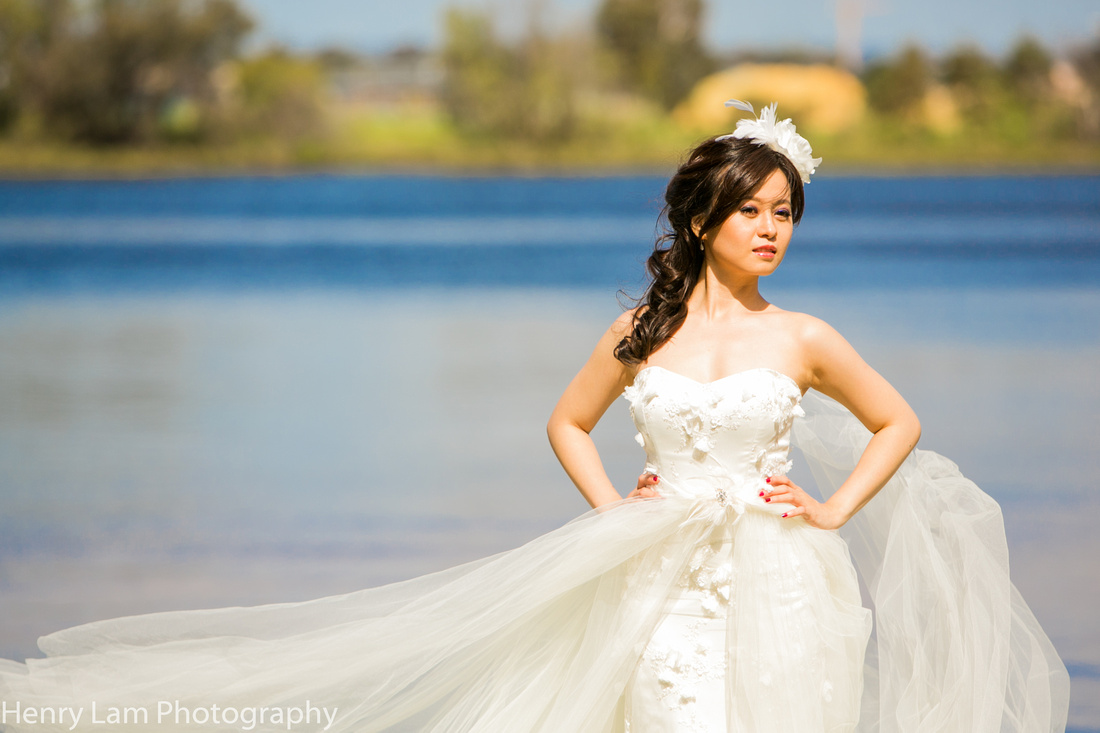
 Southbank | Brisabne | AustraliaBlue hour over Brisbane skyline from Southbank. Straight out of Camera Raw
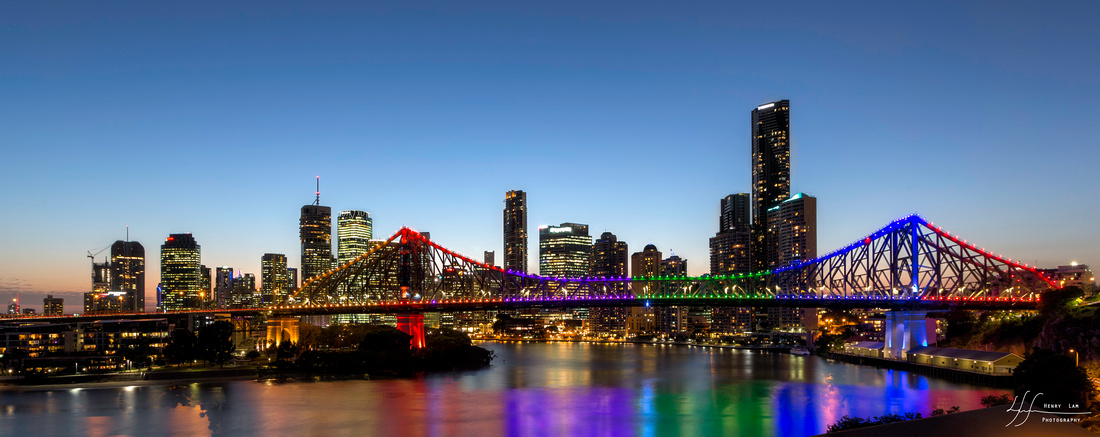
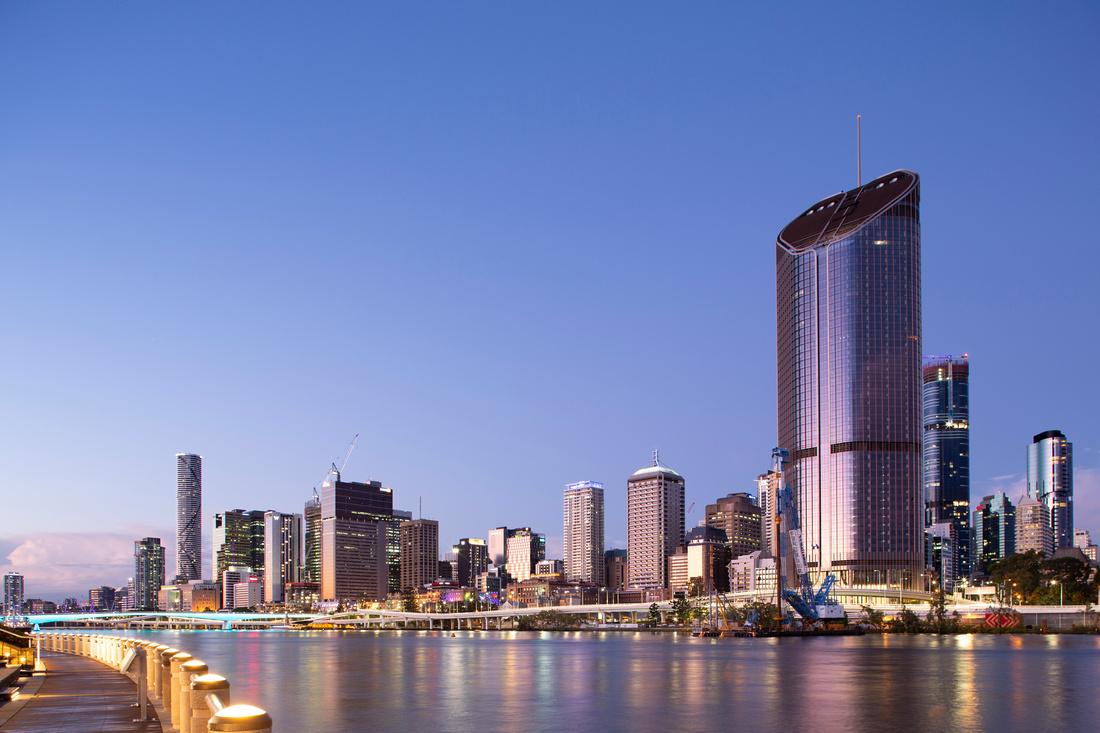 Straight out of Camera Raw
As a photographer we love to have as much control of the scene as possible. Before we take the photo, we have preferences on how the we want the final image to turn out in the end. "We want a type of light, subjects arranged in a particular way, an expression etc. However; Not all elements are available for us to control and one of them is the weather conditions.
So by having the skill to change the sky (the largest portion of the image that is the weather) is a good one to have. Now, we would never be able to get it 100% and it is always preferred to be there at the right time and place. However, that is not always viable due to time, cost and opportunity.
Classic scenario is when you have travelled afar and only have one opportunity to photograph the scene. Upon arrival of the location the condition is less than ideal. What do you do? Do you mope and whine that things aren't going your way or do you go at it with optimism. It is extremely frustrating and deflating to arrive at a location that you have worked so hard to get to and anticipated for and then only to be handed with less than mediocre conditions.
So whereas before, I may not even bother to take the photo because of my negative emotional state, I can now have a wider latitude of optimism and go ahead with the possibility of recovering from the weather shortfalls.
The idea is to make the sky replacement seamless. This is not trickery, it is about representation. Artists represent the scene of what the scene was like, not for what it was. This could be a topic for another discussion. If the image looks good, that is the ultimate goal. Others may have a different opinion on that matter and that is fine.
To make sky replacing seamless it requires skill, practice and wisdom. You can not simply just add any good looking sky to the image - you require to put some forethought into it.
Things to consider are time of the shoot ( You must put a sky that was taken at a similar time of day as the original photography). Don’t put a night sky onto a scene when it was clearly taken during the day.
Pay attention to the lighting direction, By using the given direction of light you must have a sky where the light source was coming in the same direction. I.E if the scene is front lit from the sun, don’t have a setting sun in the scene where it appears to be in the background.
When it comes to sky replacing there are three steps that I go through:
First, select an appropriate sky to be the replacement. Taking into the above mentioned considerations.
Second, is to mask out the sky out from the original photograph. This is by far the most challenging part. Depending on the complexity I use a combination of brush masking, blending modes, channel masks and manual selection tools.
Third, add a consistent finish to tie both the scenes together.
Here are some examples of sky replaced images that I have done so far, bear in mind, I only started this techinique in July 2020.
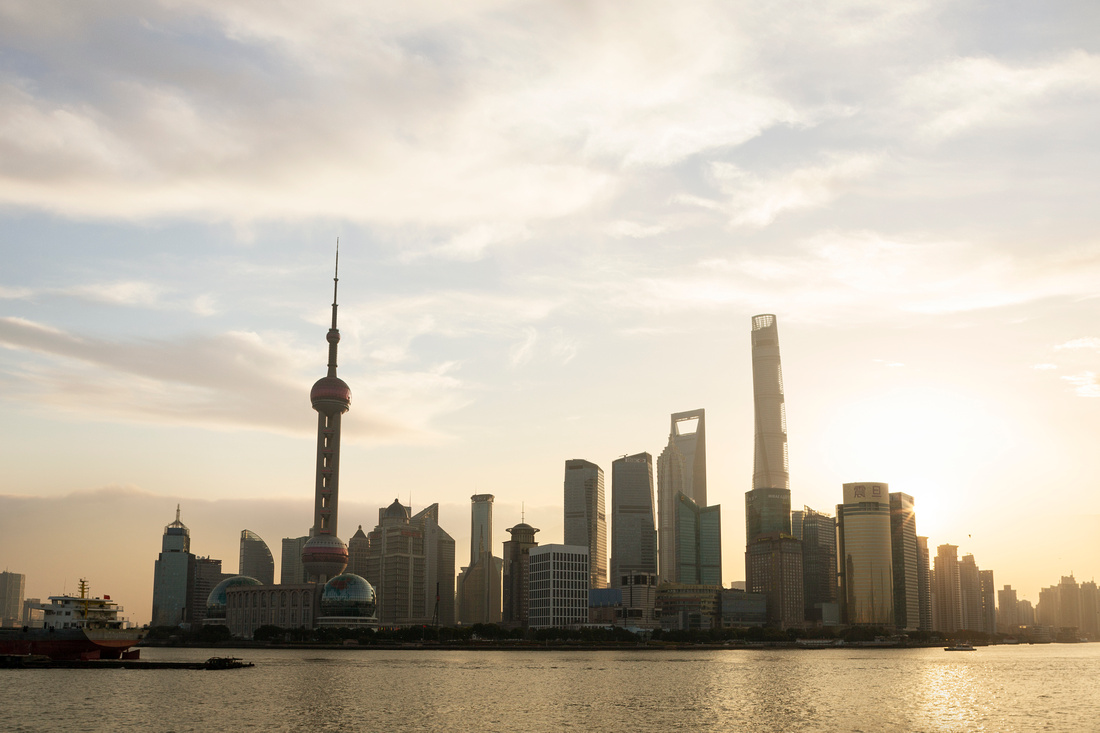 The Bund | Shanghai | ChinaMorning sun peaks over the classical cityscape of the Bund in Shanghai.

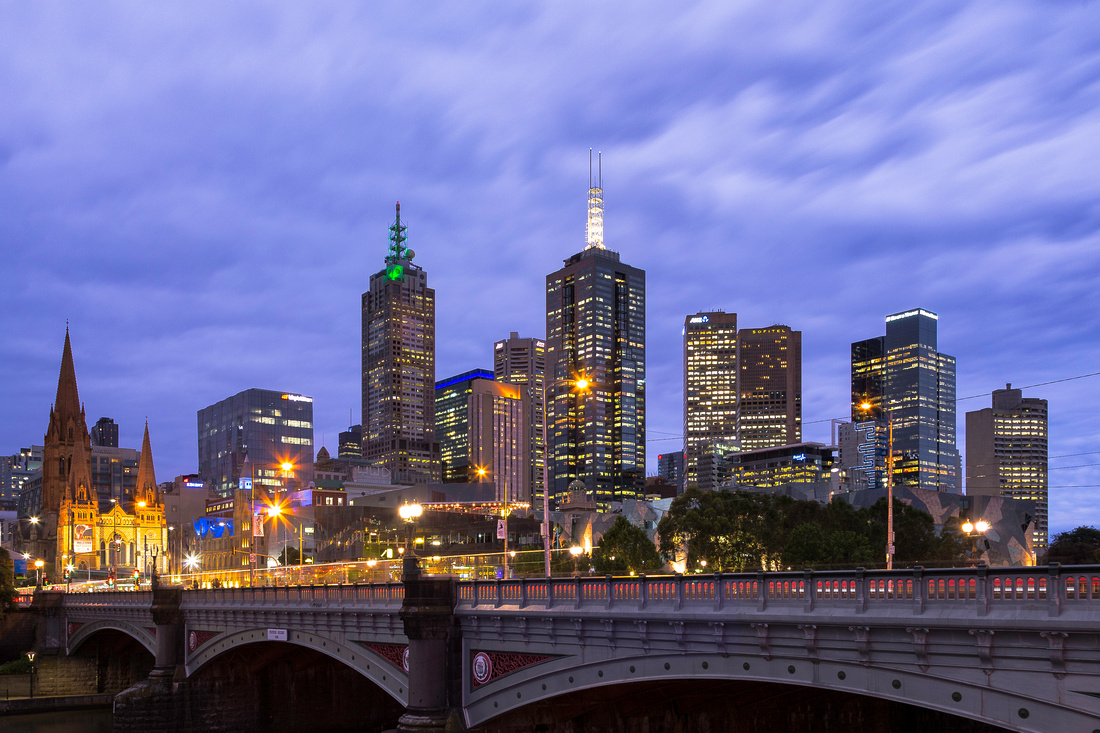
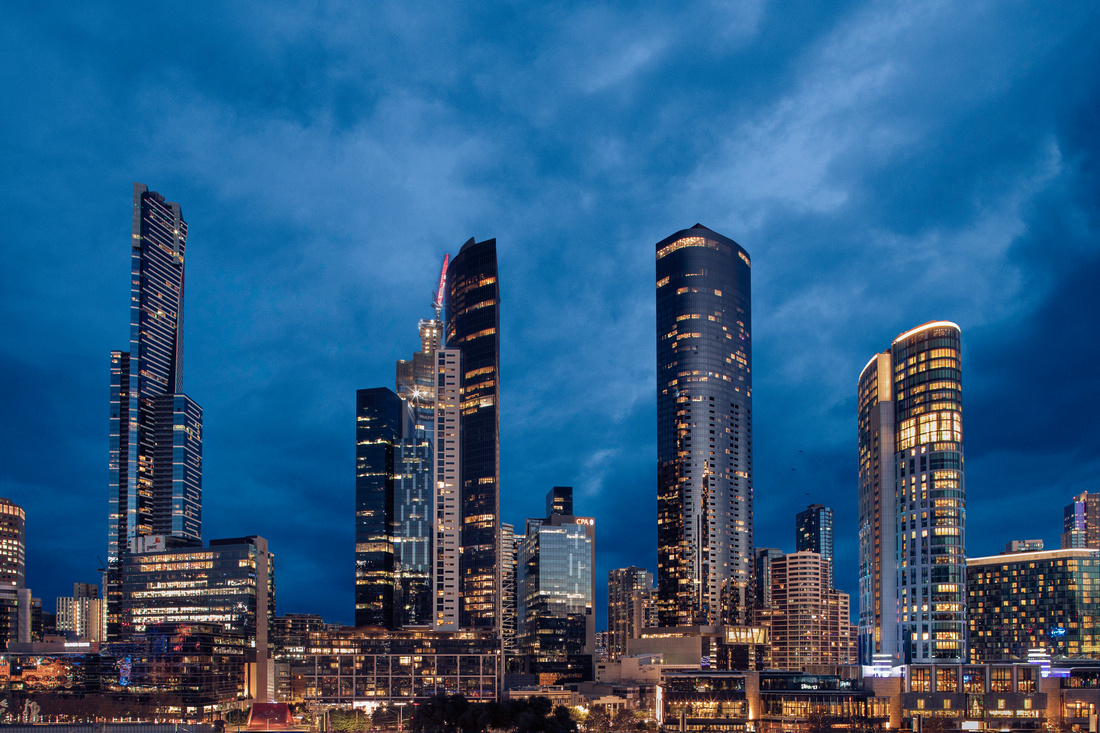 Southbank | Melbourne | AustraliaEarly blue hour of Melbourne's Southbank city skyline.
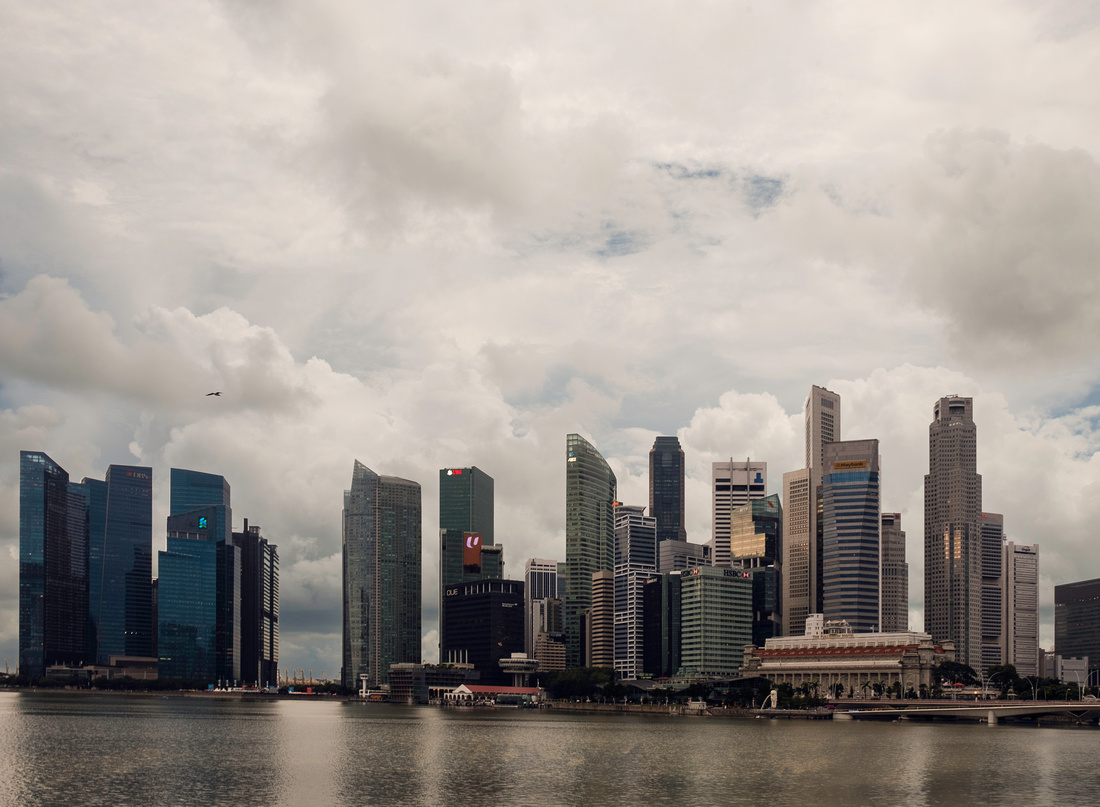 Singapore CBD | SingaporeGood morning Singapore CBD skyline
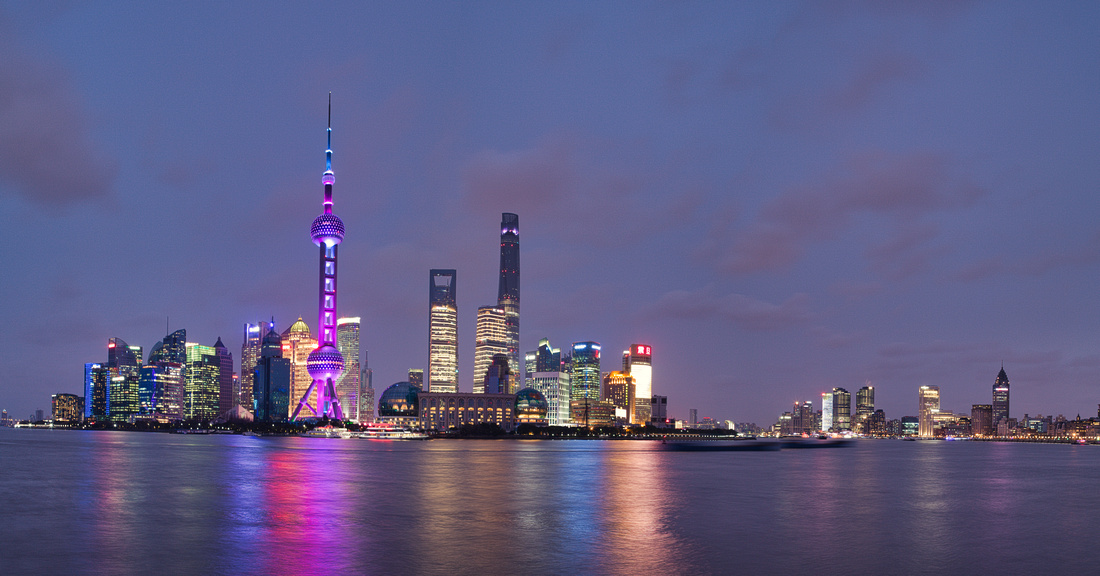 Shanghai CityShanghai city skyline taken from the Bund
Are you planning to travel to Shanghai and photograph the Bund Cityscape? The Iconic cityscape is definitely worth a visit if you are interested in modern cityscapes. My trip on January 2018 was my first time visiting Shanghai or even China. There are few things that I learned (mistakes made from a beginner that I wish to pass onto would be travelers in the future).
These are some things I wish I knew before going to Shanghai and that someone warned me about before going there. Some points are important and can be costly if not prepared, other things are just good to know and bear in mind:
In no particular order:
1.Pudong Airport is BIG!!!
Pudong airport is quite large, and can take some time to exit the airport. I flew in with China Eastern Airlines from Bangkok and I recall it took around 20 minutes from the moment the wheels landed on the runway till the plane switched off the engine. The taxi'ing process takes a long time. We landed at around 4:00 but didn't leave the airport till around 5:00pm
2. Use the MRT rail system where possible to get to the city... AVOID TAXI unless it is IMPERATIVE!!!!
This was a big one. Sadly to admit, Elaine and was stumped by this pretty bad, When we entered the arrival hall, we were already thrown back by the long day of traveling, airport transfers, extreme change of weather from 33 degree celsius Bangkok, to 3 degree celsius in Shanghai, our minds were not in the best and clearest of states. Long story short, I thought I had airport transfer organised however this was not the case, In the midst of stress. I didn't plan the route to our hotel. We eventually became succumbed to a taxi driver who would take us to our hotel for a whopping 650RMB. That was about AU$140. So please don't do this!! They can be convincing, and if you are somewhat lost, it can be very easy to fall into.
The best method by far to get into the city is to use the High speed rail, which is CONVENIENTLY connected to the airport. Shanghai offers two rail options. Shanghai Metro line runs from 0600 to 2200 everyday and there is a train every 8 minutes. To get to People's Square (Bund), it will take approx 68 minutes and will cost 7RMB.
Shanghai has one of the fastest, if not THE fastest high speed rail system in the world. A quicker and more expensive train is the Shanghai Maglev Train. Trains depart Maglev Station at a whopping maximum speed of 430km/hr. The train wait time is 15 minutes and it only takes takes 7-8 minutes to arrive at Longyang Road Station, Costs 50RMB per one way trip. From there you can get onto inter-change for Metro Line 2 bound for People's Square. People's Square will be approx 20 minutes rail from Longyang Station.
3: Do not use the Money exchange system at the airport.
They charge you a flat fee of 9RMB for any one time exchange........ OUCH! we change all our Thai Baht there, although we didn't change much, like $20 Australian dollars worth, it was just that we hardly got anything back. Best bet is to use ATM there.
4: ATM are really good in China!
I must admit, the ATM in Shanghai, city area. Are one of the best I have ever come across. They feel very safe. In a way they look like public toilets with the vacant and occupied lights on there. To use the ATM you enter the booth, close and lock the door behind you prior to using the machine. It felt clean and very easy to use. IT was a bonus that the ATM has English option as well. I just did withdrawals from my VISA credit card.
5: Check visa requirements:
If you are coming from Australia you need to purchase a visa prior to entering China. I got my visa done at the China embassy here in Brisbane city. It cost me $109 to get a single entry visa into China for 4 days. You need to fill in an application, provide at least 2 passport photographs. If you passport is less than 12 months old, the agent at the embassy asked to review my old passport, so always keep them nearby. The application process was complete and ready for pick up in 4 business days.
6: No google, youtube and facebook
Don't expect to find access to these websites whilst you are in China, however; somehow I managed to get access to them in my first hotel but not on my second. So what I am suggesting is make sure you either get all you neccessary sites and information. I couldn't remember if even Gmail was accessible. If you have an IOS device, I hear that is the best alternative.
7: Tripods are allowed on in the Bund area
I write this point in because when I was traveling through some public areas in Bangkok and in Japan, tripods were restricted. You shouldn't have too many issues in setting up a tripod and a location to view the Bund area. The riverside stretches a good few kilometers around the scene. When I travelled there it was in the middle of winter so it was low season. This place can get quite busy with tourists, so be mindful of your equipment as pick-pocketing is common in China.
8: China uses the same power plugs as AUSTRALIA
Good news if you are from Australia. all your 2 point plugs are all compatible in China Shanghai and you do not require and adapters.
9: Not as cheap as you may think it is
Shanghai is not a cheap area to visit if you are comparing it with many of the other South Eastern Countries. You will find that most prices of goods are just a little bit cheaper than Australia if not the same. Food is comparable to Australia prices, and you can get some restaurants here that can be even more expensive. Expect to spend around $10-$15 for a standard meal for lunch and maybe around $15-$20 for a meal at dinner.
10: Large crowds around food stalls is a good sign the product is good.
If you are unsure of what is good to eat, just follow the crowds of people. If you see a large queue in front of a store, chances are good you won't be disappointed with their product.
11: Make the trip to the observation deck of the World Financial centre if the skies are clear.
I say this out of regret because I was unable to make it. If the skies are clear, I would recommend paying the entry fee, you will not be disappointed with the view. http://www.swfc-observatory.com/ticket.php
Getting to the Bund:
Subway: Take Line 2 or 10 to East Nanjing Road Station. It is approx 10 minute walk from there.
By Bus:
Take bus 33, 37, 55, 65, 147, 305, 307, 317, 330, 921 and get off at East Zhongshan 1st Road / East Nanjing Road
Take bus 123, 135, 145, 576, 934 and get off at East Zhongshan 1st Road / Hankou Road
Take bus 576 or 868 and get off at East Zhongshan 1st Road / Guangdong Road
Take bus 220 or 939 and get off at Middle Sichuan Road / Hong Kong Road
Take bus 42, 71, 311, 316, 320 and get off at East Yan’an Road / East Zhongshan 1st Road
Take bus 20 and get off at Jiujiang Road / East Zhongshan 1st Road
Take Tunnel Line 9, bus 26 or 926 and get off at East Jinling Road / East Zhongshan 2nd Road
By Ferry:
There are scheduled ferryboats between East Jinling Road Ferry Dock and The Bund in Puxi and Dongchang Road Ferry Dock in Pudong.
Photography Tips:
- From the typical shots of the Bund, you are facing towards the EAST, thus the sun rises behind the buildings
- It is generally quiet in the morning, so crowds are less.
- There are complimentary charging booths nearby to charge mobile phones and computers
- The city lights turn on at 1800 hours. the buldings behind a little bit later around 1845hrs
- Plenty of railing space for tripod setup
 Sunrise of the BundSilhouette image of Shanghai from the Bund during sunrise
To watch me photograph the bund, watch the following video and subscribe for future updates
https://youtu.be/CFqVNBK15KU
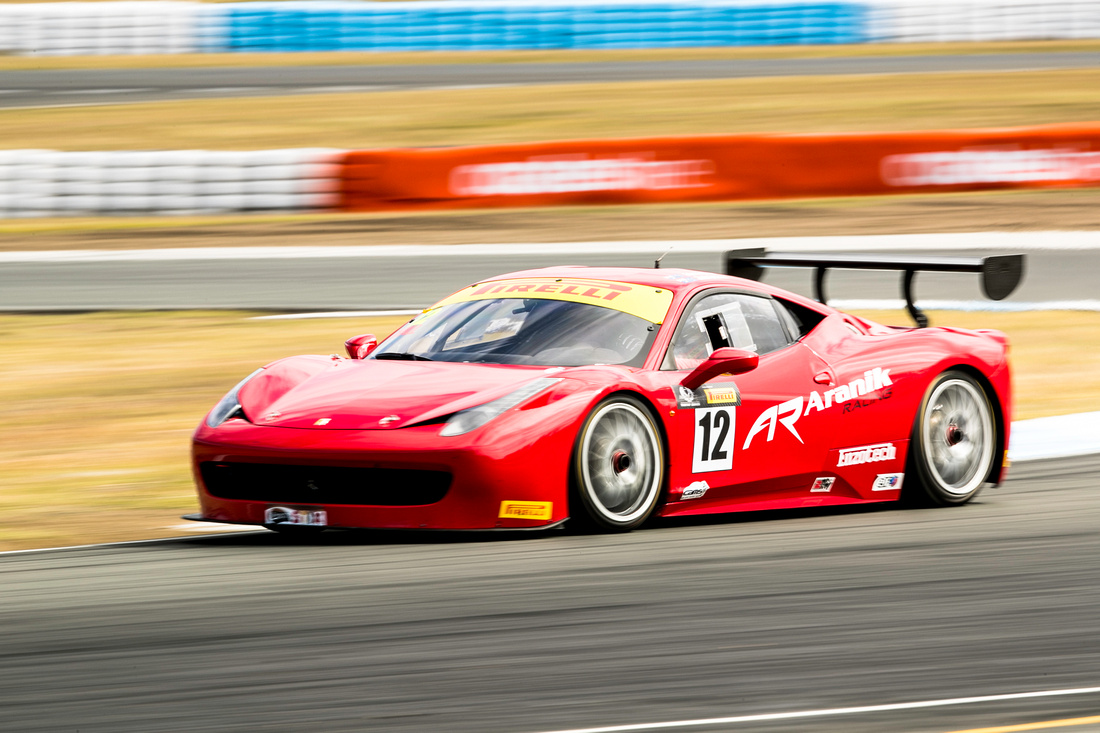
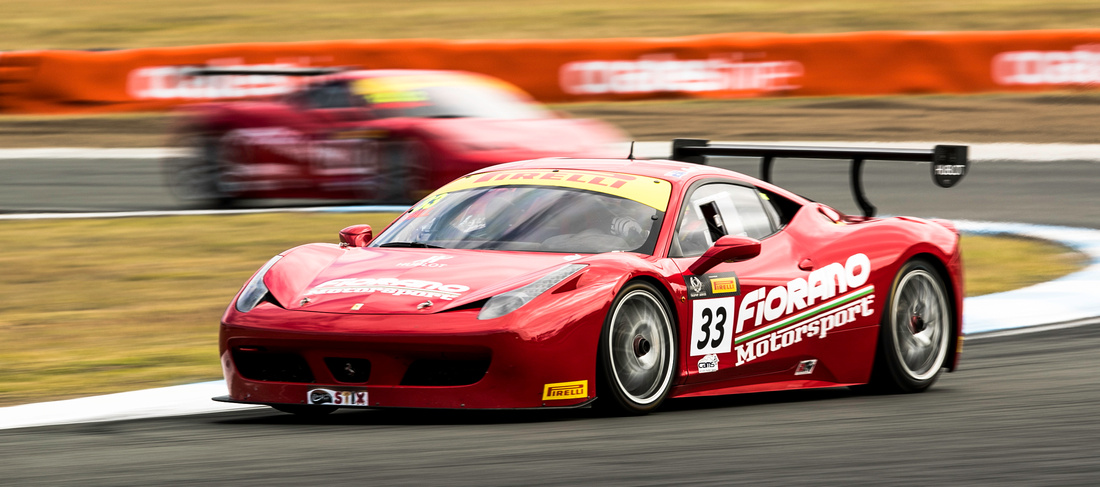
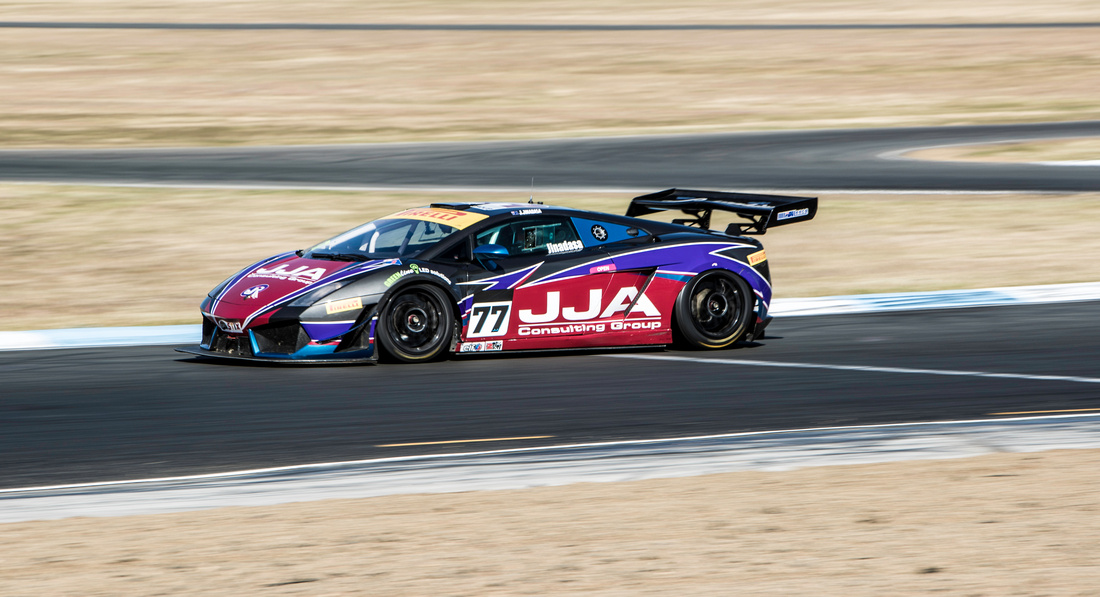
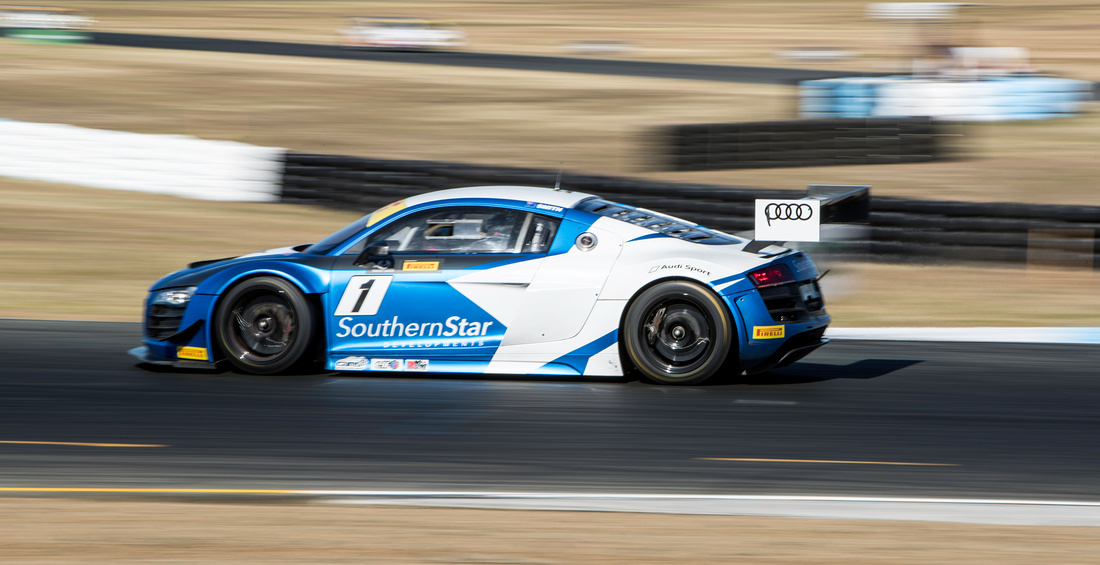
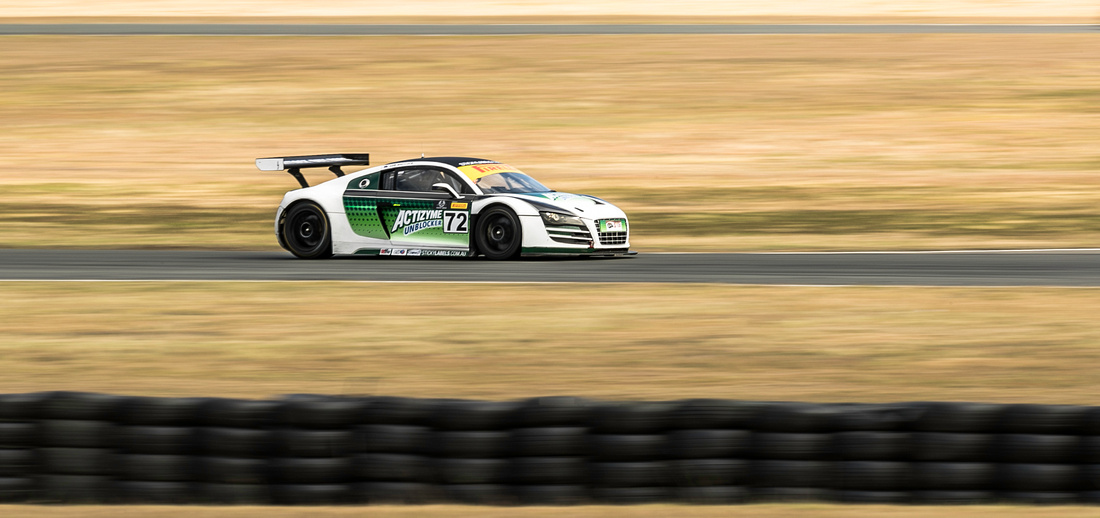
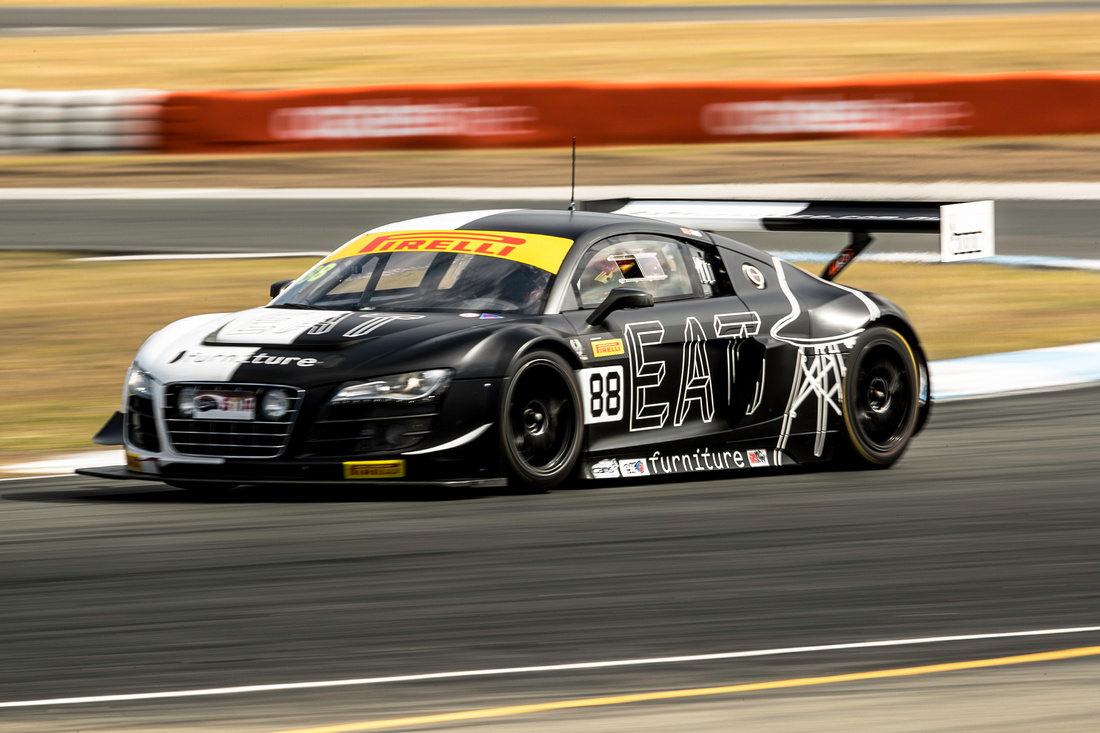
It has been nearly 10 years since I last did any form of sports photography. Canon Australia and Camera Pro of Brisbane hosted a motor sports workshop.
Canon was generous and allowed exclusive access to some of its flagship sports photography equipment.
Today I armed myself with the mighty Canon EOS 1DX Mark II (Retailed at $8999) and that in combination with my 70-200 2.8 IS Lens and the monster 400mm 2.8 II IS Lens (Retails at $12 960)
It was an interesting an loud day of shooting. I learned a few new tricks on Sports photography from the host and acclaimed photographer, Mark Horsburgh.
Such as use an insanely slow shutter speed of 1/60 to do panning shots of fast cars. That notion didn't even occur to me, and it was fun and challenging trying to do that with the monster 400mm.
The majority of the photos were taken in Tv mode, set between 1/60 of a second to 1/8000.
ISO 100
White balance set between daylight and cloudy (Where appropriate)
AI Servo
And use low burst and single burst
Couldn't afford to use High burst Machine gun mode, cos I only had a measly 4GB CF card.
Overall it was a great day of shooting, meeting other photographers and playing with some very expensive equipment.
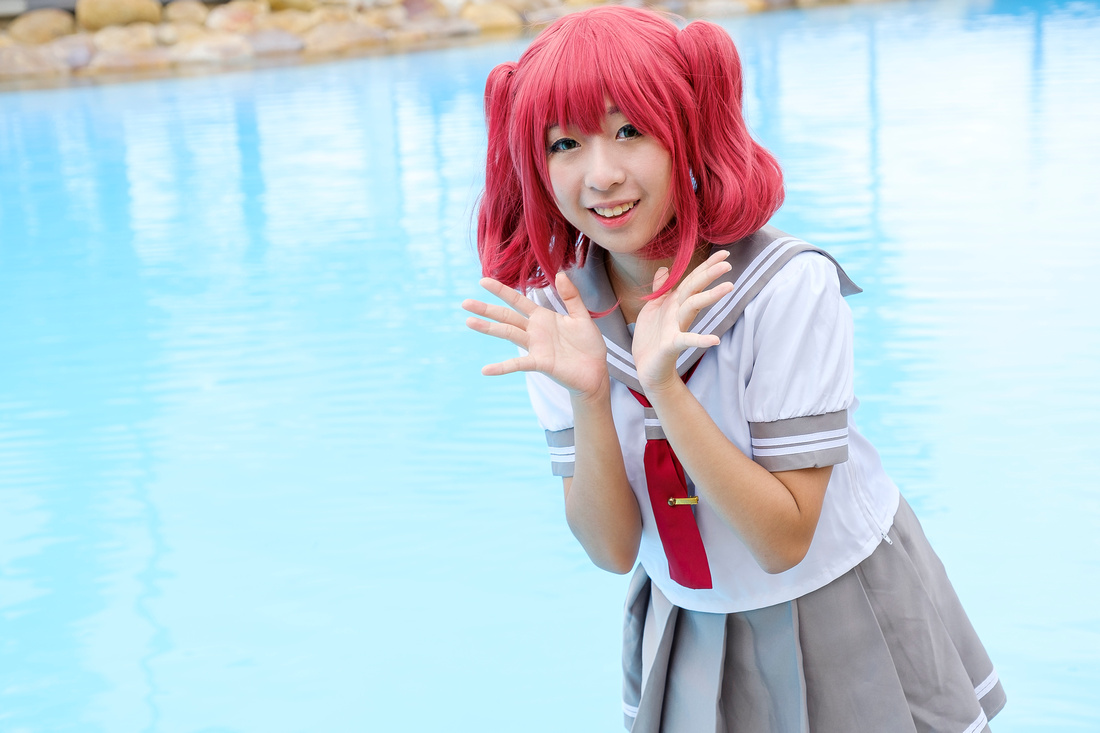
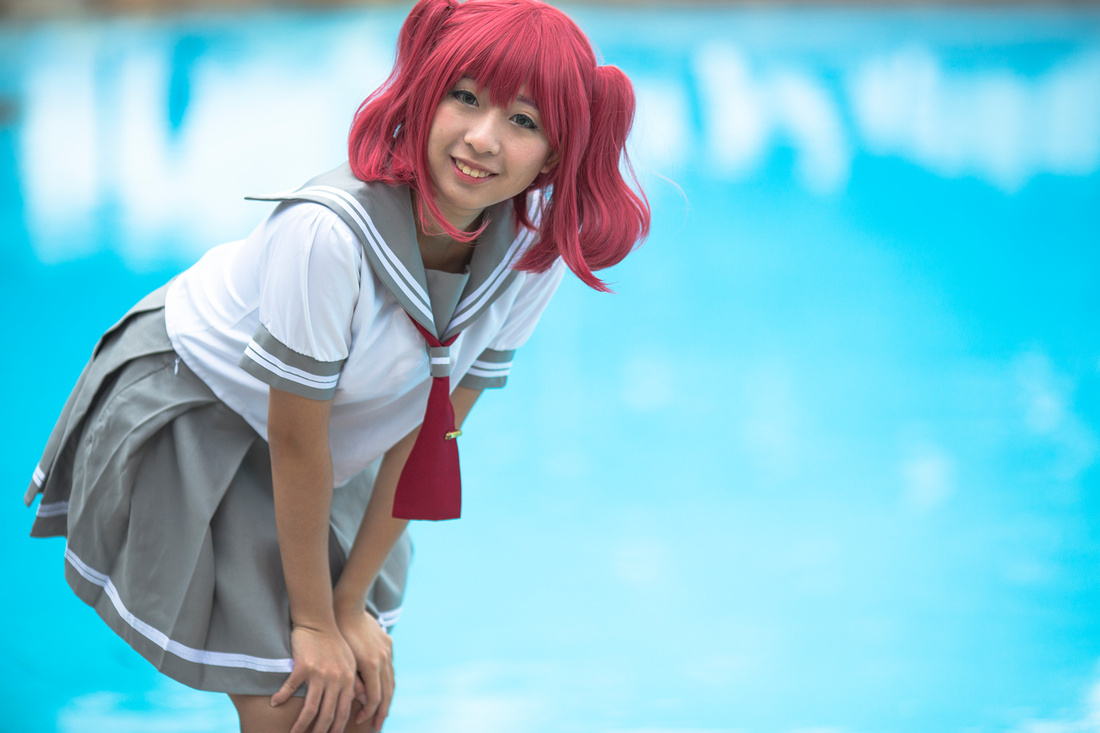
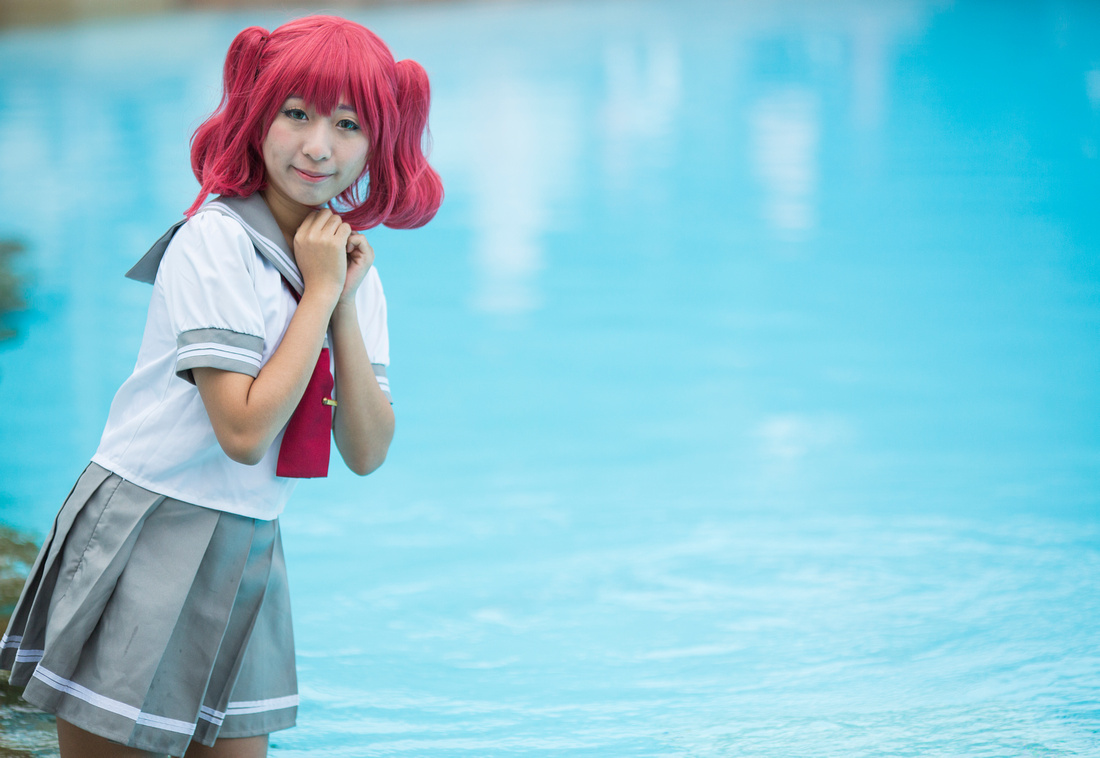
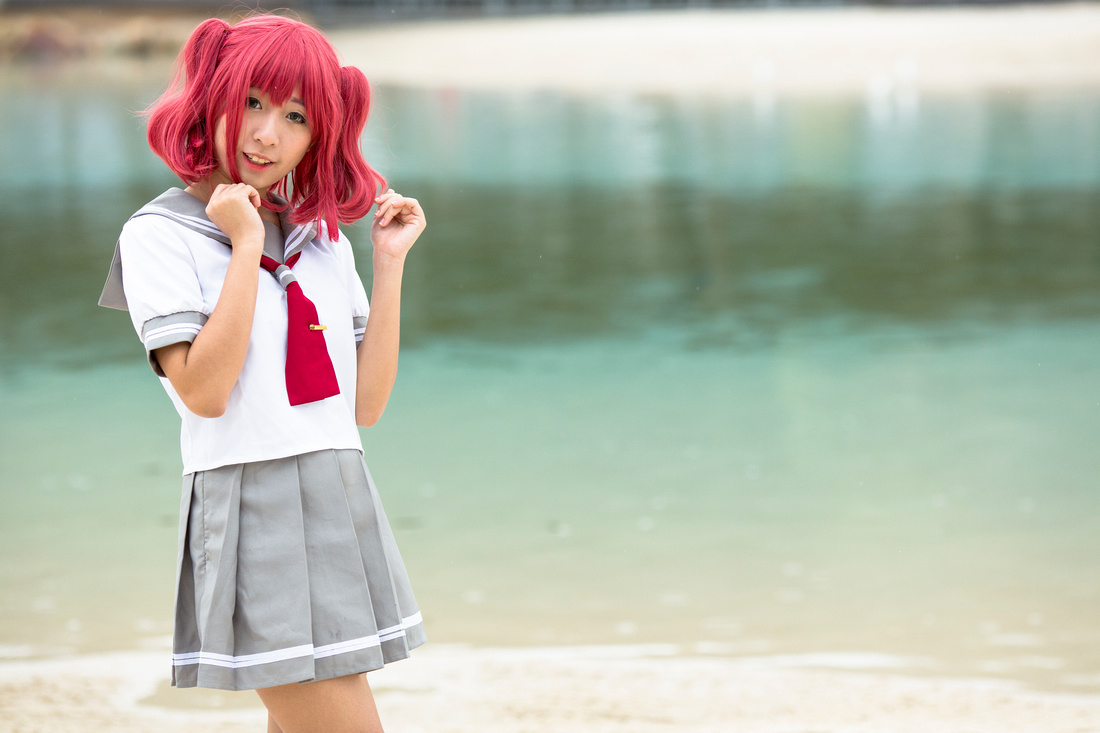
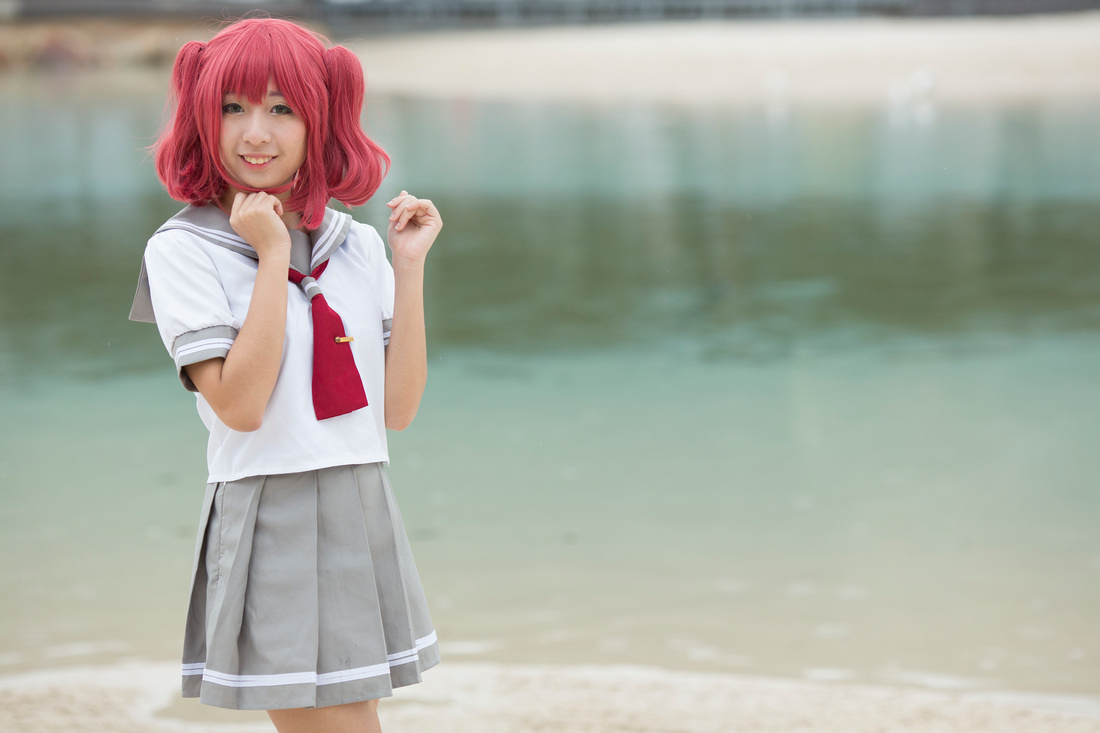
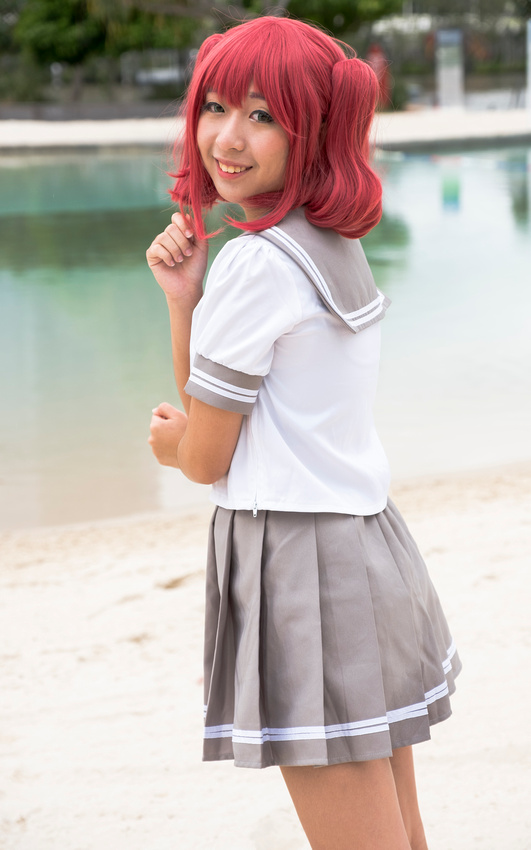
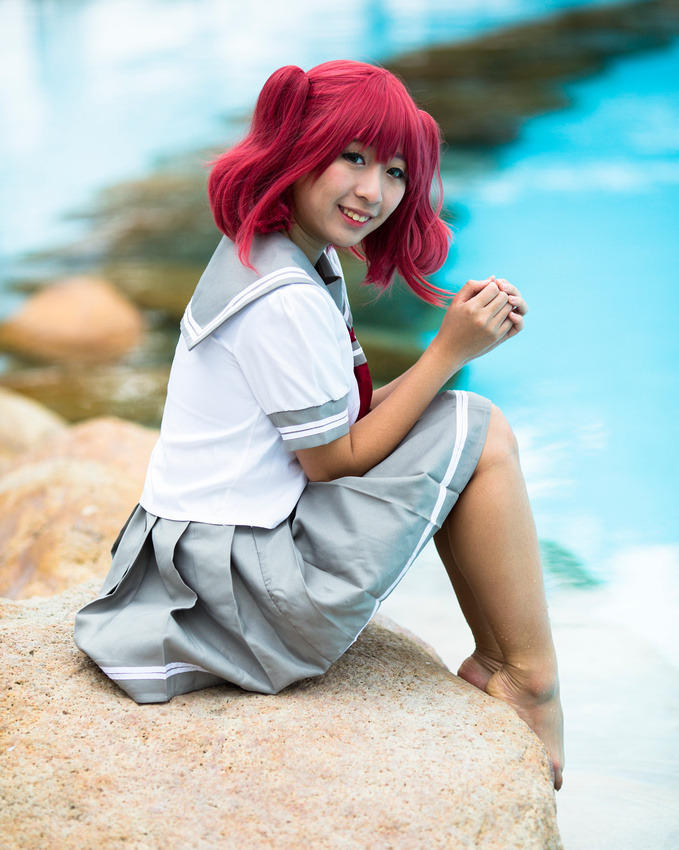
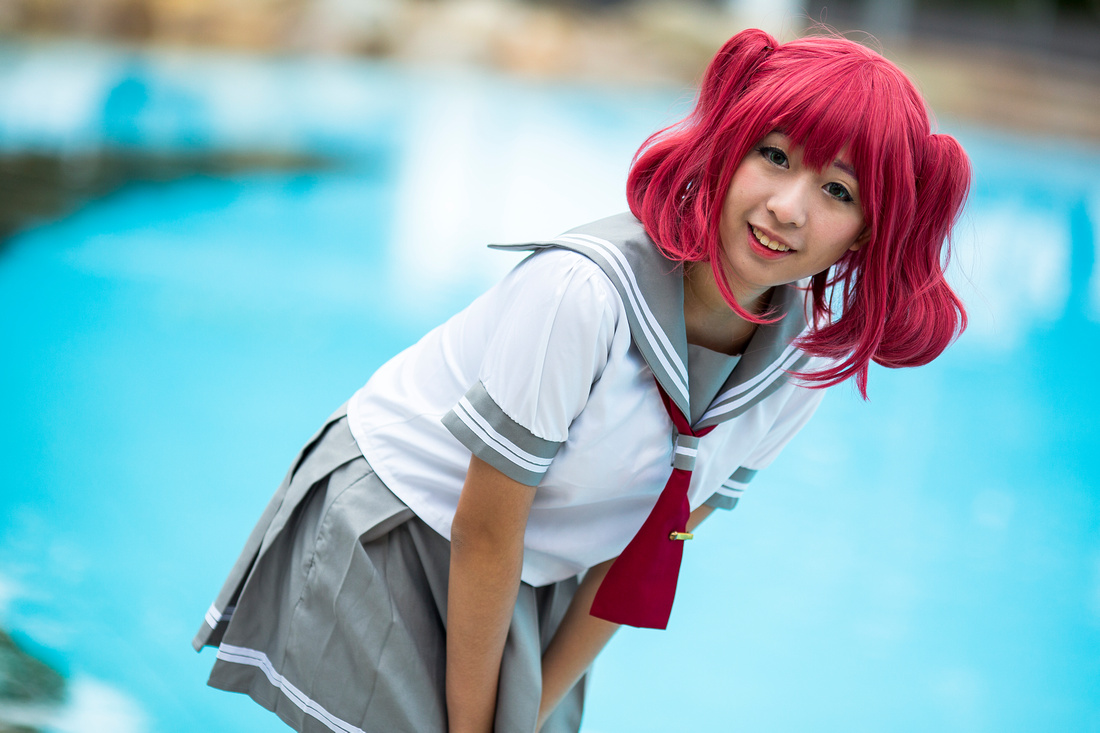
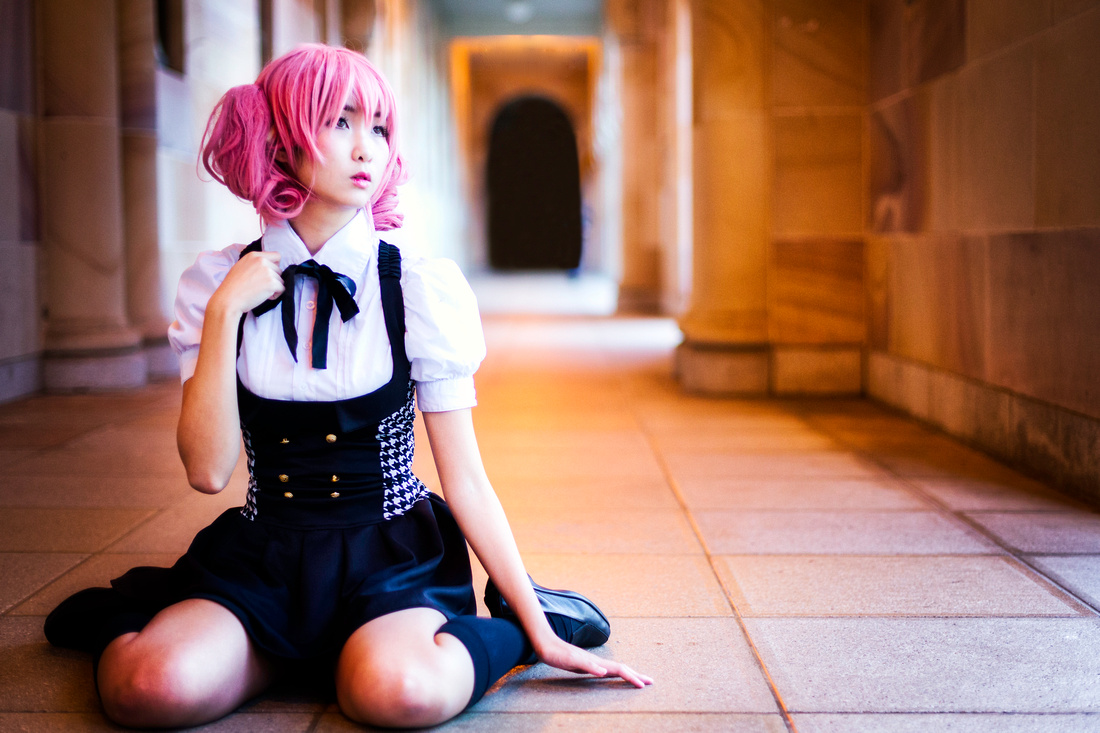
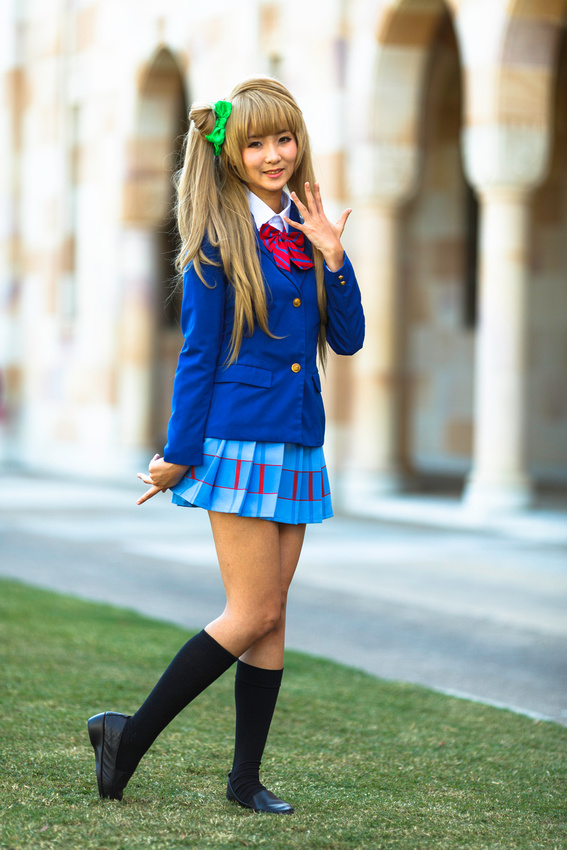
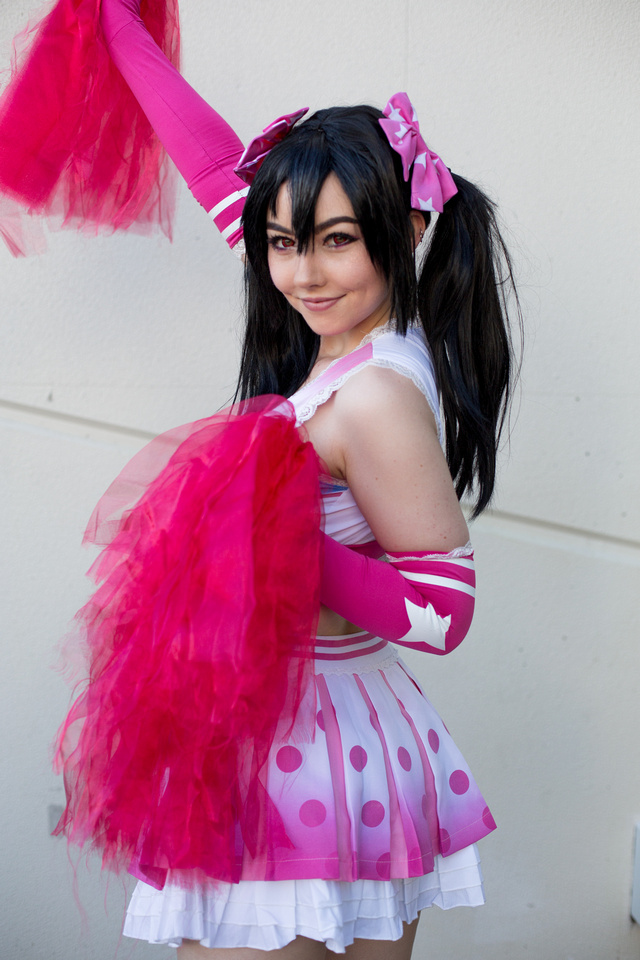
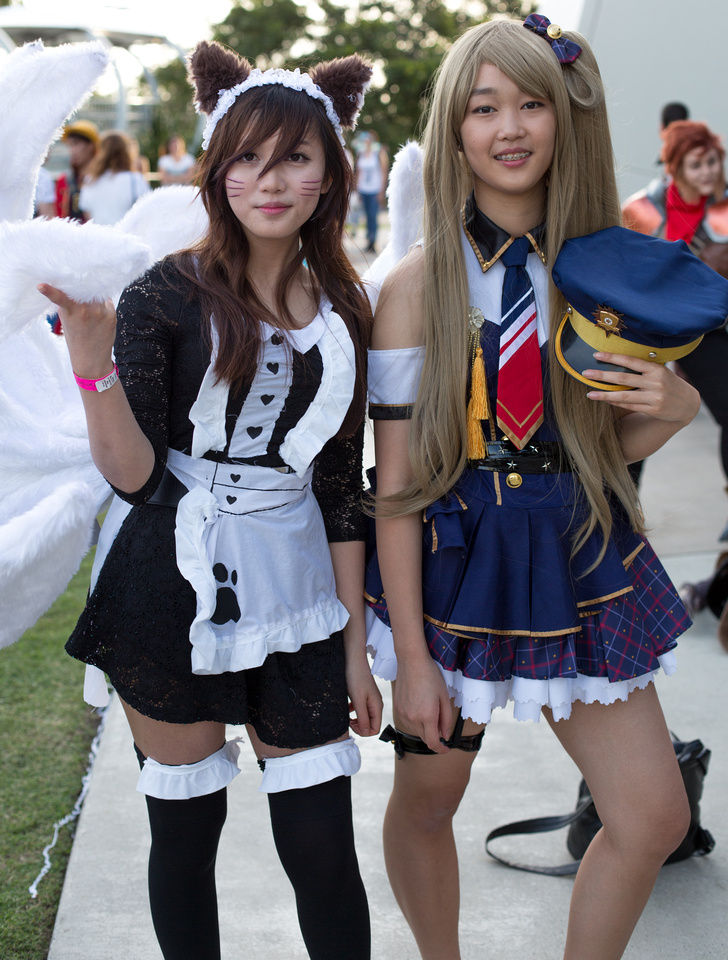
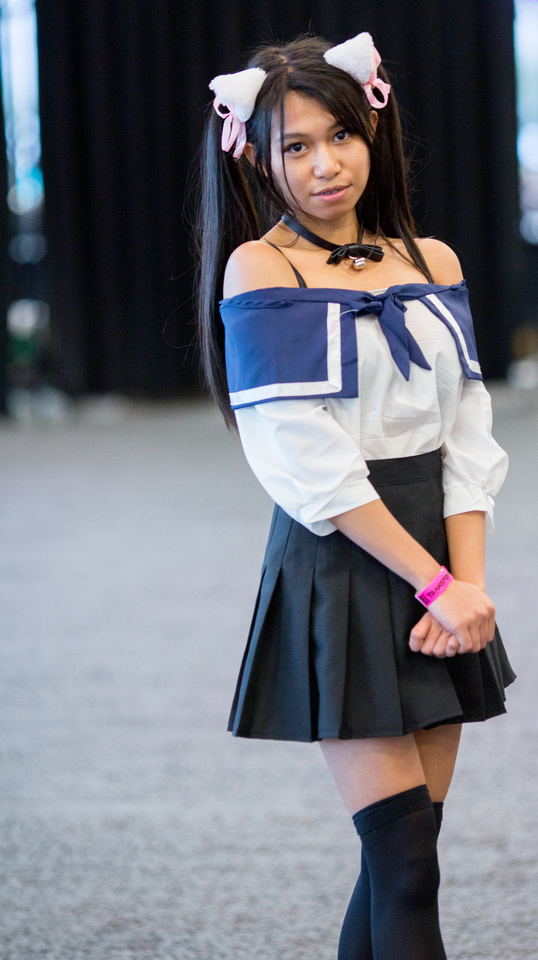
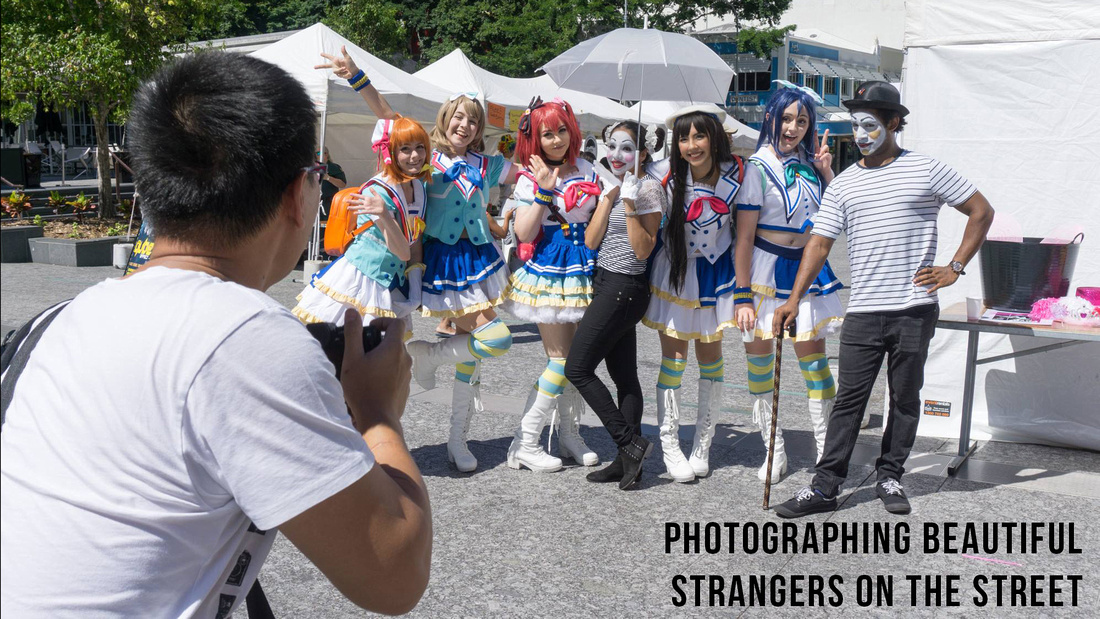
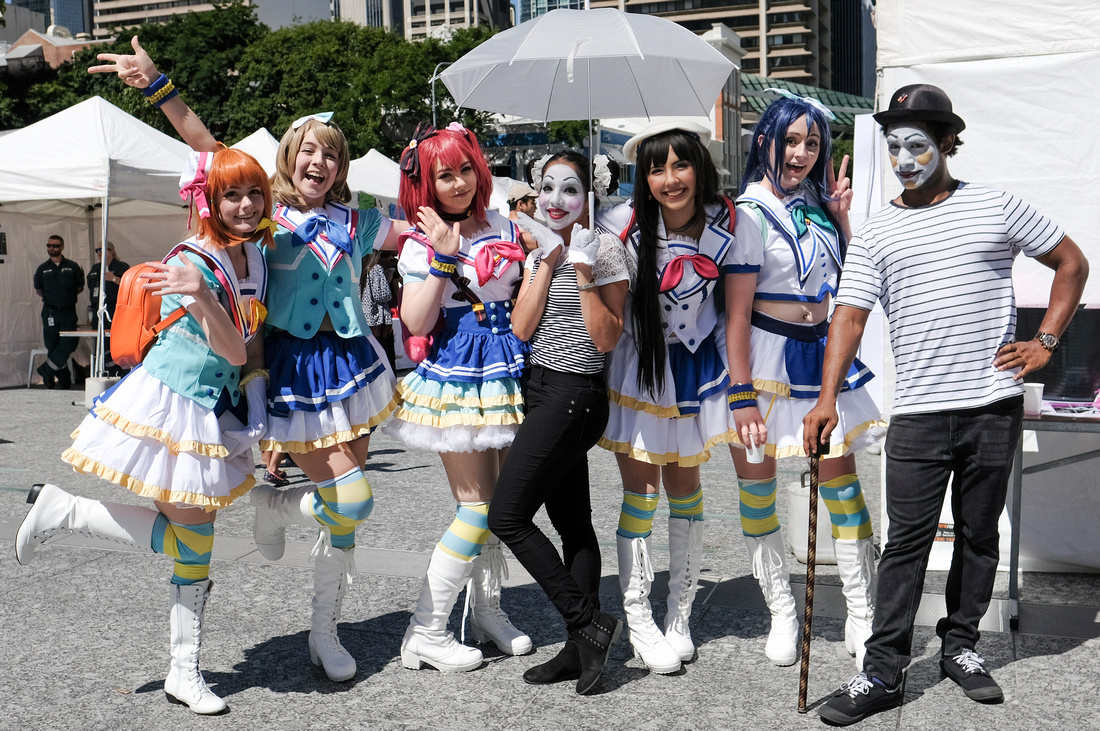
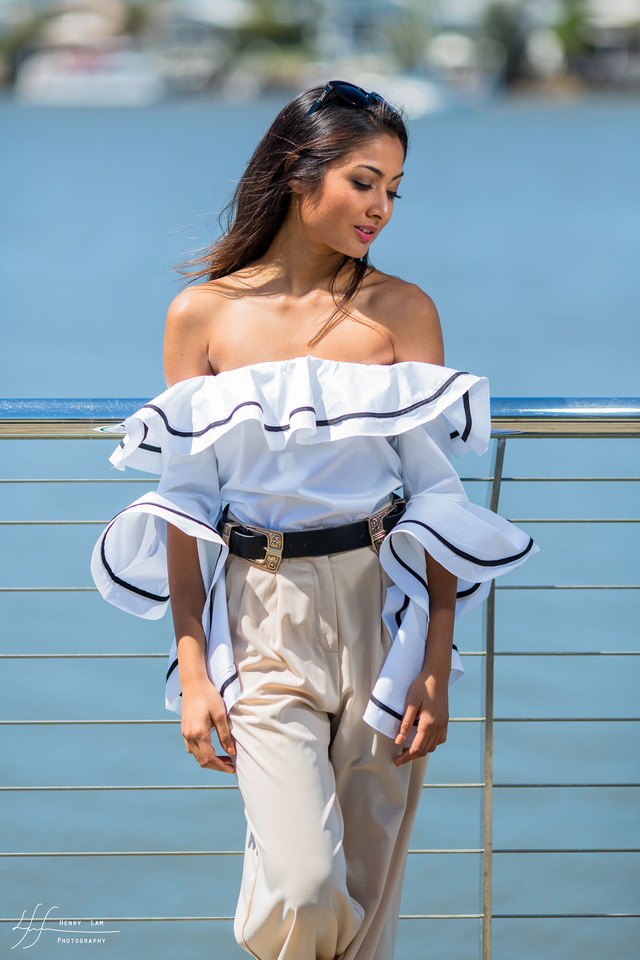
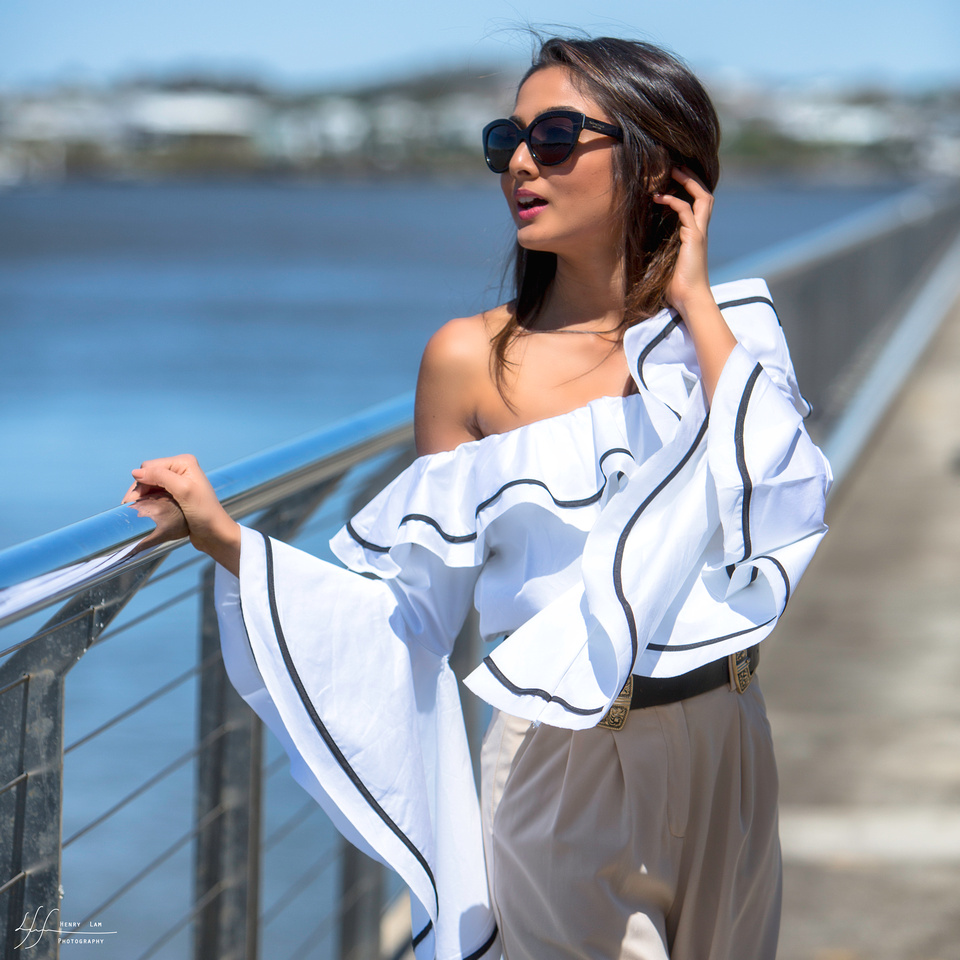
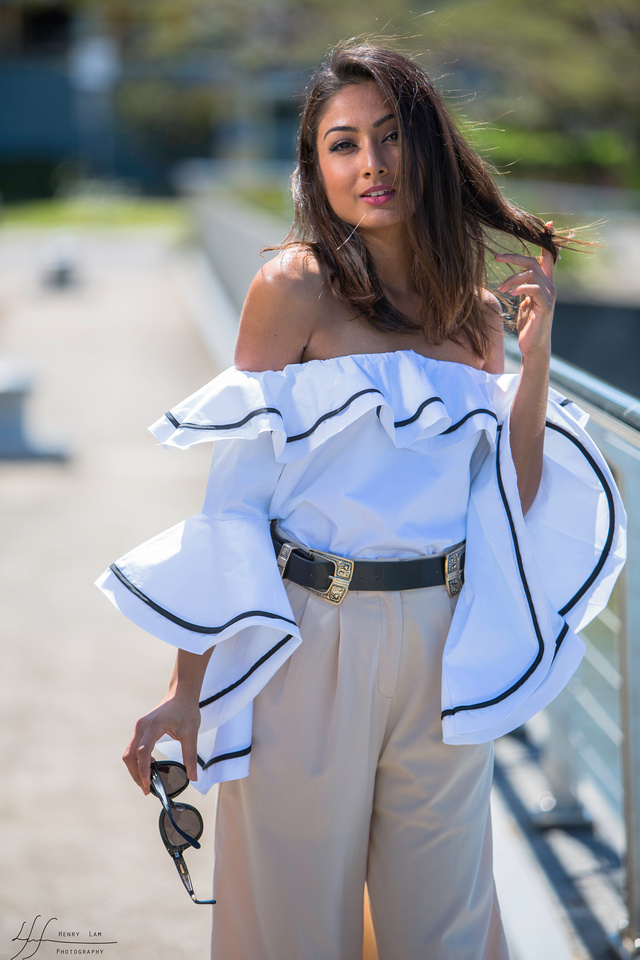
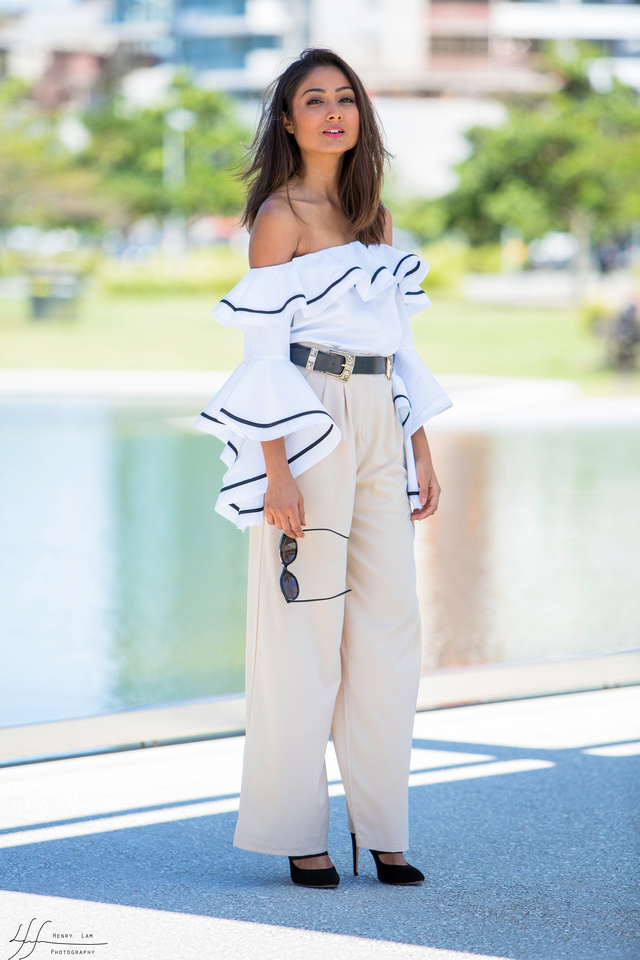
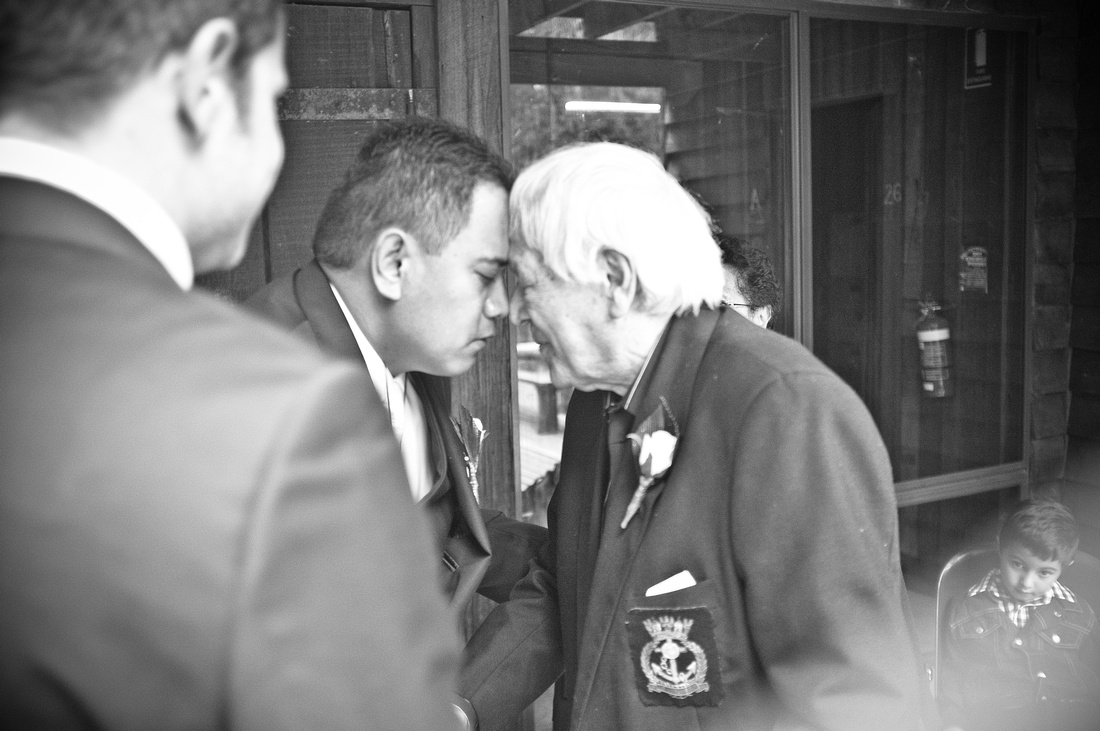
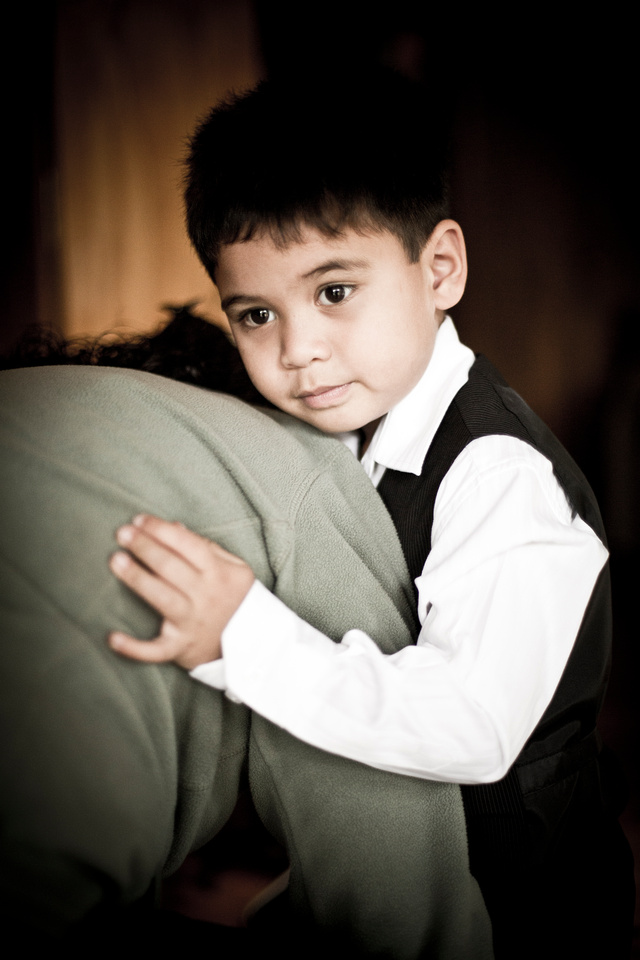
Another weekend, and another photographic adventure. This time my cameras and I have found themselves photographing the young Elyon Lim in the Street Beach of Southbank Brisbane. Elyon was cosplaying the adorable character Ruby Kurosawa from the popular Japanese Anime Love Live. With the weather teasing to rain we had to make the shoot go quite fast (just over one hour of shooting time). Luckily everything went smoothly and we were able to get some really good images.
Here are some pictures taken from that shoot.


]]>
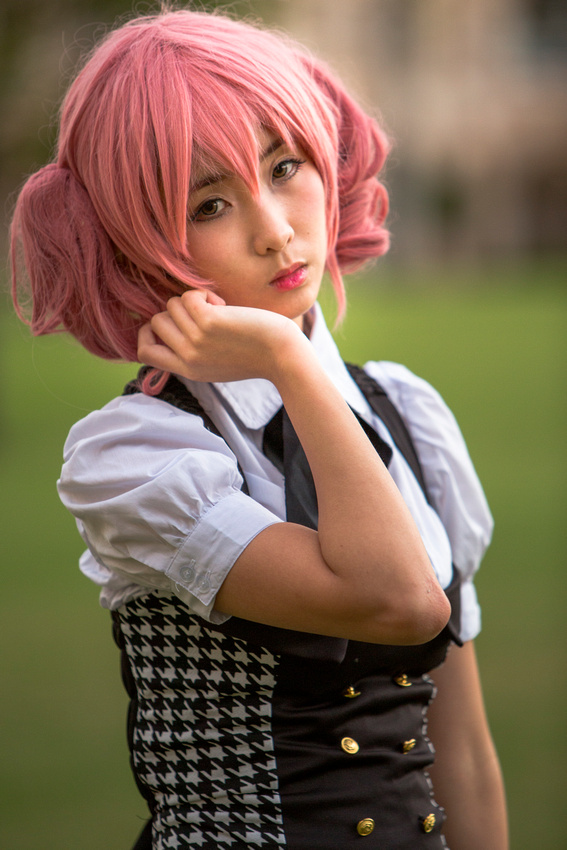
 Karuta Roromiya | Inu x Boku SS
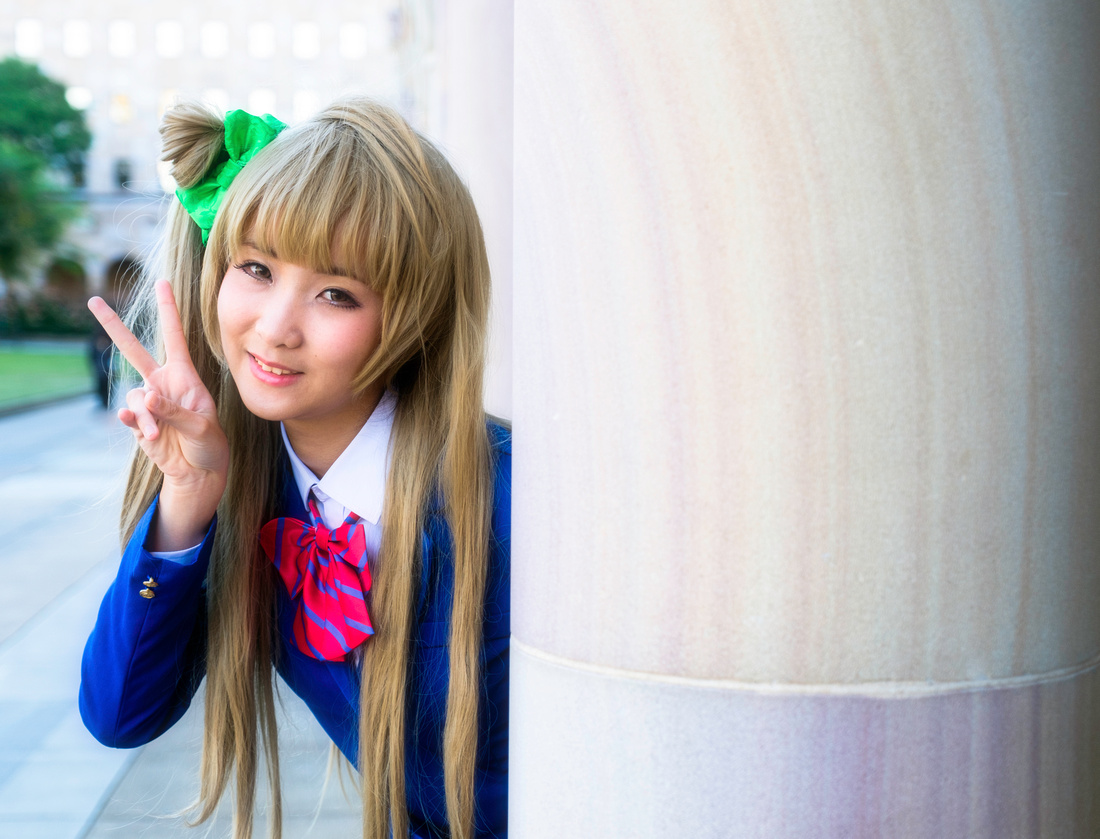
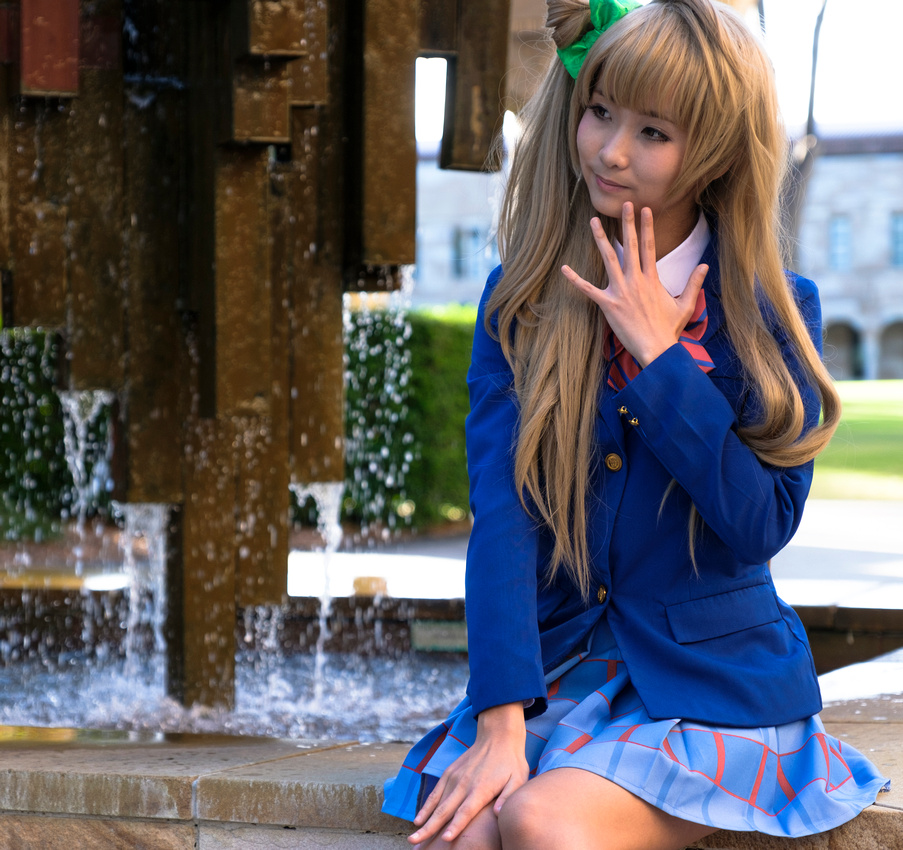
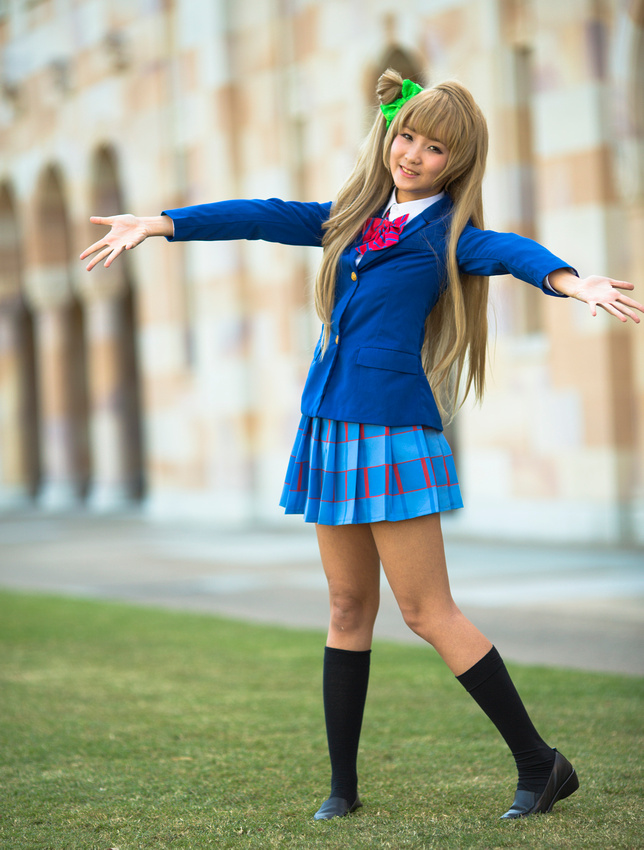
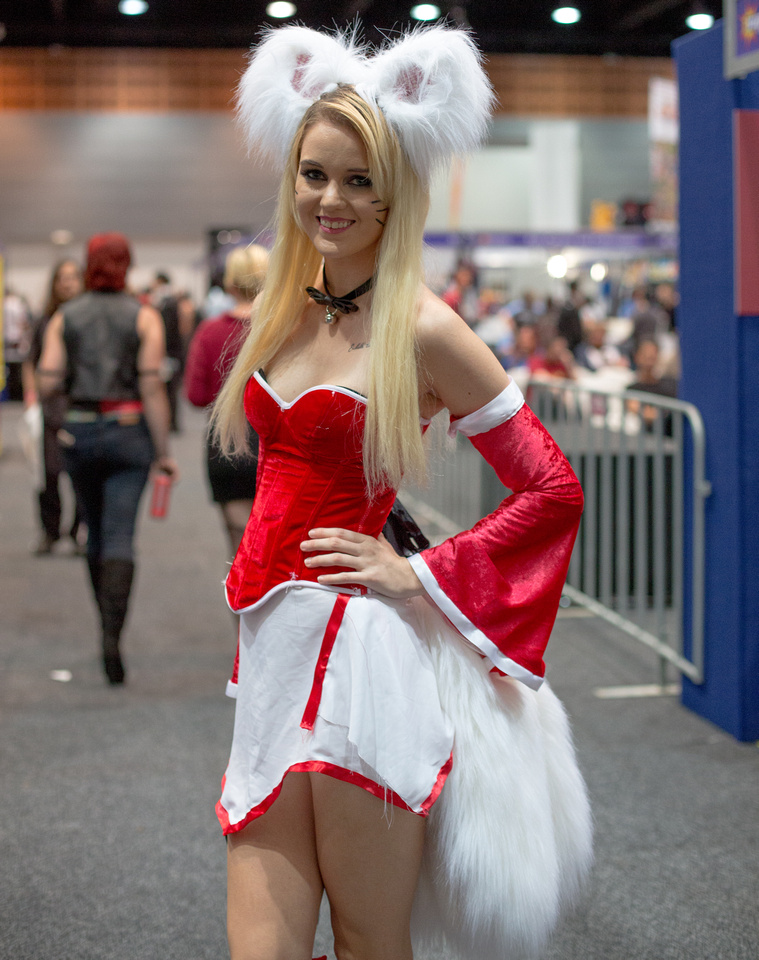
Another lovely weekend, brings upon new photography adventures. This weekend, I had the pleasure to meet and work with a lovely cosplayer, Suika. Outside of full-time study, The young and adorable QUT student from Brisbane, loves and endulges in Japanese anime cosplaying. Joining up with me Suika brought upon two Cosplay outfits, one as Kotori Minami - Love Live, and seconds as Karuta Roromiya from Inu x Boku SS.
All photographs were taken at University of Queensland, with the assistance from Suika's friends Kelly and Cameron.
Suika was such a pleasure to work and collaborate with, She will be joining upon my cosplaying team, as a model for future workshops or privately booked photo mentor/sessions.
Check out some of the images we managed to get together. If you are interested in getting similar shots with Suika, please email me on [email protected] and we can have one of the exclusive sessions arranged for you. - Guarantee to be a worthwhile session.
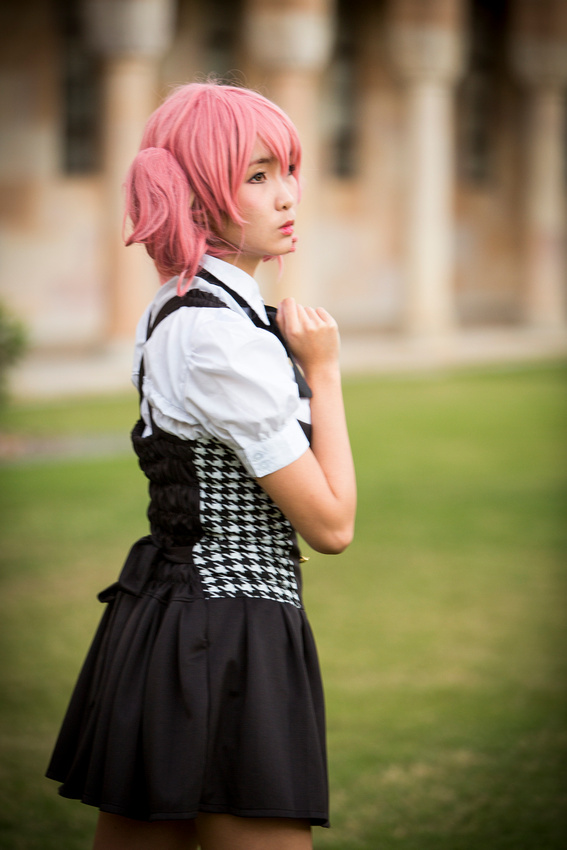
 Kotori Minami | Love Live
 Kotori Minami | Love Live
 Kotori Minami | Love Live
 Kotori Minami | Love Live

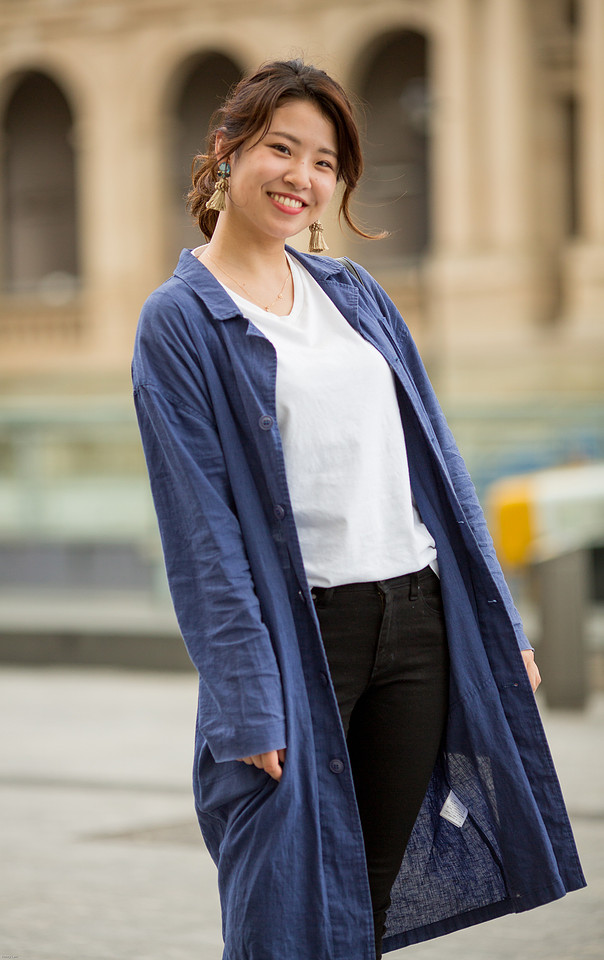
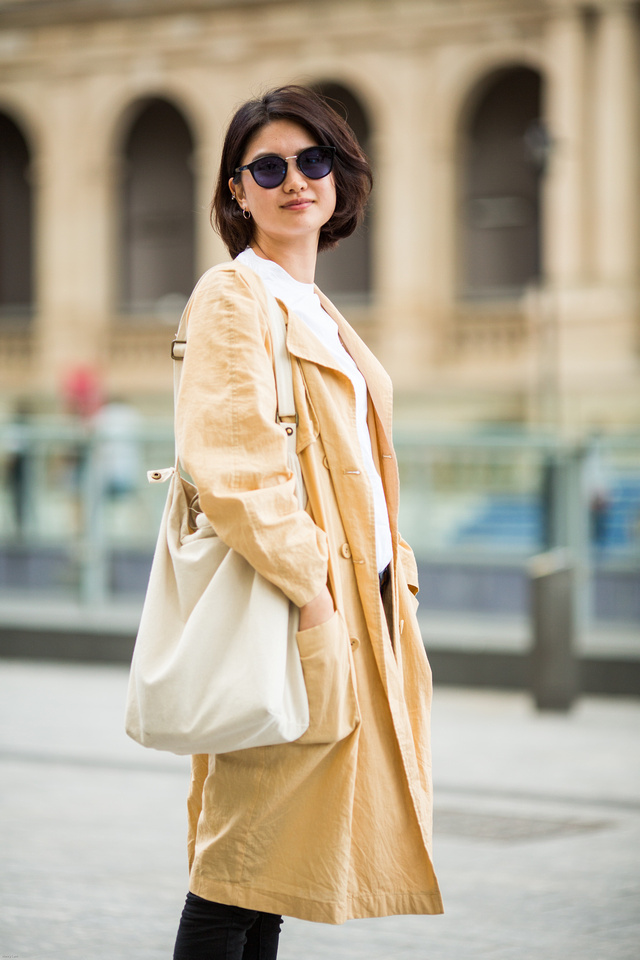
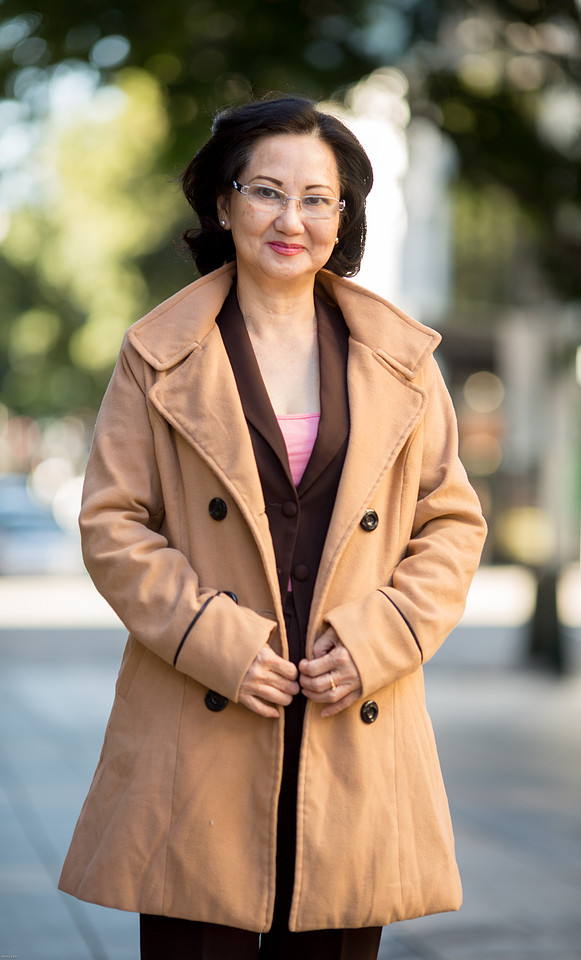
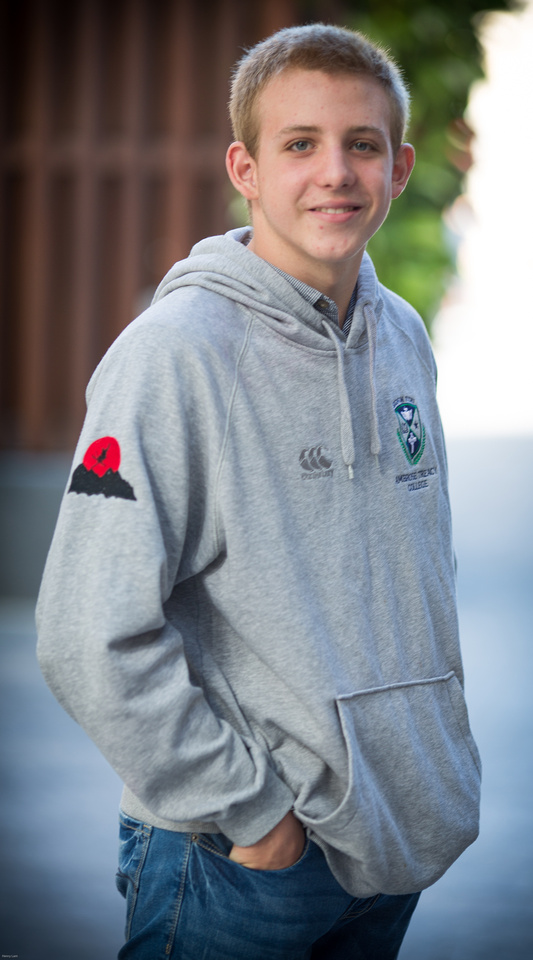
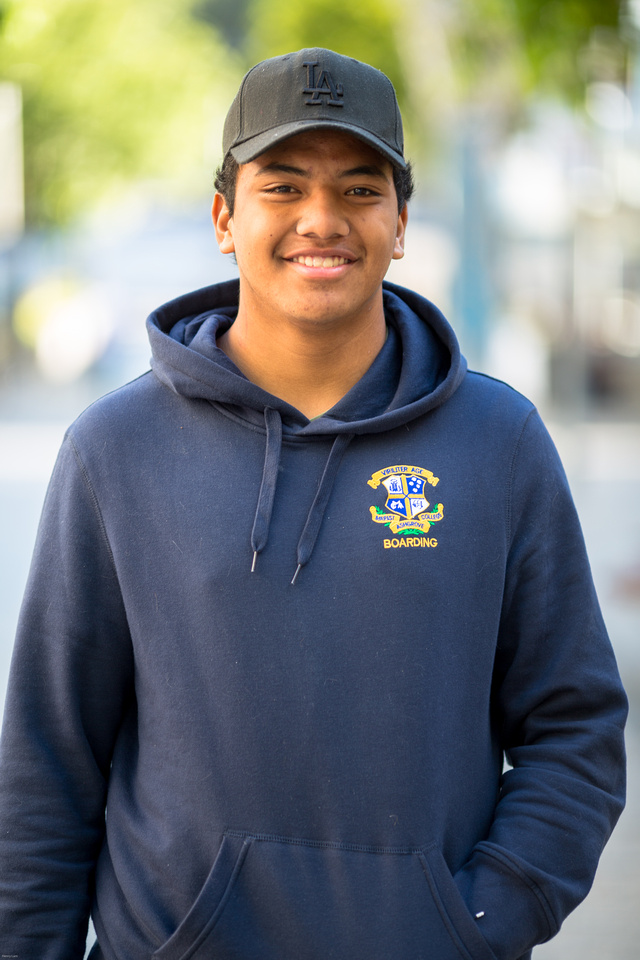
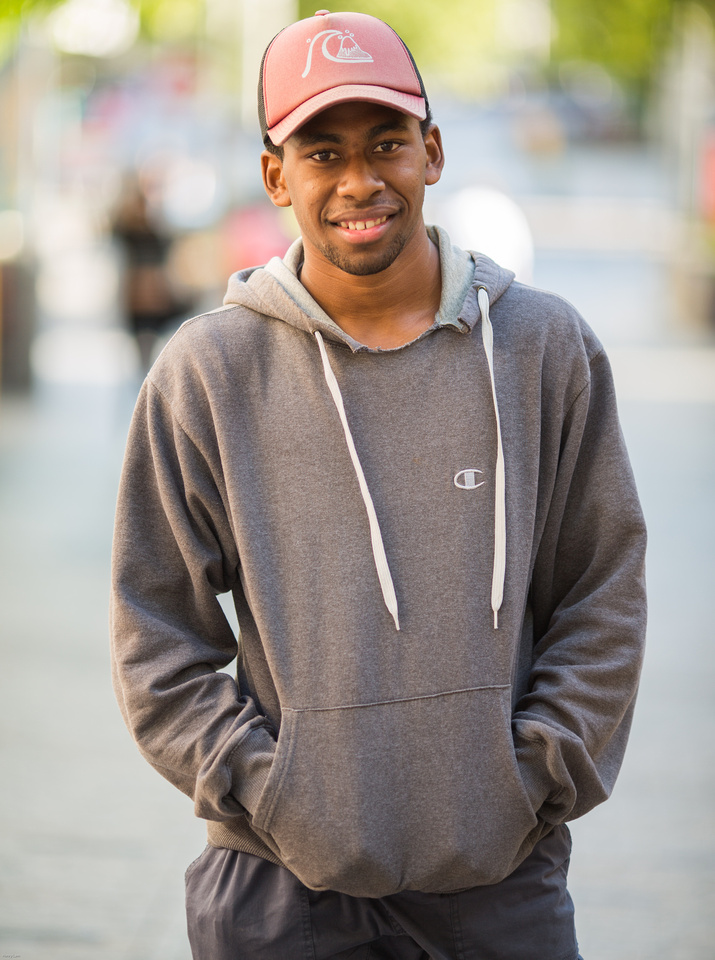
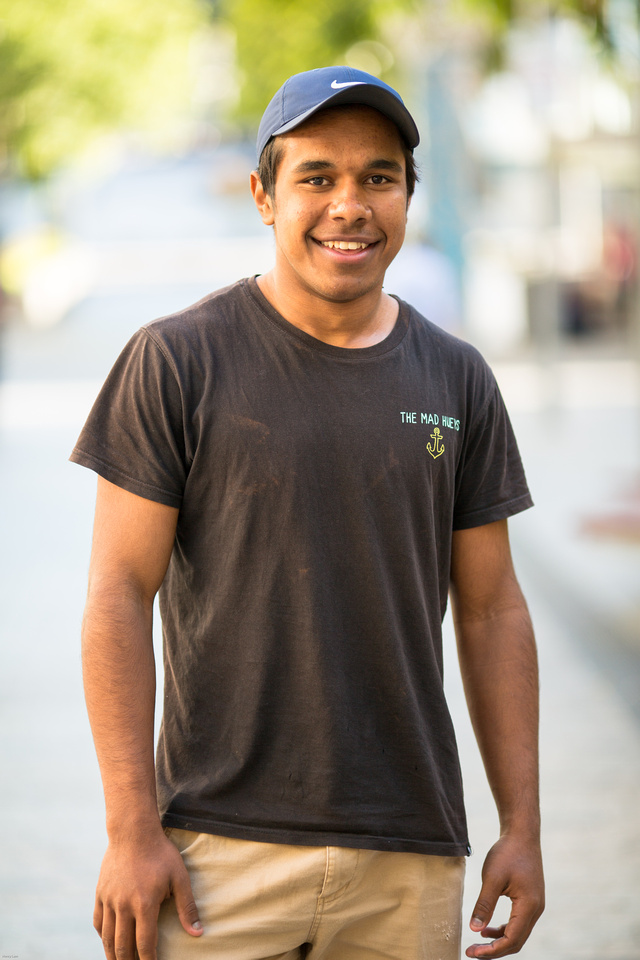
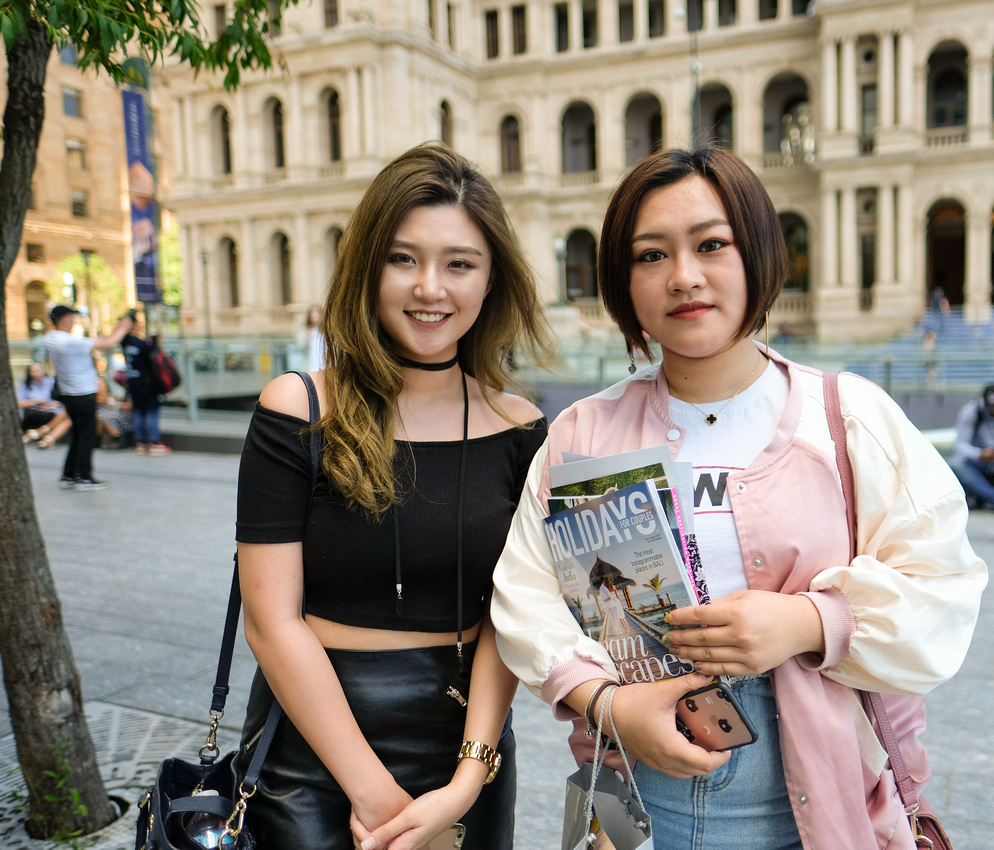
Hello photo friends
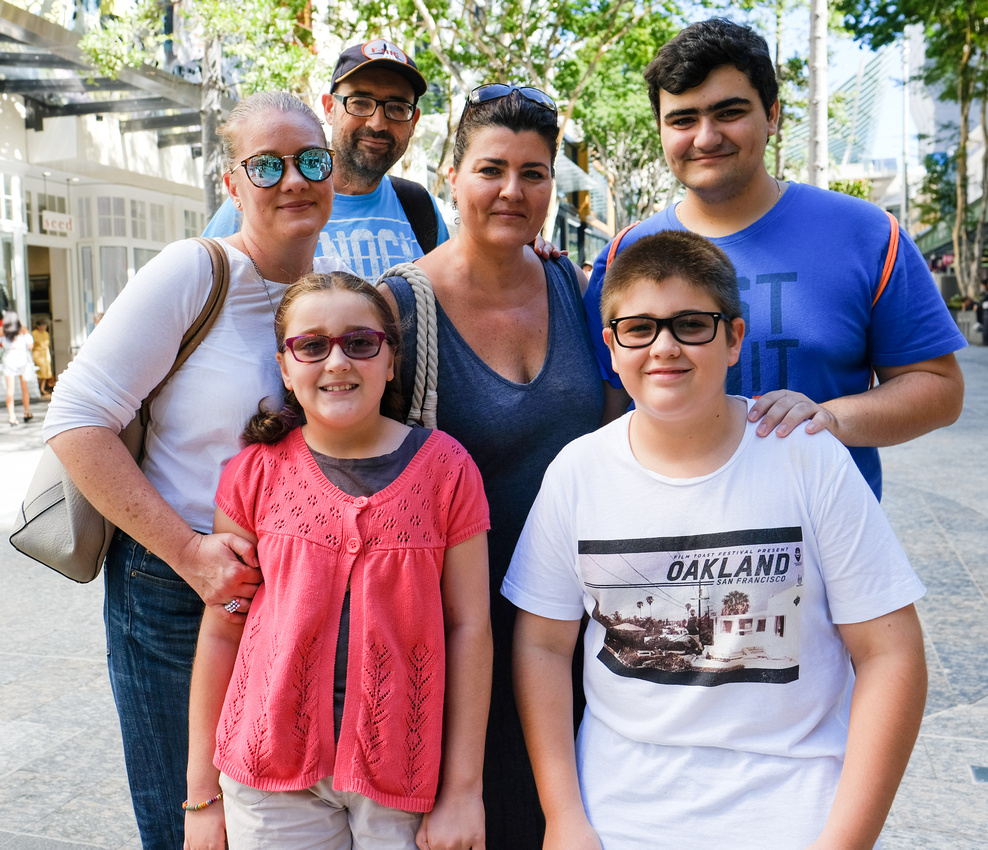
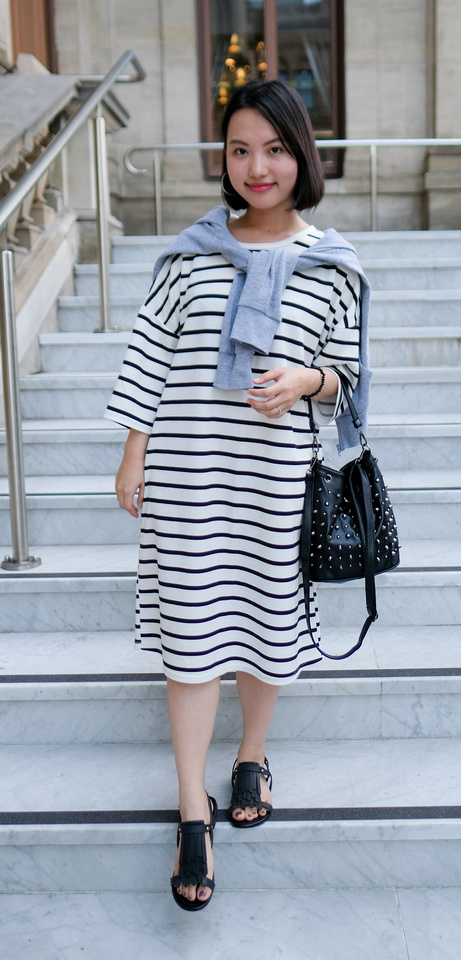
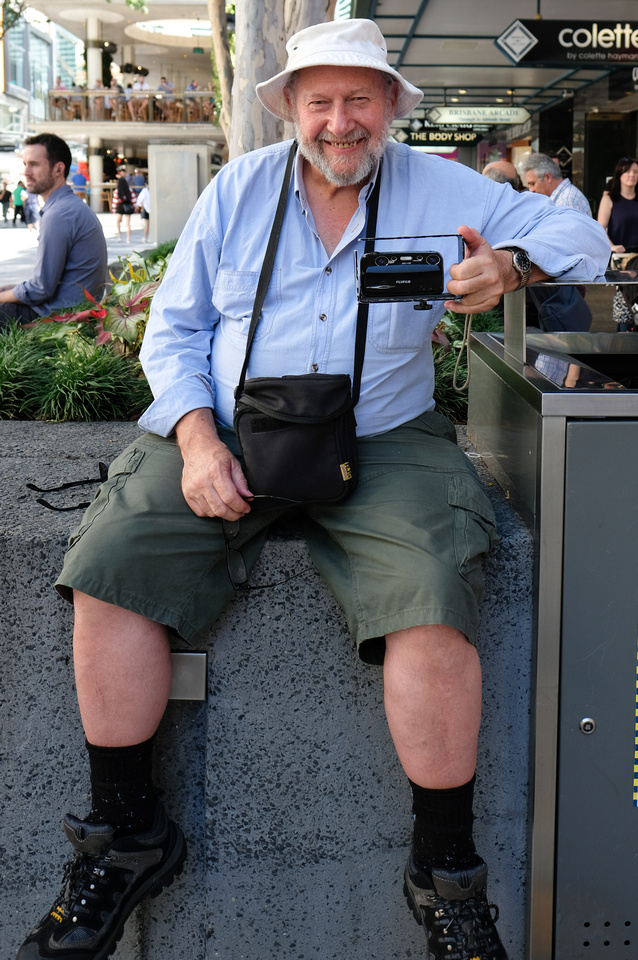
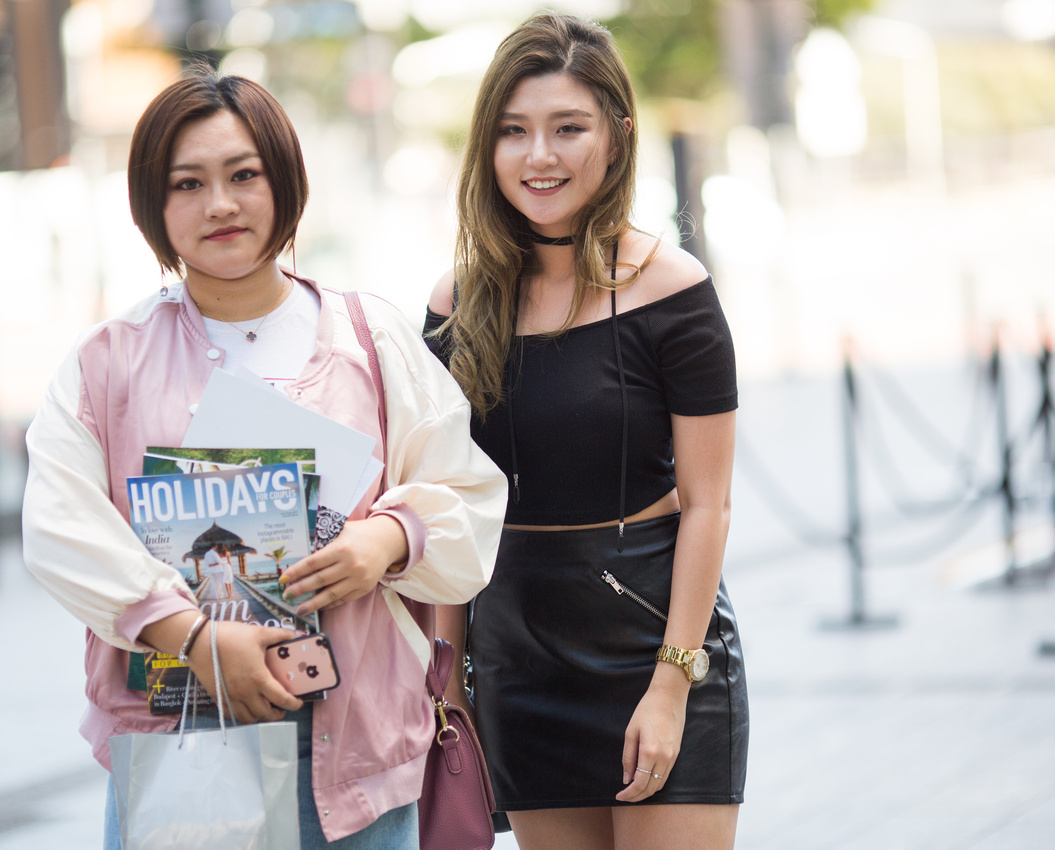
Here is Post #2 on photographing strangers in Brisbane City. Once again, I set this challenge upon myself to bravely walk up to random strangers on the city of Brisbane for their photographs. This time I walk alongside with a notepad and pen, to gather a bit of story behind each person in the photograph.
Why do I do this challenge some people ask?
I do this to self test myself, I must admit to you, I am a very shy and usually quite introverted person in most of my everyday life. I only have a few sets of good friends and tend to keep to myself and with my girlfriend for most of the nights. However; I do enjoy meeting and talking to new people. This scary combination of approaching new people puts me straight out of my comfort zone and deep into a vulnerable state. Its rather crazy yet rewarding at the same time.
The second time around, was not necessarily easier than the first time, I was still challenged with approach anxiety, and I still had lots of negative and self-resistance upon each approach. Everyone that was photographed was very willing to share some random and interesting information about themselves.
There was no structure upon the information given, besides the fact that I got at least a first name, It didn't necessarily had to be a real name - just something I can identify the person with. The sorts of questions I asked were not intrusive such as, what is your favourite past-time activity or what is your favourite food. It is nice to know that each person had a background story to tell and share.
I think along this shoot I would have easily walked about +5km over the period of about 6 hours. It was a very slow and random walk. There was times that I walked a same path at least 3 times. Each time I passed the same spot a different set of people would be presented in front of me.
Unfortunately this time there was no recording of video, as I did most of this issue on my own.
Do make sure that you stay tuned to the next issue as I will certainly do this again. If you haven't seen part one, click on THIS LINK to go straight there.
Here are the pictures I came out with from the end of the day. Hover the cursor over the image to get the information about each image.
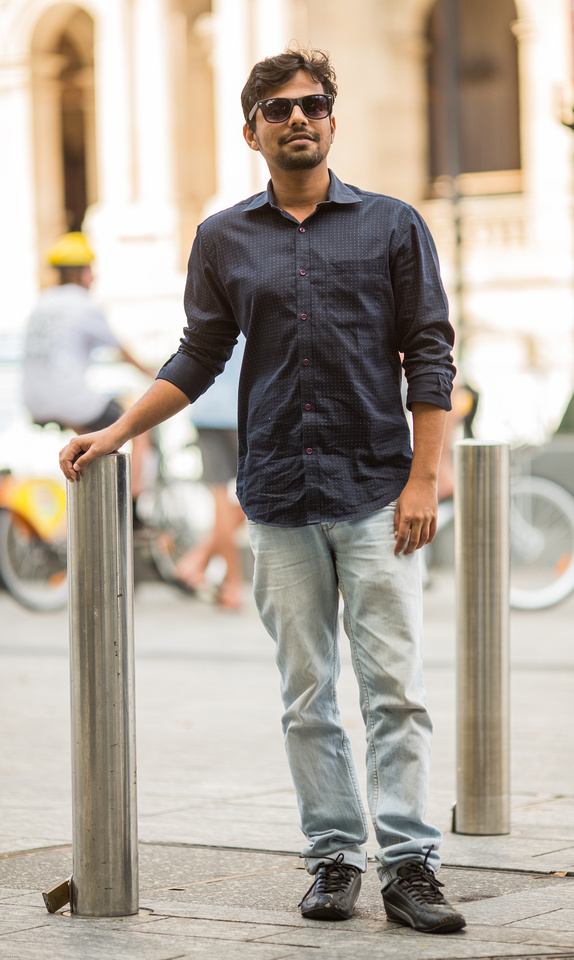 Aditya is from India but works as a software professional in Cooper Plains, Queensland.
 Kim is originally from Vietnam but lives and owns a Nail Saloon in the suburb of Brisbane, Inala.
 Baby Sokiu, Cindy and Jeff Yu are a young family here in Brisbane, who moved here from Hong Kong.
 Roland, 17, was currently relaxing in the city with his school friends, Roly and David. Roland plays ruby for the Brumbies (Canberra)
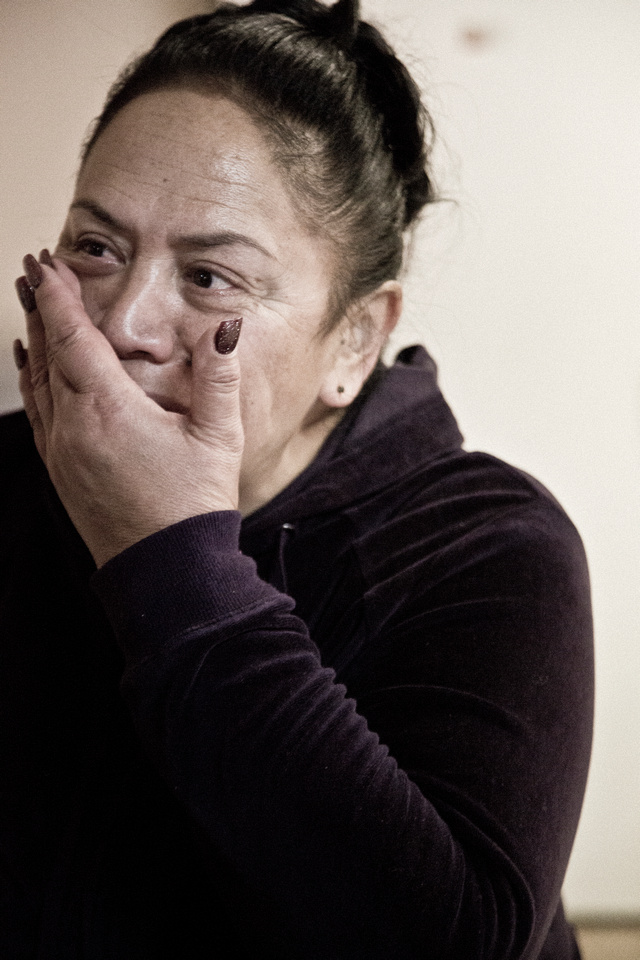
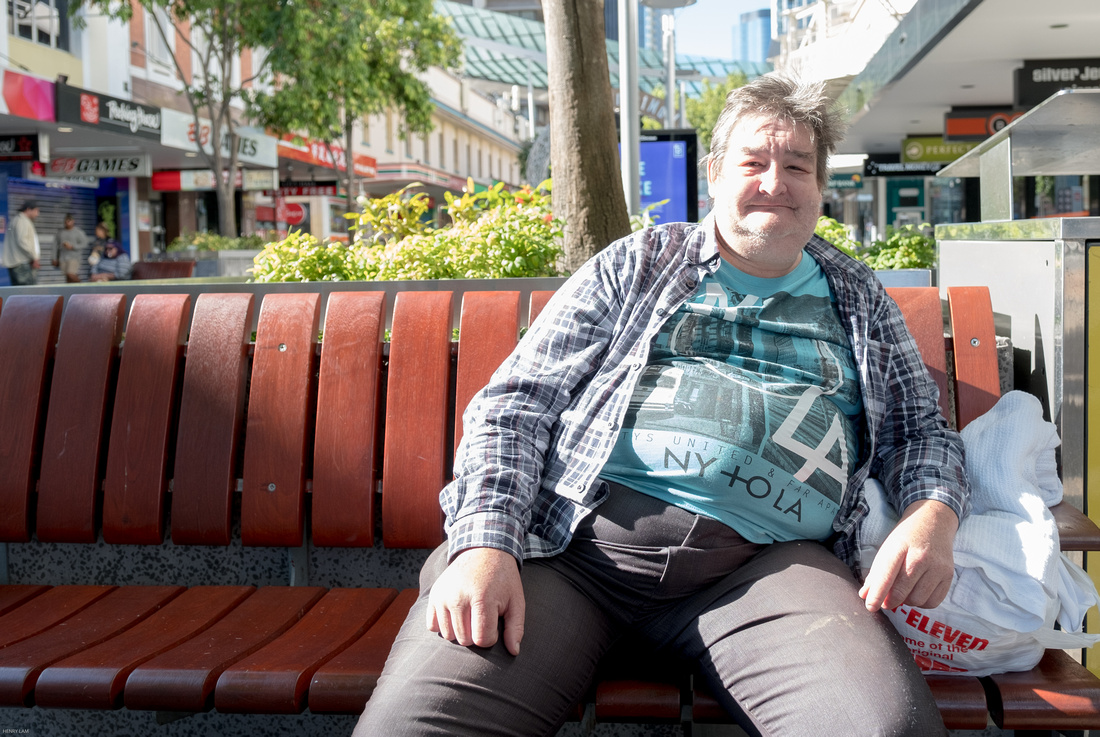 Dave, 52, has recently had heart problems and is currently homeless and unemployed, He was once a police officer for 19 years. He holds true to the value of a good friend which we both like to refer as '4am friends.' Those special and invaluable people in our lives that we can literally call upon at 4am in the morning and with certainty be there for us.
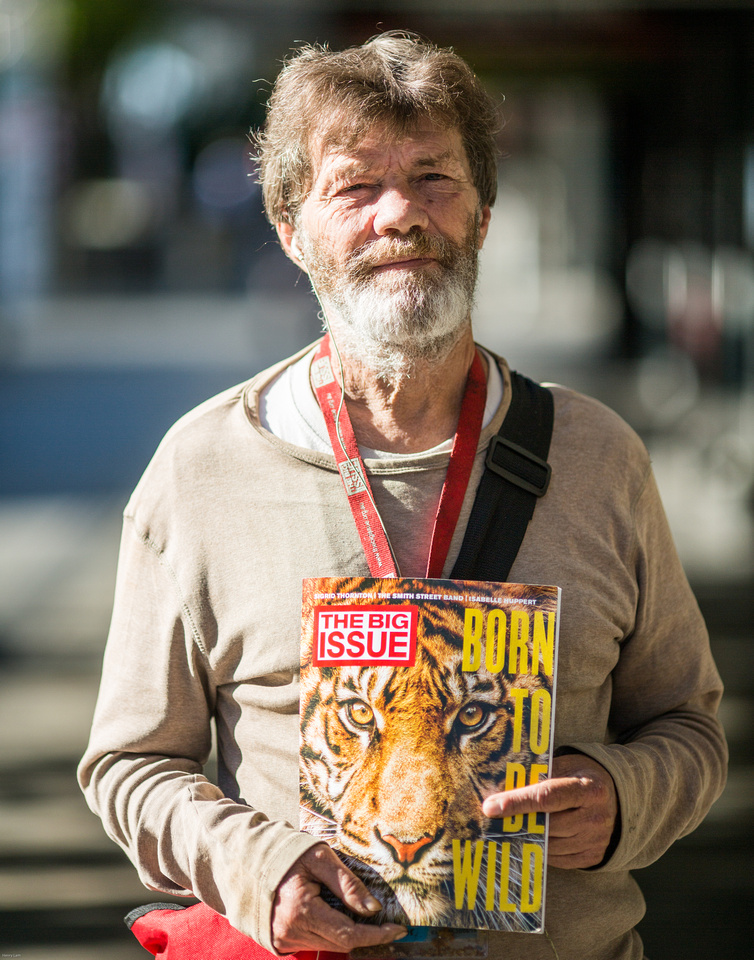 Ronnie, is currently homeless yet he enjoys spending time out in the city selling The Big Issue magazine to street patrons.
Thank you for viewing this blog post, please subscribe and follow this blog for future updates and posts, Till then, take care.
]]>
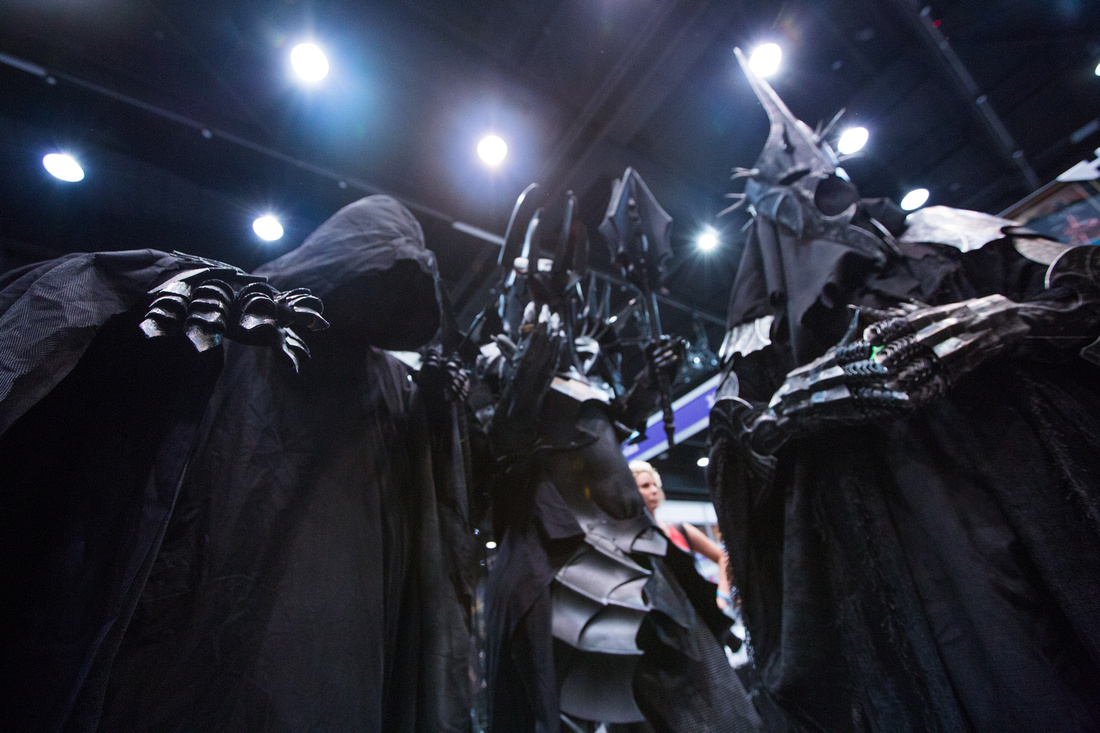
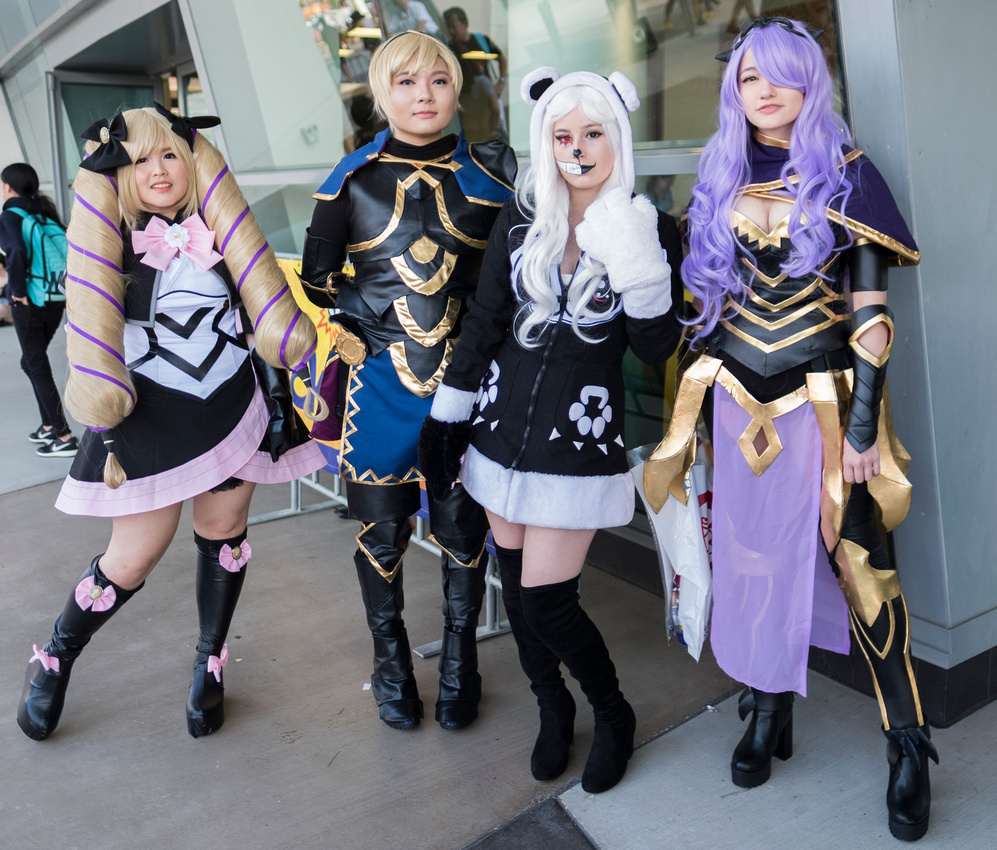
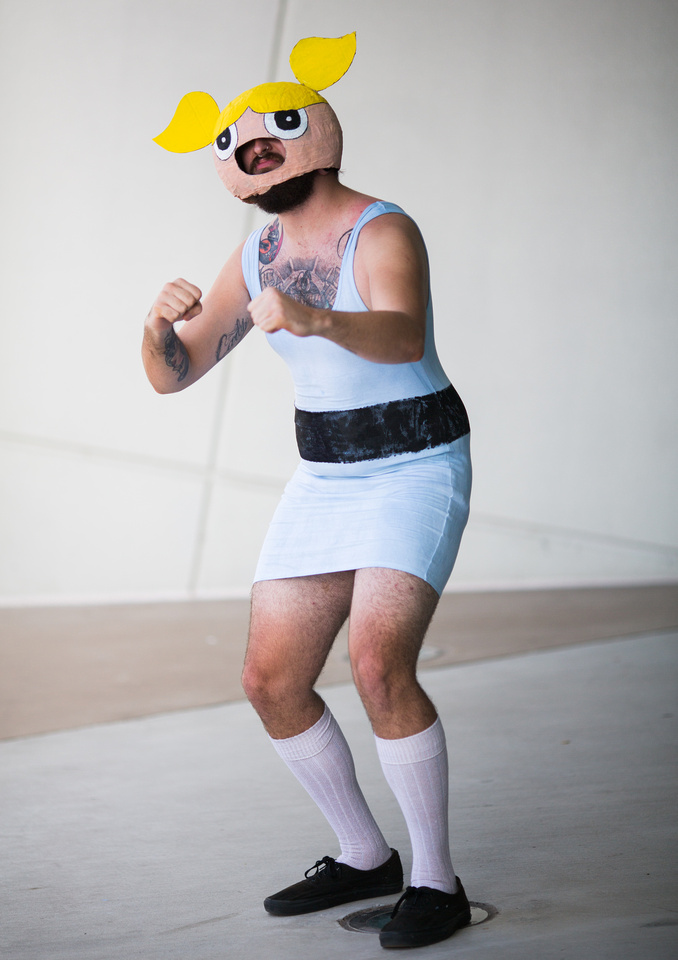
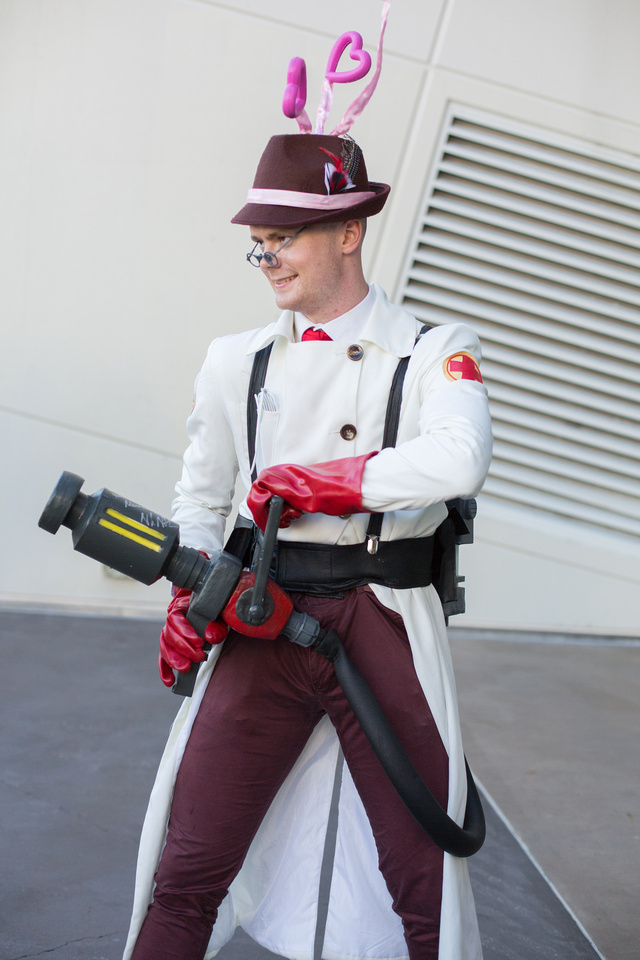
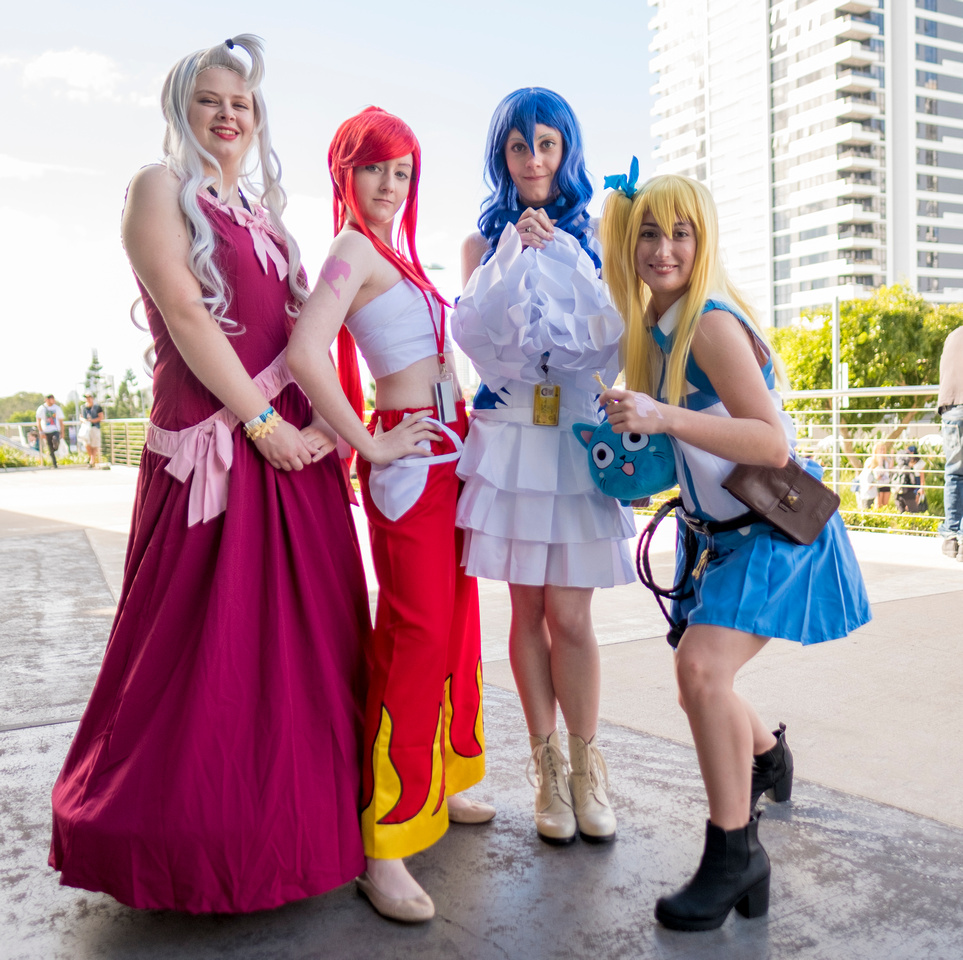
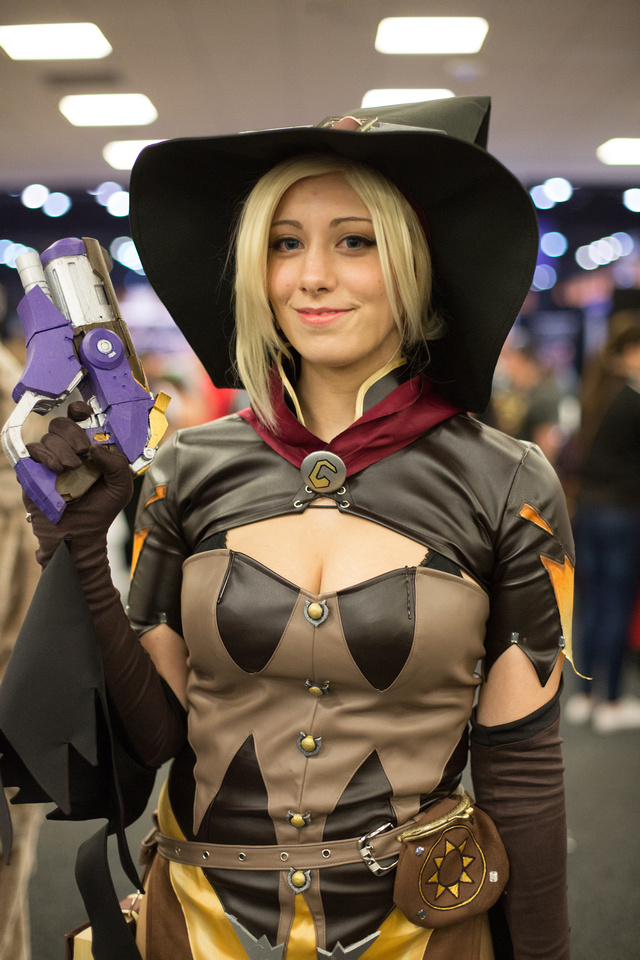
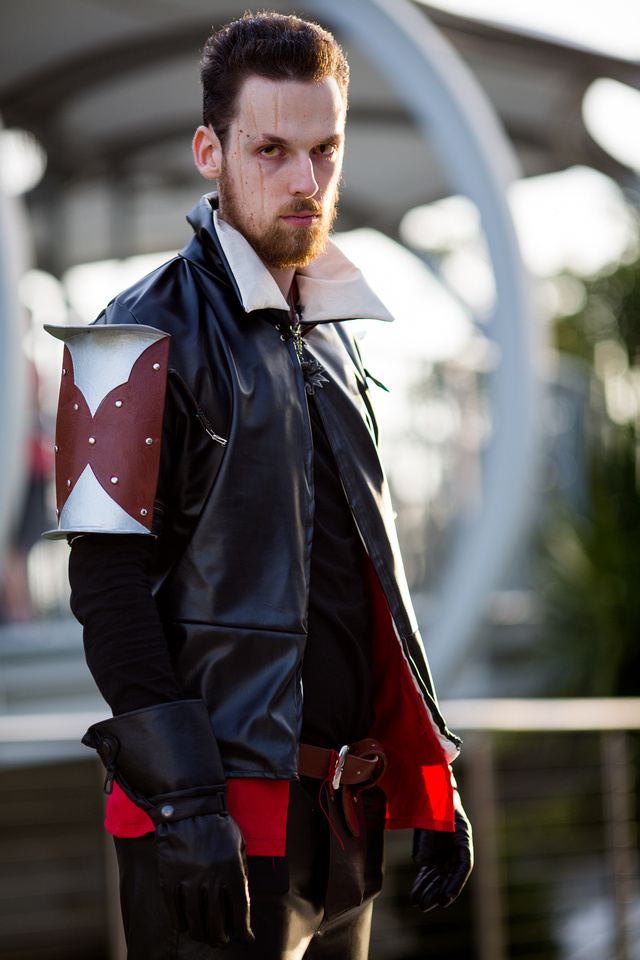
After a short successful day on Saturday, I decided to go back to Supanova on Sunday. At first I was reluctant to drive a 180km round trip from Brisbane to the Gold Coast, however my insatiable desire to get some awesome photographs finally won the best of me. I could not pass off the opportunity to freely photograph awesome looking people in some of the most fanciest costumes I have ever come across.
Upon finishing the day, I did not regret making the second trip back. Here are some of my favourite pictures from the second day. A link to the entire gallery can be found on the bottom of the page.
Thank you for coming to my blog, I hope that you can comment and follow my work on here and Instagram (henrylamphotography) and all my other social media that is linked on the tab above.
If any of the cosplayers are from Brisbane, Please give me your contacts as I would love to get in touch with you.
Love you all!!


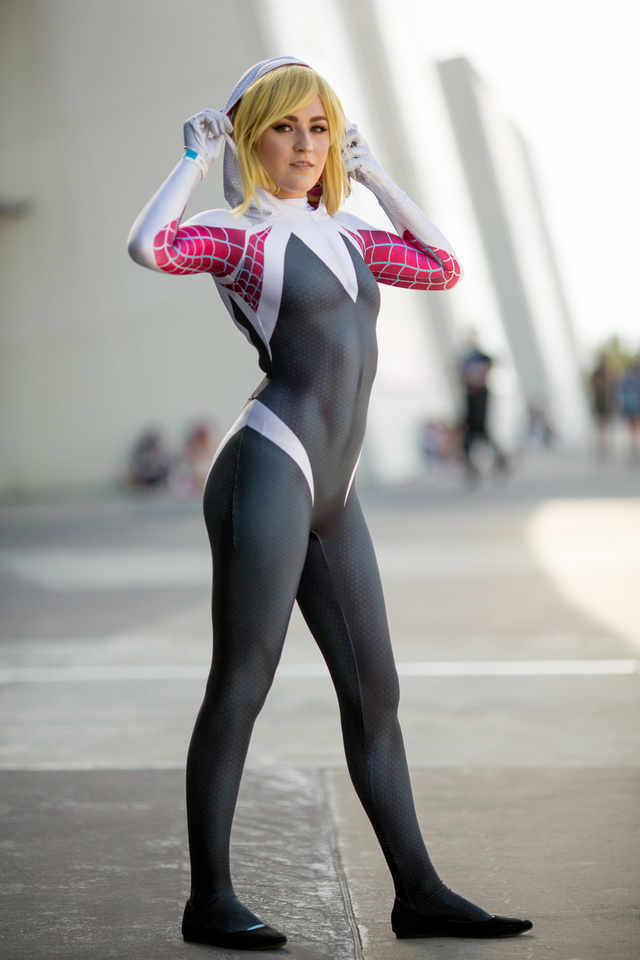
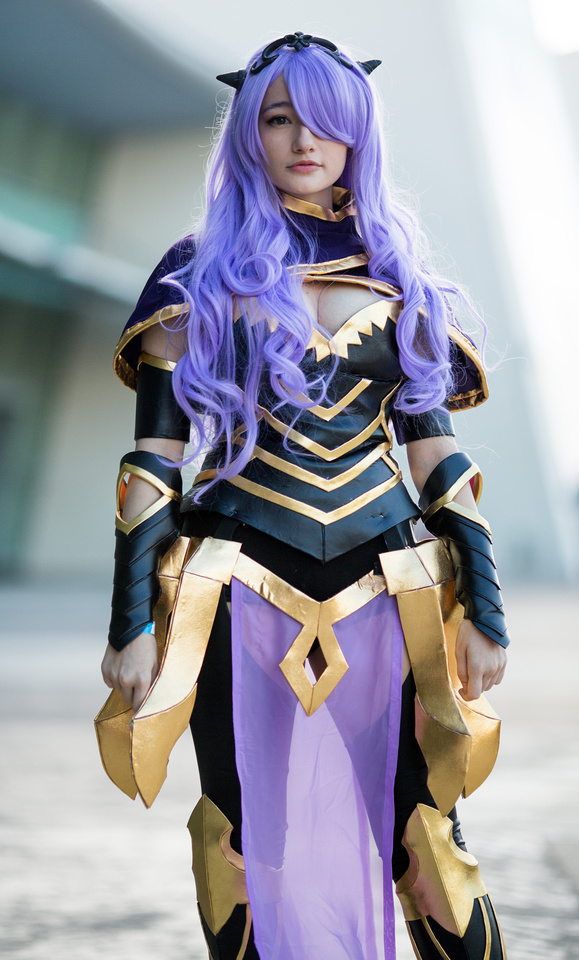

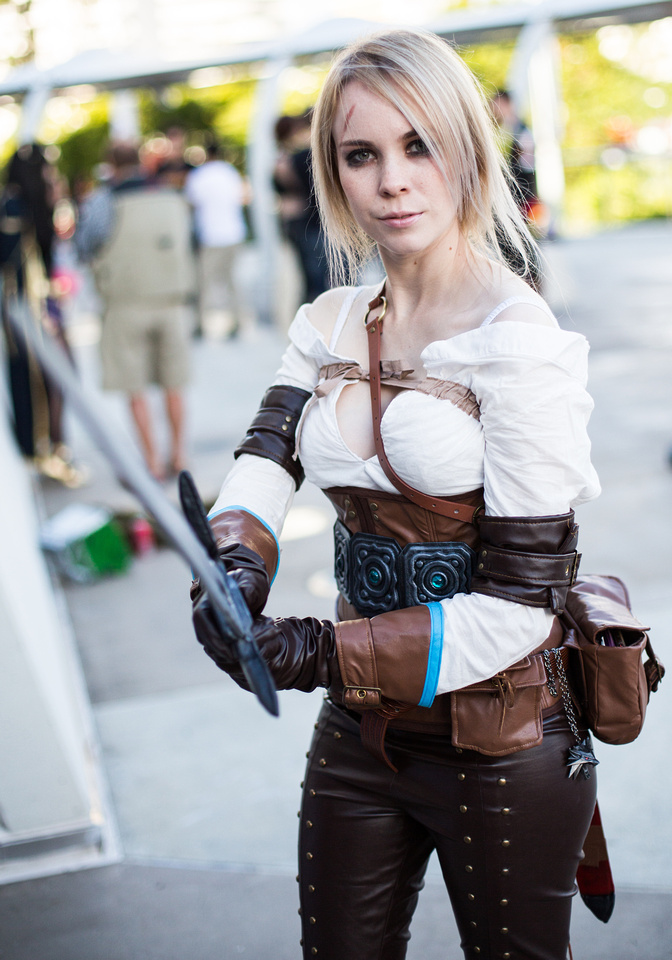
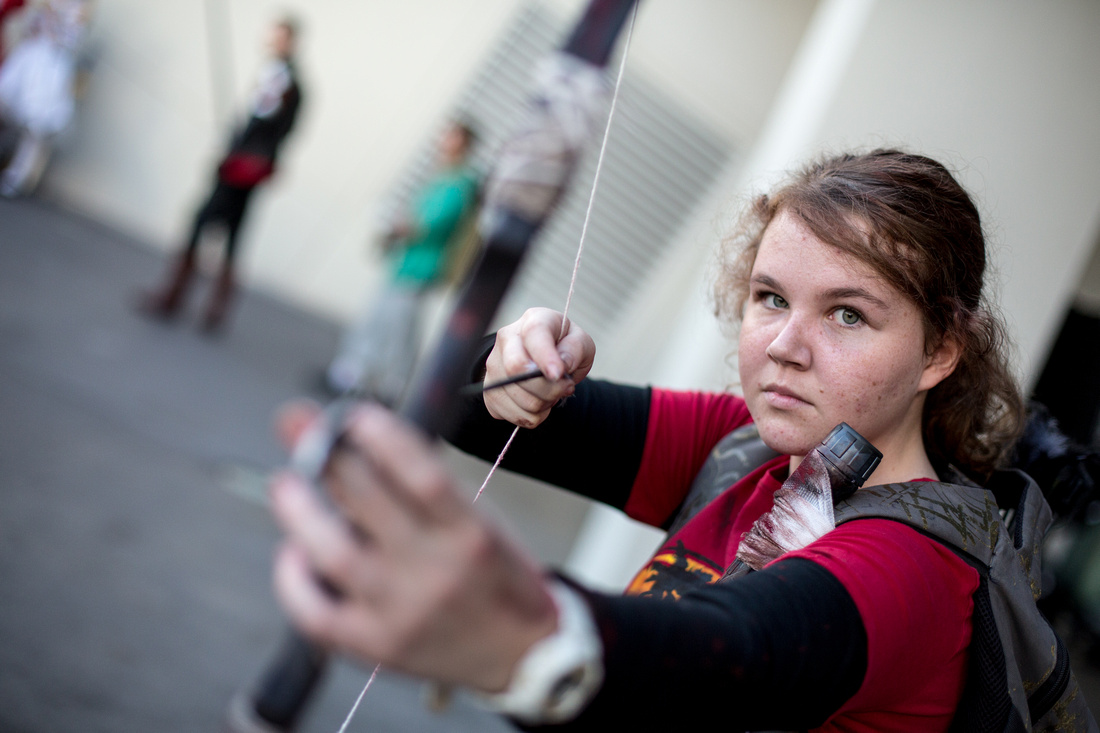


Go to this link for the entire gallery
]]>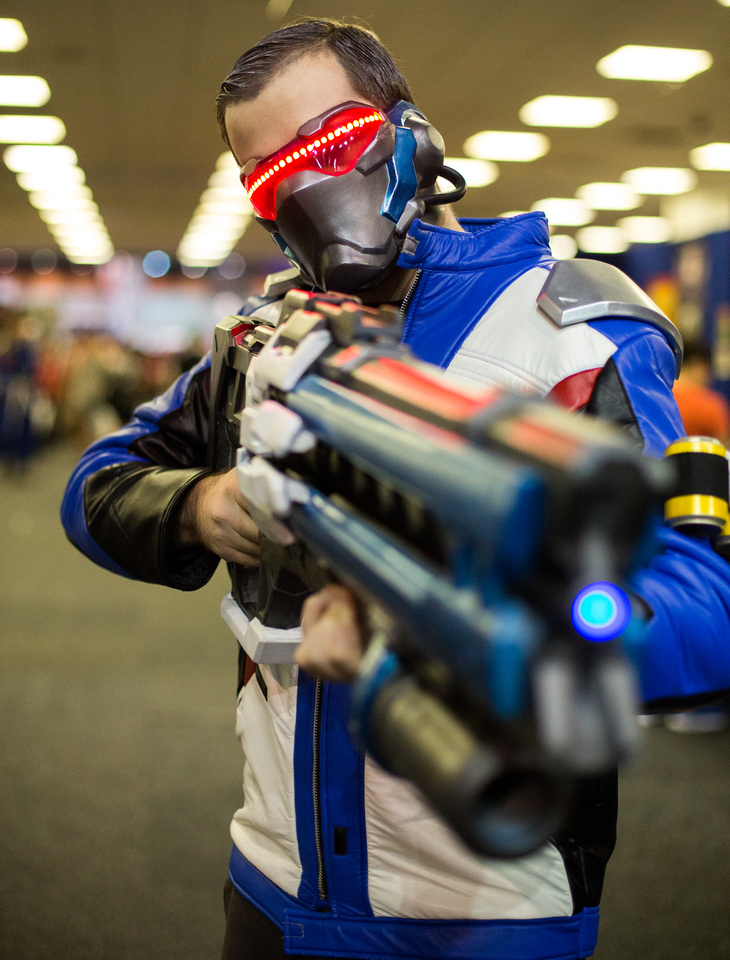
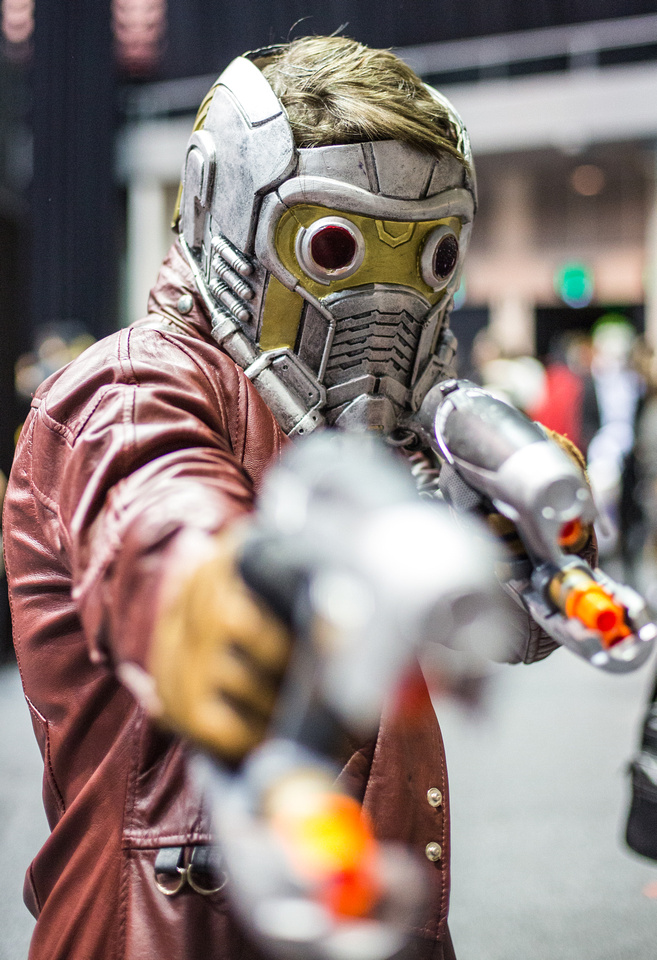
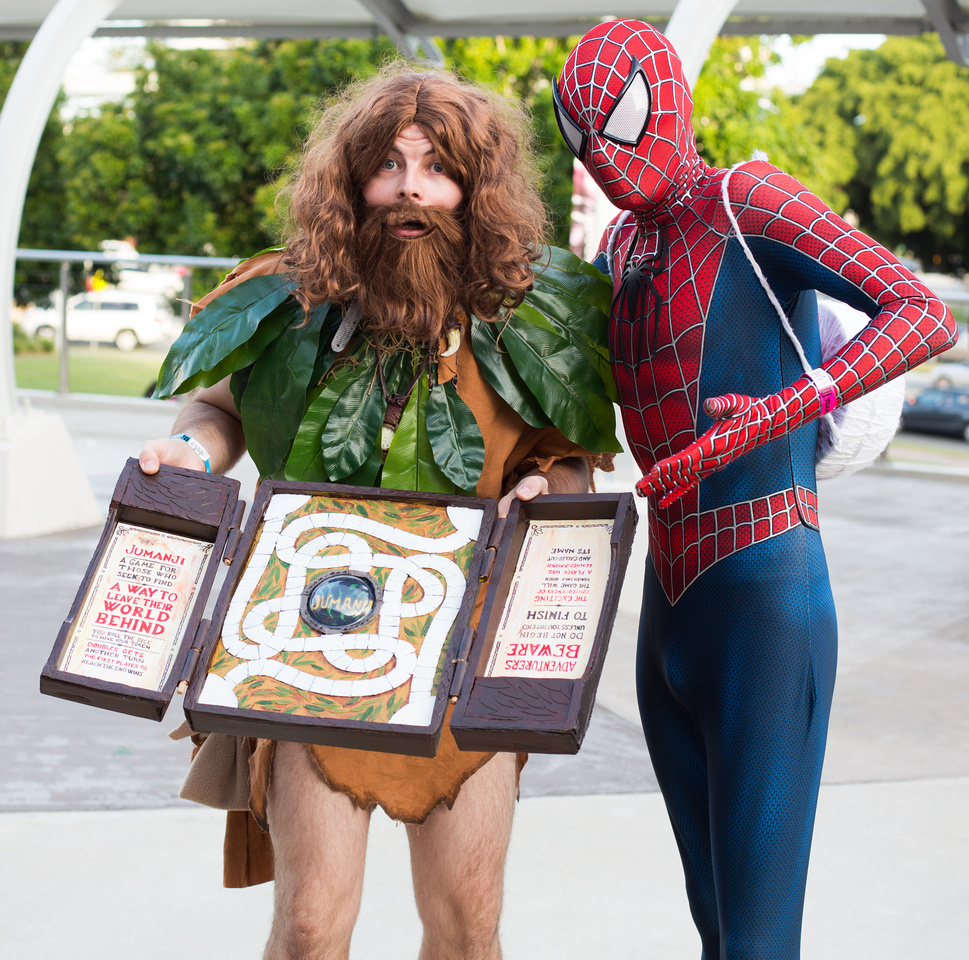
In my previous post, I wrote about what it was like walking up to new people along the street for their photograph. This time I was invited to be a volunteer at Super Nova in the Gold Coast by my friend photographer Steven Yee. Steven was kind enough to offer me the opportunity to take part in taking photographs of the cosplayers and charters at the pop culture convention.
Here I was able to capture pictures a variety of different people and characters, Albeit the fact that the convention centre was an ideal photographing location, and also we are not dealing with professional models here, it was still plenty of fun and a great experience to have the camera in front of so many different people.
Some of the costumes were really impressive, I have never really been into the pop culture world, however, I do appreciate and respect the time and effort some of the people have put into, to make the outfits the way they did.
It was nice to be able to photograph many will'ing people at the expedition. This experience helps me build my confidence in asking everyday people for photographs. I just wish that I am able to walk up to people in every day street life for pictures just as easy as this.

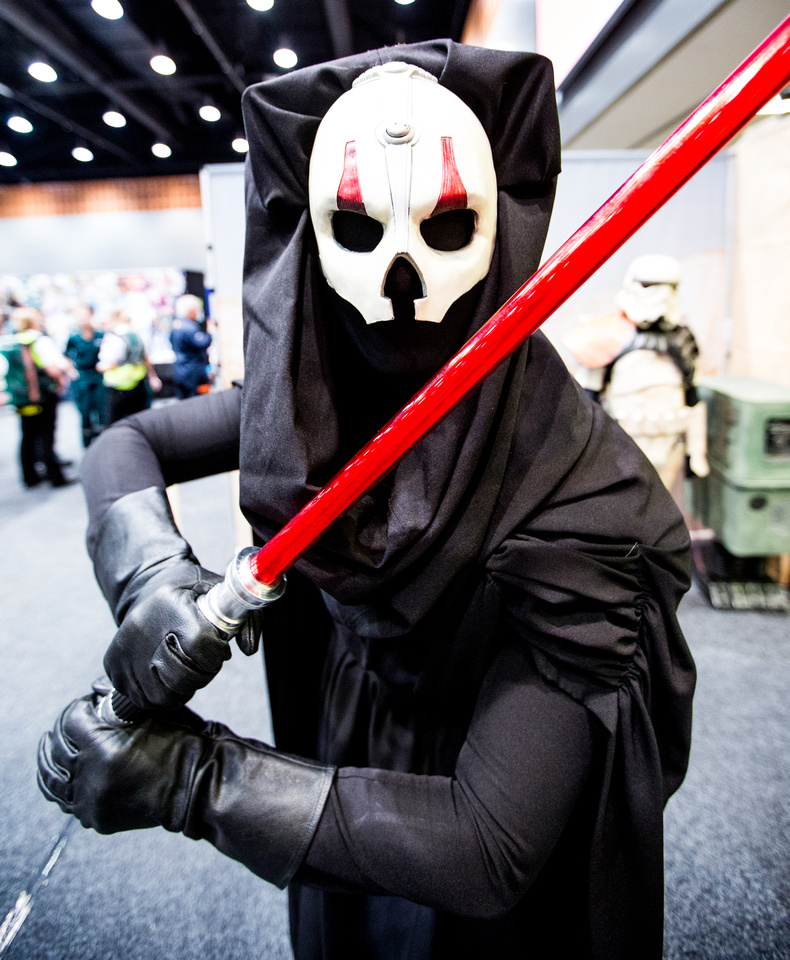


Stay tune for more pictures coming after Sunday's (Tomorrow) event.
]]>
On this week's Photography adventure I go off on a photo mission that would send most other photographers running in back in fear.
That is walking up to random people on the street and asking for their picture to be taken.
Often street photography is taken in a covert and discrete manner, where most of the time the subject is oblivious of their picture being taken. This form of photograph has at times have had some negative connotations attached to it, as it can been seen as weird, creepy and stalking-type behaviour.
Watch me go through and approach 10 different groups of strangers from my city on whether they would accept their picture to be taken.
To accomplish as a success, All the participant has to do is accept the offer. A reject would be considered as an attempt that failed to get an image.
There are obvious moments throughout the video where I am genuinely scared, nervous and reluctant to perform. There are times when moments get really close to a reject and when I am almost certain attempts will not go through the opposite result happens.
The final result at the end was very surprising. Watch the whole video to find out who rejects and who accepts.
Here are some valuable things that I learned during this experience:
1: Be overly positive in your emotions.
I think a key part to the success is the emotions that you are expressing during the approach. It is 100% natural to feel emotions such as fear, anxiety, adrenaline, reluctant, discouraged in these situations. This makes sense because most people are not masters of walking up to strangers and asking for things. However, your emotions will be very contagious to other people. If you are feeling happy, positive and full of energy, it is very difficult for people to counteract that, especially when you catch them by surprise. - In hindsight, if you approach with a sense of negative self-talk, that will also show as well.
2: Be convicted to your reasons for doing this and explain to the participants.
The most common thing that is going to happen when you approach is that the participants is going to want to know why and what you are going to with the photograph. You need to tell them EXACTLY what your intentions are in an honest way. I just tell my subjects, that I am doing an experiment for myself to see whether or not people would be accepting of having their picture taken. The images will be posted on facebook and on youtube. From there the power is then at the mercy of the participants decision. Most people would want to help you out if they see and can't think of a reason not to.
3: Always be grateful
Always be grateful for the approach, irrespective of the outcome. If they said yes, that means what you did worked, and it feels great. You would want to thank your participants for allowing you to feel that way. If the participants decline, again you should be grateful because without them, you were not able to practice and experience conquering a fear that you have. Its a Win-Win in any given situation, and never any need for anything negative.
4: Always Offer something back.
At the time of this video, I only had my business card and an email address. I gave my participants the opportunity to collect the images at their free will as a sign of appreciation. With combination of a generous heart, positive emotions, and providing an interesting twist to their day... its ALL good stuff for everybody.
5: Its okay to be Nervous and Scared.
It is okay, and I think advantageous to show that you are genuinely scared of the situation. Yes I do mumble, and my sentences are not articulated 100% when I ask. that because I am genuinely scared till the point of shaking... When people see that, with combination of your positive energy, they will not feel threatened by your approach.
Bless and thank you to all Participating members. You all really made my day!!
Here a link to a video and some photos taken from the day!
Please subscribe and thumbs up the video on Youtube!
 Link to VideoClick here to watch the video,
please subscribe, share and thumbs up the video.
Link to VideoClick here to watch the video,
please subscribe, share and thumbs up the video.
 Street Portraits
 Street Portraits
 Street Portraits
 Street Portraits
 Street Portraits
 Street Portraits
 Street Portraits
 Street Portraits
 Street Portraits
 Street Portraits
 Street Portraits
Photographing a cityscape can be a very rewarding experience. We have all been in a situation where we want to take best picture we can of the city we live in or come to visit. This blog post will give you my insight and tips on how to achieve the best possible picture you can.
Understand your Equipment
Just like all photography, the more verse you are at using your equipment the more proficient you will be at maximising its potential. There is very little point in using a high end DSLR if you don't know how to change or make adjustments to its fundamental settings. Settings that are useful for shooting cityscapes are:
- Changing the image quality to shoot from JPEG to RAW (Always Shoot in RAW where possible)
Cityscape require a bit of help to blend exposures and extract details. Shooting in the RAW format of your camera gives the most latitude for editing, thus giving the better finished product in the end.
- Fire the camera remotely
When you require the camera to be still and uninterrupted, it is always good practice to fire your camera remotely, delayed (Self-timer) or wirelessly. Even the slightest touch could nudge the camera in an unwanted direction. The error may seem faint at first but when you comes to laying 7 bracketed shots on top of one another the smallest errors become apparent. By setting off the camera without touching the shutter can reduce the chance of this happening. Mirror lock up is also a good option to turn on if available.
- Activate the histogram
Sometimes the LCD on the back of the screen can give false information. Things can appear bright or dark due to the environment of which you are using it in, or even the brightness level the camera is currently set at. A histogram gives a good graphical representation of the distribution of pixels along the image. The important things to be aware of when shooting and histogram is that there is little to no, clippings on the edge of the histogram. This requires a bit of forethought because subjects such as the sun, will almost always be a clipped highlight.
- Setting Focus and locking it
Once the camera has its focus set it should be locked into position. This can be achieved by either pre-focusing the camera first and switching it to manual focus. I personally like to use back button focus.. so that my shutter button doesn't activate any of the auto focusing systems.
- Bracket your images
Bracketing your images is a good way of making sure that the dynamic range is covered.
Plan
Cityscape photography requires a bit of planning before shooting. You need know know the Where is the best location to capture the image. A good resource is using the internet for reference. I like to just use google images, where I type in a search for cityscape images of (CITY) and take a quick sample of where other photographers have taken images of that particular city. Also pay special thought to the position and path of the sun. Once you know where to take the picture the next is the HOW.
HOW to get to that location, does the location require a hike or specialised mode of transport. If its a hike do you have the proper attire and equipment to make it possible.
WHEN. In my opinion the best time to get a cityscape image is during the twilight/blue hour period. Twilight occurs when the sun has dipped below the horizon and the the colours of the sky go from warm reddish/orange colours to a deep blue. This happens just before it goes black. Twilight happens twice during the day, before sunrise and after sunset - or in the A.M or P.M hours.
For cityscapes, the P.M twilight tends to work better. This is for several reasons as I will point out:
- More city lights and street action is happens during the P.M because people stay late at work (office lights) and cars on the street.
- People are generally asleep and not in the office during the A.M (thus less lights)
- Don't require to wake up REALLY early in the morning
- Setting up in the evening, there is still plenty of available natural light, so you can see, compose and set yourself up well ahead of time
The best resource for me to find out when to shoot is the weather website www.wunderground.com To use this site you can enter the city you want, then click on the Sun and Moon link and you will give you 3 points of Twilight sessions during the day. The most optimal twilight is Civil twilight. that is the time when you want to be a the peak of shooting the ambient city lights.
One important thing to note about cityscape photography is the particular day or period of the year you are shooting in. On a week to week basis, the best to shoot cityscape is during mid week (Tuesday and Wednesday). This is because most of the businesses and corporate buildings often work into the twilight period. People tend to stay later at night at work during the mid week and taper off as the week ends towards Friday. There is usually just a fraction of business lights on during the weekends.
WHAT to bring is very important in your preparation. The most common things you require are:
- Camera with fresh memory cards and full batteries
- Correct lenses at the appropriate focal lengths. (I find lengths from 16-35 are the most useful) for cityscape landscape
- Tripod
- Camera shutter release or remote triggering system
- Appropriate clothing/Shoes/weather protection
- Insect repellant
- Lens cloths and camera cleaning equipment
- Protective camera bag
- Water
- Torch or headlamp
Setting the Photograph
Arrive on location Early
It is wise to arrive on location early, by using the information given on Wunderground.com you can easily backwards plan your day. If the site states that Civil is going to happen at 7:14pm in the evening, you should try to get to location at least 1 hour prior that at 6:15pm.
Popular locations such as lookouts will attract other tourists and photographers so you want to have the first grabs of the optimal locations. Once you have found your point of composition, here is a checklist of recommended things you want to set prior to getting your collection of images.
- Set and secure the tripod and ensure that horizon is level, consider the compositional rules such as horizon lines on lower or upper thirds - Also ensure that the tripod is on a solid surface and not in contact with any walls or fences that people could move.
- Ensure that there are no distractions and unwanted objects poking from the edge of the frame. (Eliminate these minor errors on camera and it will save you a tonne of work on computer processing.
- Set your camera to shoot in RAW format
- Set and lock your point of focus, by focusing onto a building and use tools such as your live-view to verify that you have sharp focus. I like to refer to text and signs on buildings for reference.
- Activate overall metering, Canon calls this Evaluative, Nikon calls it Matrix to get a general correct exposure
- My preference is to shoot in Aperture Priority mode and let the camera choose the shutter speed. I like to use F8.0 but you can use between F8.0 - F16
- Have your ISO set to the lowest native value. (Native is when you are not using any ISO extensions) if you are not sure. ISO 100 or 200 is GOOD.
- I recommend turning off Noise reduction setting on the camera, this will help you speed up your in camera processing between shots.
- Turn on your brightness histogram and review it whenever possible, to ensure that all the detail are within the boundaries. - Having blinkies or high light alert on is also a good idea to ensure highlights are preserved - Things like Street lights may eventually blow out, this is natural.
- Keep shooting until your Shutter speeds start getting to around 10 seconds, after this you can stop shooting because city lights will begin to blow right out and signs on buildings will become unreadable.

]]>
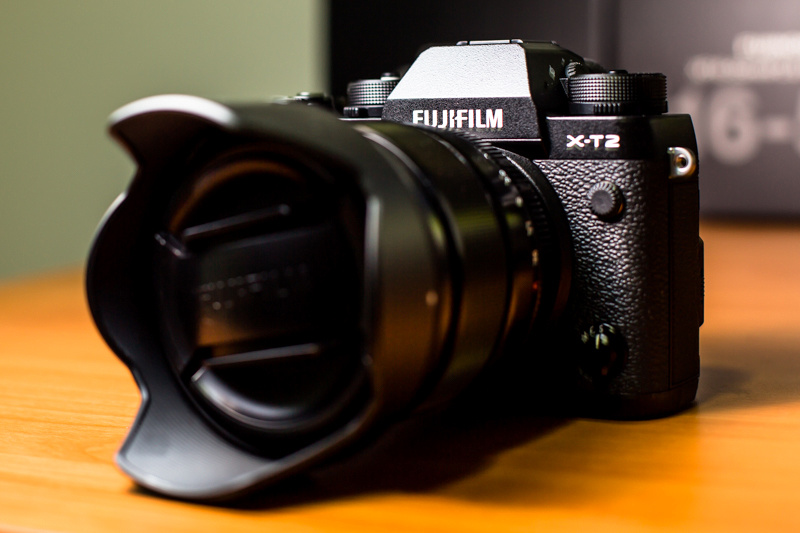
Camera-lust for the X-T2 started just days into my trip in Taiwan about a month ago (October 2016) where I was walking, hiking, mountain-climbing, wading across the river and carrying my Canon 5D3 with me. There were days during that trip where I would be wearing the camera and its gear for up to 5+ hours. I managed to hike up the Zhuilu Old Trail on the gorge which was a 4 hour round trip up a mountain, with a camera bag that weighed 12kg. By the end of the day, my shoulders were at the tip of breaking point.. My obsession with getting the camera to a unique location was approaching its critical limits. I have to come to realise that my body isn't getting younger as time goes on, I may not be as fit as I was when I first started doing all this photography work.
After a month long battle with camera-lust and trying to convince my girlfriend Elaine, I was finally able to purchase my own FujiFilm X-T2 Camera. The tipping point for making the plunge, besides the constant nagging to Elaine, was the limited cash-back offer that was made available. I am able to redeem a total of $600 off the total purchase. To justify my actions; I doubt that the price of the camera + lens will come down by $600 in a hurry - thus I believe that I am in for a pretty good deal.
As my photography life matures. I have gone from carrying the Professional series of DSLR, Canon 1DMarkII from 2009-2012. In 2012, I purchased the Canon 5D Mark III as it debuted in Australian camera stores. This was also the time my 1D Mark 2 went into retirement. Four and a half years later (today) I made the big step into the smaller world of mirrorless camera, with the recently released, FujiFilm flagship camera, Fujifilm X-T2.
The main reason for going into this system was to have a competent camera which is smaller and lighter than my current 5D Mark 3. Its not a camera to replace my 5D3, its there to complement. I plan to have this camera as my traveling camera and use it for street style images. The 5D 3 will still be used for my organised photo-sessions such as portraitures/couples/weddings. I'll use the Canon system, when I do another camper van trip, because in my last experience it worked well having the cameras nearby the car.
The X-T2 is my first Mirrorless camera, and before owning it, I had very limited experience in using them and knowing much about them. During the month I have been doing a lot of research on this particular camera, and trying to find the advantages and disadvantages of this system. The reviews by large majority rated highly positive for this camera. The X-T1 was a fantastic camera from FujiFilm, and so the X-T2 was the latter camera with a few extra perks.
As soon as I got the camera, I was very excited to go out and test it out in the field. As expected the first thing I noticed about this camera, was the size and weight. It is at least 1/2 the size and weight of the Canon setup. This to me was a great relief. I only charged the battery for about 15 minutes out of the box, and that got me to 30% of the battery. The lens that I attached to it was the Fujinon XF 16mm F1.4 WR lens. This lens gives me a FF Eq. of 24mm.
With all new things for the first time, There was a small learning curve to overcome. The controls and dials on the X-T2 are all placed really well and quite natural to use. However, the blessing of the small size of this camera actually comes at a cost. I am one of those photographers with rather large hands, and holding onto this camera, isn't the most comfortable thing to grip onto. I find that my pinky finger needs to just tuck itself away under the camera, it doesn't really have a place for it to go. It was as if the camera makers made this camera for people with only 4 fingers. I am going to give it the benefit of the doubt of the fact this camera system is new to me, maybe in time I may learn to grow into this smaller camera; if not, I may have to consider purchasing the optional grip.
Another downside I noticed, was the speed that the battery drains. I'm not sure whether it was the fact I had only charged my battery for about 15 minutes out of the box, but my battery went from 30% down to 12% after 45 minutes of being on and only shooting about 30 shots intermittently. I am hoping it was the fact that I didn't fully charge it first, otherwise we are in for some problems.
The good things about this camera, is that it is much lighter in comparison to Canon equipment. I do enjoy the subtle sound of the shutter, and most of all, the physical retro look of the camera is a great plus.
Overall, The smaller size and the battery life are the only two things I have noticed about the camera that require overcoming. I guess it is only natural to have a few little setback as I try to adapt to a different system. I do really appreciate the lighter weight, hopefully the size doesn't become much of an issue.
The following images were pretty much uploaded straight out of camera. I may have used Lightroom to tweak some horizon lights and adjusted some of the white balance.
]]>
Last Friday I had the absolute pleasure to meet and work with Darni for a photoshoot. Within a few correspondence earlier on that week, Darni and I were able to arrange a photo session in Newstead-Brisbane. The idea was to photograph her in a new outfit she has recently acquired (go to her blog on www.darni.net to find out information about her stylish attire.) and give herself, the outfit some context in the form of photographs.
After the initial meet and greet, we were straight into doing what each person did best. That was me weaving magic behind the cameras and her just looking amazing in front. My gear for this shoot was my relentless Canon 5D Mark 3, and my trusty 70-200 2.8 IS Lens. To support me in the shoot I also made good use of the Avenger C-stand+Extender arm with a Rogue flash bender XL. My flash was a Canon 580EXII firing from a Pocket wizard TT5 unit to my camera. my supporting camera was my nifty DJI Osmo for video. (Check out the video at the bottom of the blog).
The rest of this blog will go on about my thoughts whilst I was doing the shoot :)
As a photographer I am often required to deal with the weather conditions that mother nature offer's me. For this particular shoot, I had to contend with high noon, full blasting sun. There was zero cloud cover to offer any relief from the harsh and hard sunlight. To make things that little bit more challenging, there was the frequent strong winds to contend with.
Photographing in noon sun can be challenging, especially if sunlight isn't diffused with any cloud cover. The light shines from directly above the model which causes very hard shadows around the facial features. The eyes can become very dark and the skin tones overblown. The light is blotched with areas of shadows and hard light. The model can have trouble looking in certain directions (towards the sun), camera flare can occur if the lens is pointed in the direction of the sun. Flash sync is often exceeded. Prolonged times for being out in the sun can be exhausting and uncomfortable for team members, LCDs are difficult to review. The list goes on and on.
The second factor, was the wind. A windy day can put a dampener on the shoot. Wind causes light stands to topple over, hair to be blown in all sorts of random directions, clothes to behave erratically, havoc on any audio recording. Lets just face it, wind and photography just don't mix very well.
Hence this is why most photographers will try to steer away from shooting around the noon period, and delay or reschedule the shoot earlier or later on the day. However, if you are a photographer who can still consistently create good quality images in these less-ideal conditions, I believe it is a good representation of their skill, professionalism and their flexibility to adapt to conditions.
When I first approach a shoot in the mid day hard light. My first goal is to look for shade or cover. Sometimes this can be difficult, because you may be out in an open area. However if there is anywhere with a patch of shade where the model can tuck under, this would be the best place to start. What I try to do is at the very least get the model's face in full shade. What that would do is diffuse the light that is falling onto their face, which results in an even spread of light around the face.
Once the face is evenly lit. It is time to meter for the light that is falling onto the face. I always meter for the highlights - the brightest part of the face. I still try to use an incident light meter where ever I can. I just find it fool-proof and consistently works for me. The camera's reflective meter can often be tricked and give unreliable results, and remember, the LCD can be difficult to see in the broad daylight.
On the light meter, I enter in the aperture and ISO that I wish to use and then I let the meter measure the required shutter time I need to achieve correct exposure. I then enter the required figures into my camera, which is in manual mode. This method just takes all the guess work out of finding the exposure, and reduces the time you spend reviewing at the back of the LCD, taking excessive test shots. To a certain degree it makes you as the photographer appear more professional, with your smooth and flowing workflow.
If I must shoot out in the sun, the idea is to try to have the sun behind the model. This is challenging if the light is directly above the model, but do so in a way that he/she is comfortable looking at the camera without squinting. By doing this. you will maximize the amount of shade around the face, which will minimize blown highlights on the skin. (One of my biggest hates) If done properly the sun will work in your advantage by offering you a rim/hair light on the model. Now its time to fill in the light with a dedicated flash unit.
The last thing I will mention in this blog is about prioritizing the clothing when it comes to exposure. Like I have been saying the lighting conditions during the noon sun isn't ideal. The dynamic range required to capture the entire scene, often exceeds even the most high-end cameras. The point I want to make is, if you must prioritize a subject, Priorities the clothing and the skin tones. Do what you must to keep these parts within your dynamic range, this is often done at the expense of blowing out your background.
(Please subscribe)
]]>
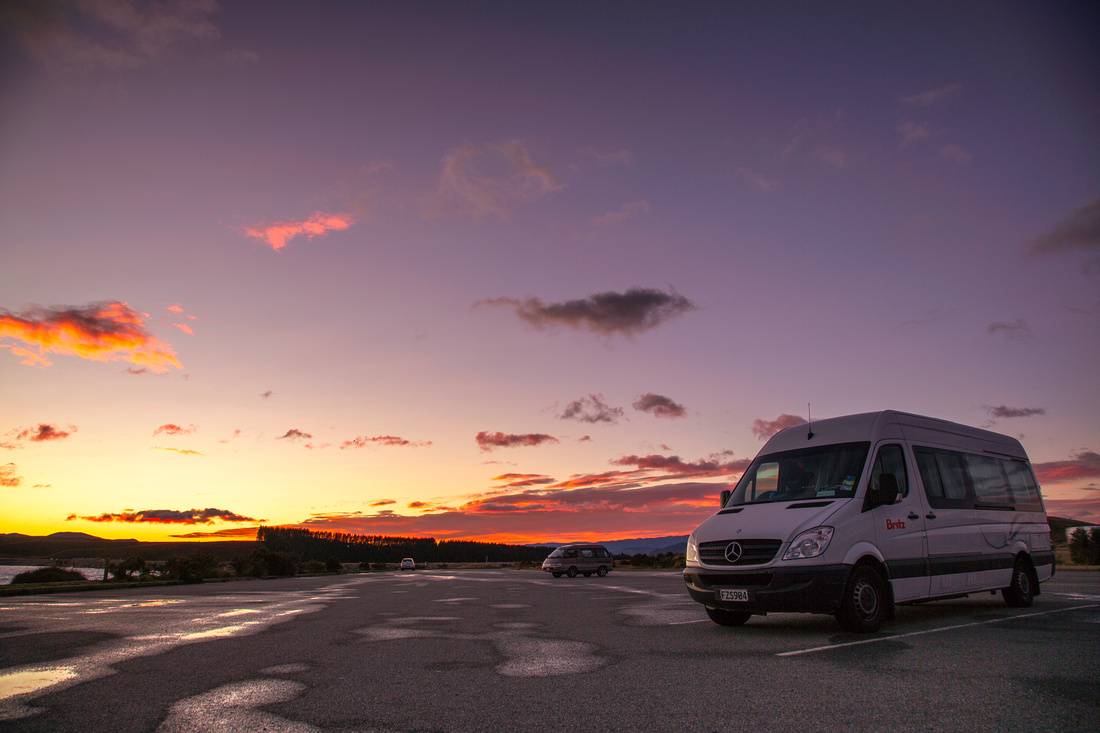
In this post, I will write about my experience on hiring a camper van for traveling around New Zealand. First I will talk about my experience I had. If you want a quick trailer and review what the experience was, just watch the video below.
Elaine, my girlfriend and I went on a Camper van trip around the South Island of New Zealand in May 2016, we hired a 2 berth(person) van for the duration of 9 nights. Overall the experience was FANTASTIC, I loved it so much and can't wait to do another camper van trip again. I highly recommend it to anyone who enjoys immersing themselves into a country and want the freedom to be and go where ever they wish.
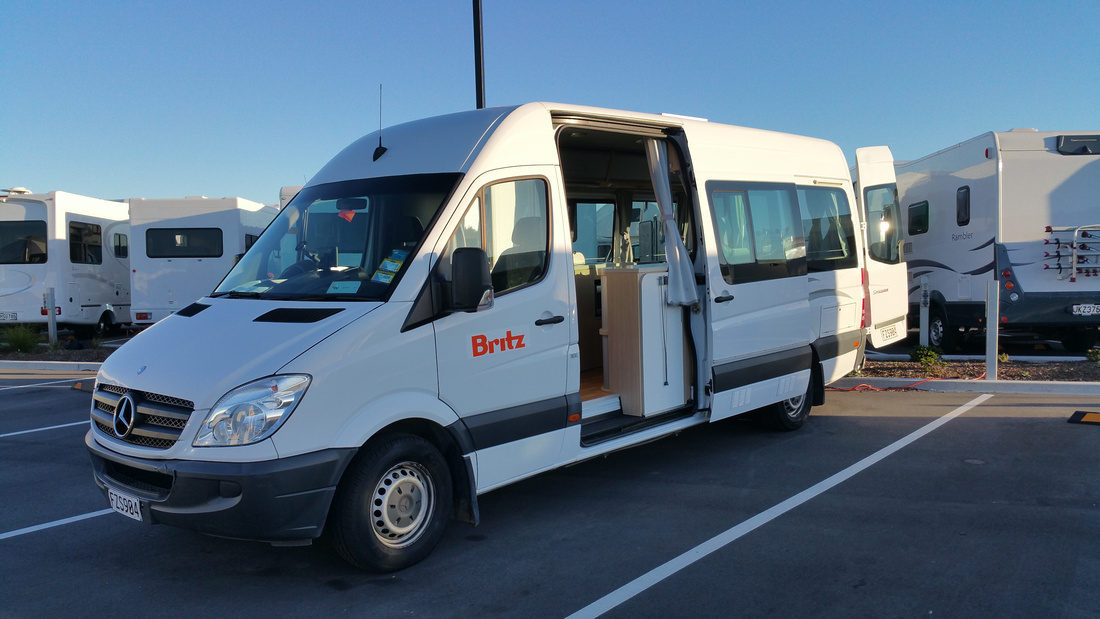
We booked our camper van at our local travel agent Flight Centre here in a small suburb of Yamanto Queensland, near city of Brisbane. I combined it with flights and travel insurance. The camper van we chose was the Britz Venturer - 2 berth Automatic. At the time of it costed me a total of AU$918. This price included the No-excess insurance.
The no-excess liability was huge, it is optional, without it the rental company will hold onto NZ$7500 on your credit card for the duration of your rental period. That was massive and I didn't want to take that risk. I think the price would have come down by about AU$40 per night of hire. This package also includes small little things like, 1GB of WIFI in your Camper van, 2 Picnic chairs and table, Snow-tracks for wheels - we didn't have to use it, but apparently you need to have it with you if you are traveling to Milford Sound during the colder months, some tickets for the driver to see glow worms somewhere (we didn't even use this) , A toll free number to call if you need road side assistance.
Although my travel insurance that I purchased separately, covered up to AU$10 000 of damage, I would have been covered even through an event of a negative mishap. I just didn't want to take the risk. I didn't fancy the idea of the Rental, Securing NZ$7500 during my trip. That was a lot of money for me. Also take into consideration that I used my credit card for about 90% of our purchases during the trip. For peace of mind, I just paid it.
In our experience, Elaine and I managed to clock up 2222km in 9 nights. We drove from:
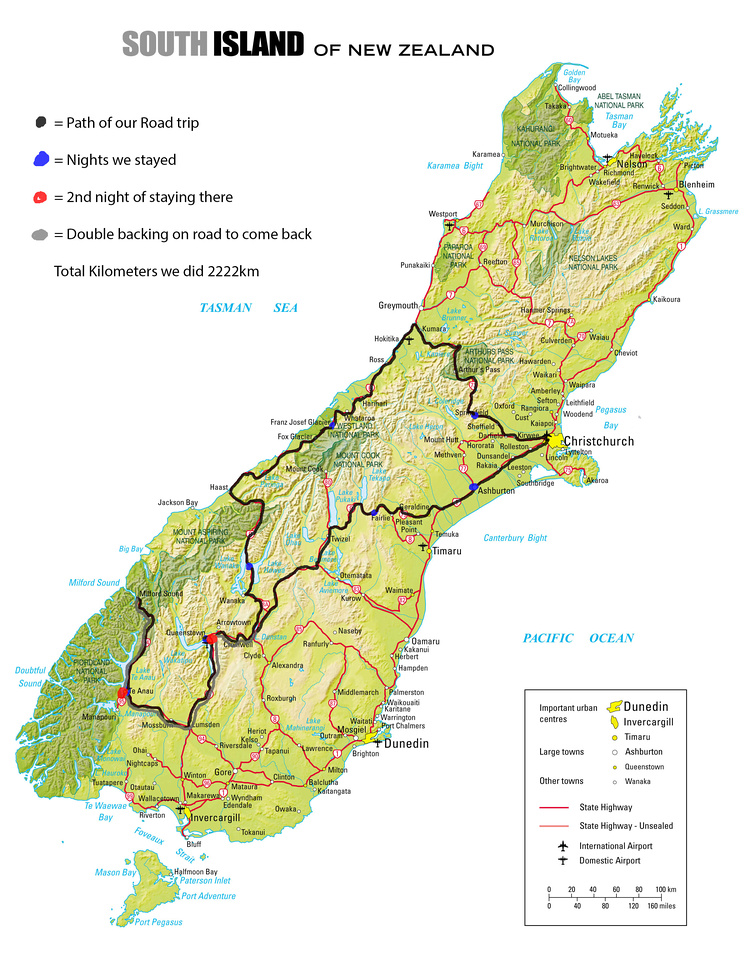
(SH) = State Highway
-Christchurch, along SH73 stoping at Lake Pearson Muana campsite towards Greymouth.
-SH6 Along Hokitika towards Franz Josef Glacier.
-Continued on SH6, passing through Haast and the Mount Aspiring National park towards Lake Wanaka.
-Rested in Wanaka and continued on SH6 towards Queenstown (Campers are not allowed through Crown's Ridge) to Queenstown via Wanaka.
-Queenstown along road 96 and SH94 to Te Anau.
-We stayed at the location of Te Anau Lakeside Holiday park, for two nights. The following day after our arrival we went on the Traveled to Milford Sound along SH94, and took the cruise to visit Milford Sound. After the day in Milford Sound we made our way back to the same camp site.
-After Te Anau, we travelled back towards Queenstown along the same road of SH94 and 96.
-After the rest stop at Queenstown at the Top 10 Holiday Park, we traveled up towards Coronet peak because it was like 15 minutes away and along the way back out of Queenstown towards Mount Cook and Lake Tekapo on SH6 and SH8.
-We actually stayed at Lake Alexandrina which was about 15 minutes, 10km drive back from Lake Tekapo.
-Early in the morning we had to back-track about 45km back towards Lake Pukaki to get photos of Mount Cook because the day before was Raining and the weather was MISERABLE!!!! - we couldn't see anything, it was so sad.
-After the morning at Lake Pukaki we drove towards Lake Tekapo and stayed there till around lunch time.
-After Lake Tekapo we were starting to make our way back towards Christchurch. I didn't have any more photo assignments that I wanted to take along this route, We wanted to stay at Rakaia George for a unpowered but hot showered site, but unfortunately when we arrived we realised that hot showers were not available from the colder months of May-October. We ended up driving back towards Ashburton and picked a random powered campsite to stay.
- After Ashburton, we started packing our camper van, filled up the gas bottle and gas tank, and made our way back towards Christchurch.
- We arrived at Christchurch at around 1430 hours, with no problems at all :)
How to collect the camper after Arrival
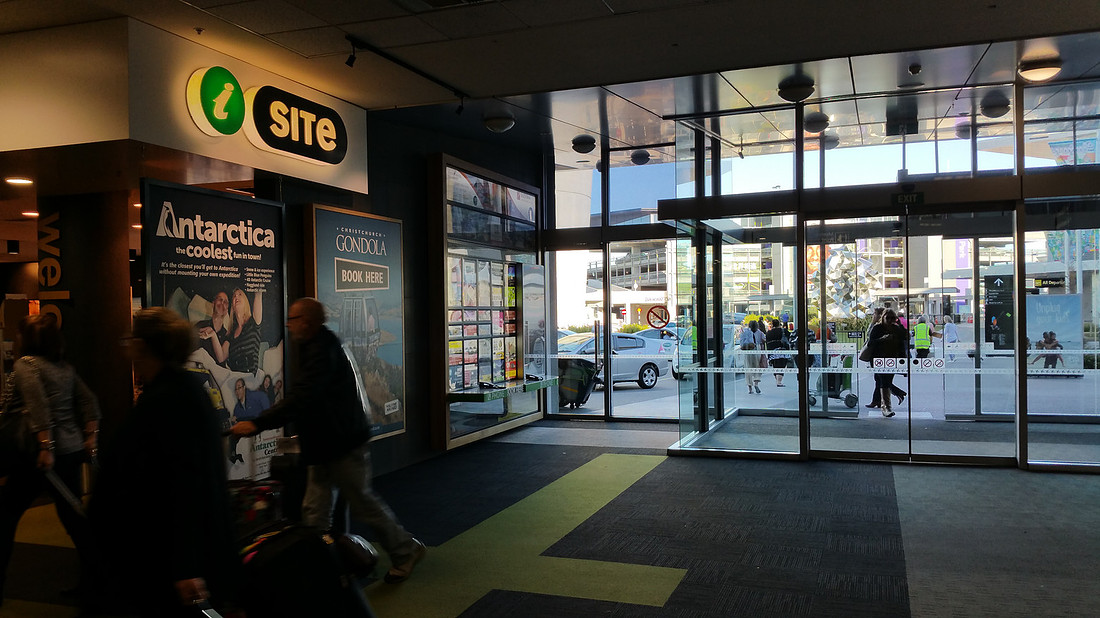
I must admit i was a bit lost when it came to this process as this was the first time I took a rental car from entering a foreign country. Fortunately for yourself, you have my blog to read and the process after doing it once is quite simple. Now we arrived at Christchurch International Airport, So the instruction I will be specific for just this Airport and Britz Camper company, however, I believe whether you hired a Britz, Jucy, Maui and maybe some others, it will be about 95% the same, the only difference is that you will dial a different number on the phone to let them know you are ready for a shuttle ride to the rental company.
- Upon picking up your luggage and walking out the arrival section. You will be required to go to the freely provided phones which is located next to Isite and about 50m away from the arrival gate you just came out of. it was behind the Information desk. here is a photograph taken for your convenience and ease (GOSH I had this information prior to my trip, because i was running around for 15 minutes looking for this silly phone,unnecessary stress and slight jet-lagged).
For our Britz Camper van. i had to dial 61. on the phone and speak to the operator there, and tell them my name and that i needed a shuttle from the airport to the rental company.
I was instructed to go to the coaches and rental car area, which is a heading of left, from the arrival gate. I had to pass a coffee shop and a Travelex Money Exchange area, towards the outside where buses were.
Here there were drivers calling out, shuttle to Rental companies.. and all we had to do was wait for someone to say, travel to Britz rentals.. but like i said, Britz, Maui and Jucy were all from the same company, they go to the same location.
We loaded our luggage into the shuttle and made our way to the rental company, i was like a 5 minute ride.
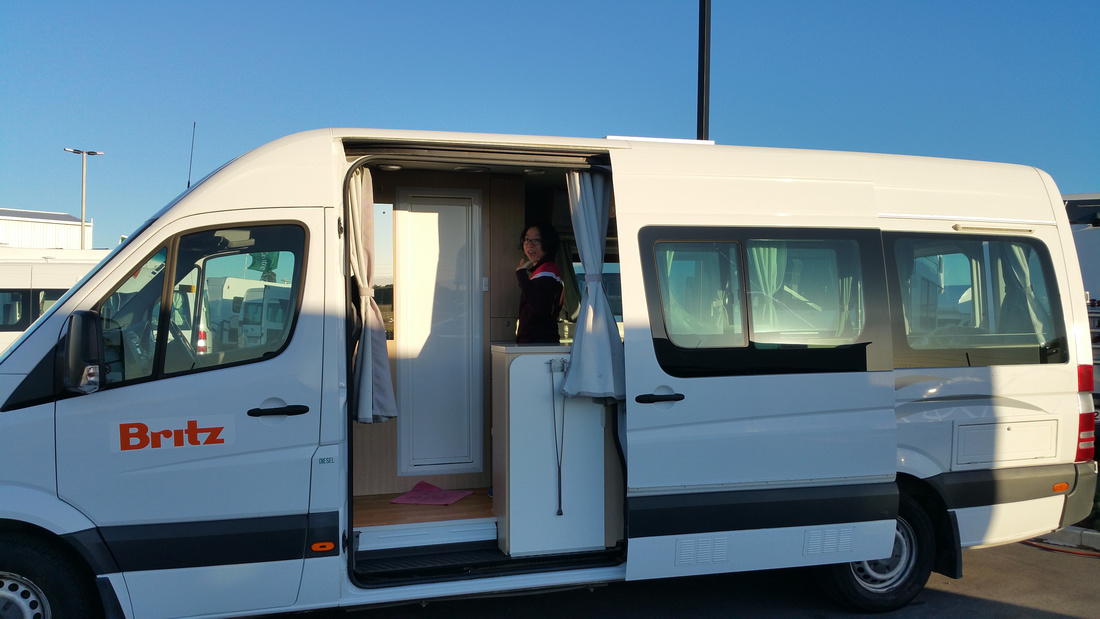
Once we arrived at the rental company everything was pretty straight forward. we unloaded our luggage, and set it aside, went to the counter with our rental documents and spoke to the agent. After filling a bit of paperwork we were shortly told which bay our camper was parked in.. We were able to take our luggage there and started loading if we wanted. We were told not to start the van because it was still plugged into the power point to await an agent who was going to give us the tour on how everything worked.
At this point it was very exciting as we would see all the campers parked along sided by side…. and we were getting towards our own.
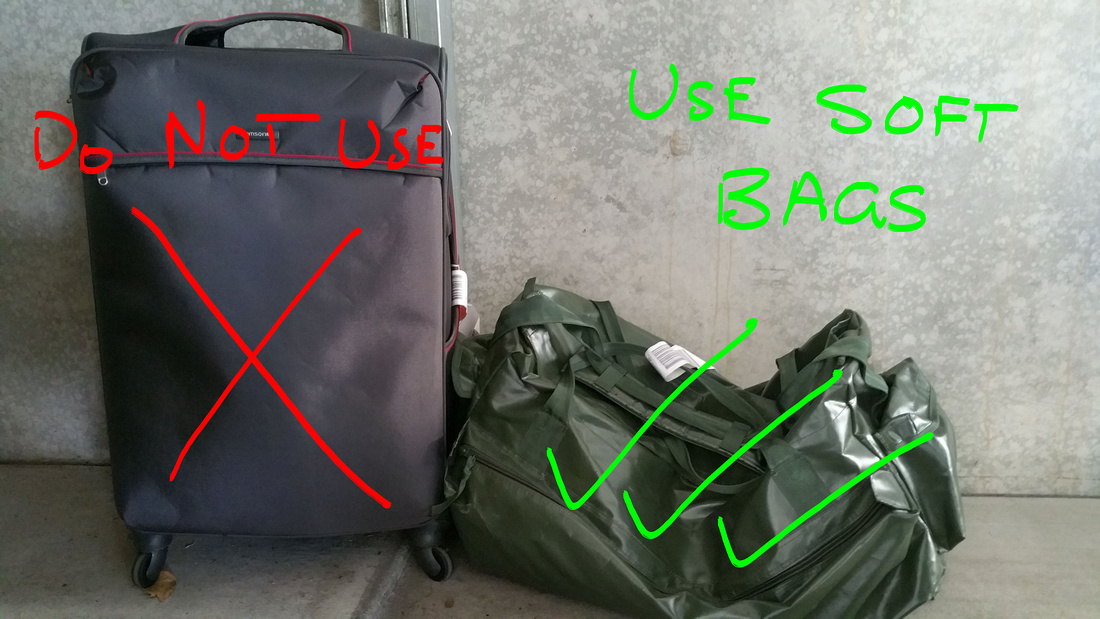
One word of advice about luggage, I should have mentioned this above somewhere I think…. Pack your items in SOFT case bags.. Avoid using hard case suitcases.. Simply because there is very LITTLE amount of room inside the van. Soft cases can be unpacked and scrunched up and stowed away easily in one of the compartments. If you had a hard case suitcase… It would be Hell to put away. Especially if you are going with more than 2 people.. they would just be lying around and be in your WAY for the rest of your trip. Elaine and I carried all our equipment in backpacks and large dive bags.
Once we finished the tour and tutorial from the agent on the operations of the camper van we were free to disembark on our journey. We were told all we had to do was to be back by 1630 on the drop off day, and we were also told that camper vans are not allowed to travel on Crowns Ridge from Wanaka to Queenstown. Apparently it a very steep and windy road. It is supposably meant to be a shorter route, but its arguably faster than the alternative route that we did.
It took us about 45 minutes to unpack everything and get things set up. The first thing we did was unload all our luggage and place them into the storage compartments. Once that was done we were able to scruch up the dive bags, and put them into the larger storage areas which was under the cushions. Having the soft dive bags, means we didn't have to fuss with them for the rest of the trip.
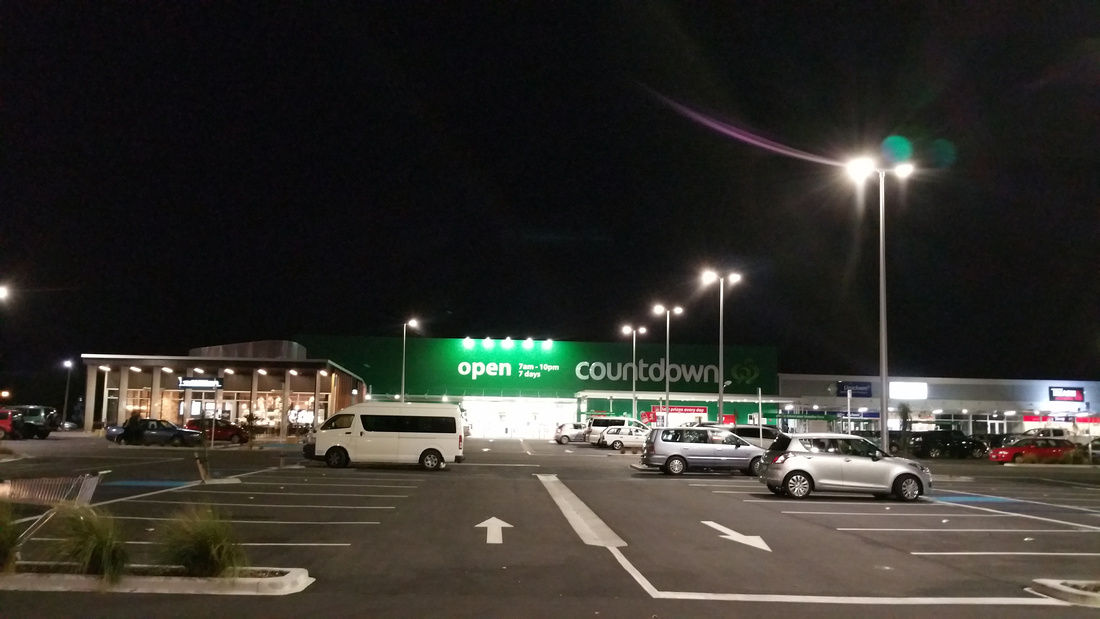
Our first destination was for grocery shopping. That was easily found by going to Countdown, which was only like 5 minutes away. We started first by having dinner because we were so hungry after the flight. We went to the Indian restaurant that was there. The food and service there was quite good and pleasant. After dinner we went to Countdown to do the grocery shopping.
After grocery shopping and loading the camper van with all our newly bought supplies.. The feeling of holiday was really starting to kick in and the excitement was starting to flow. We entered our first destination on our GPS as, Lake Pearson, Muana Campsite. That trip was about 120km away, and it took us just under 2 hours to get there.
]]>
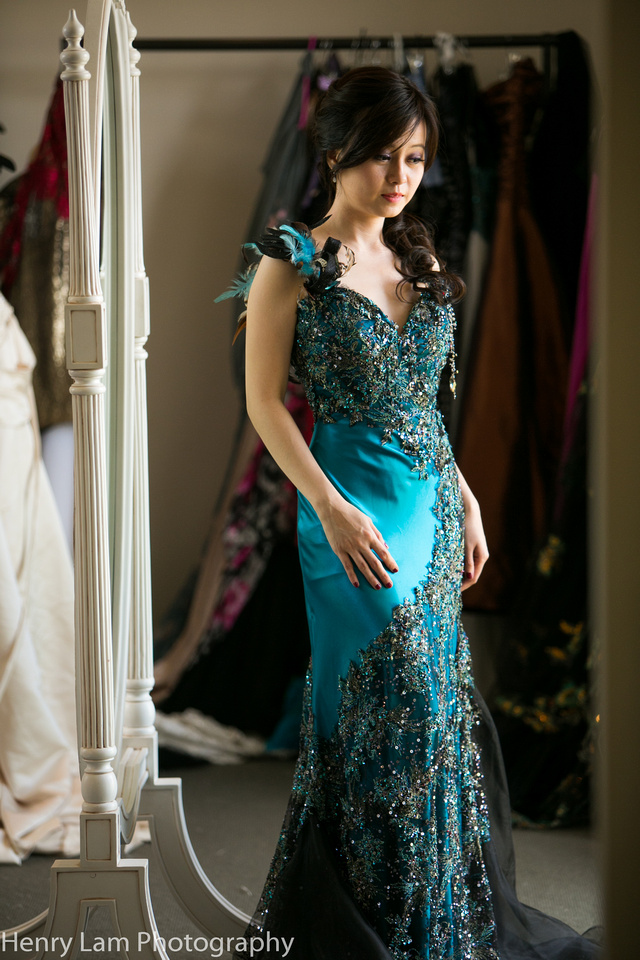
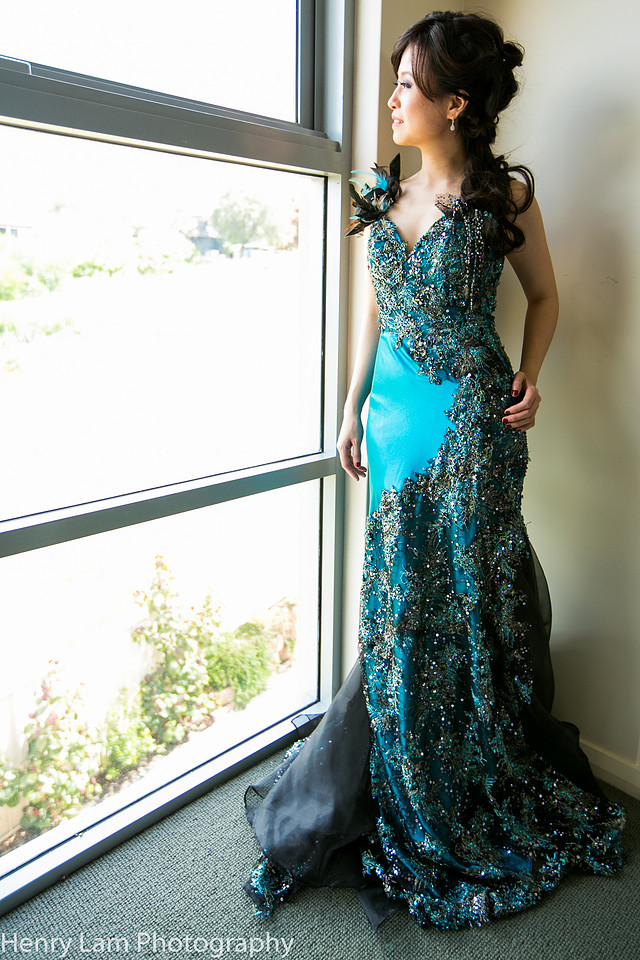
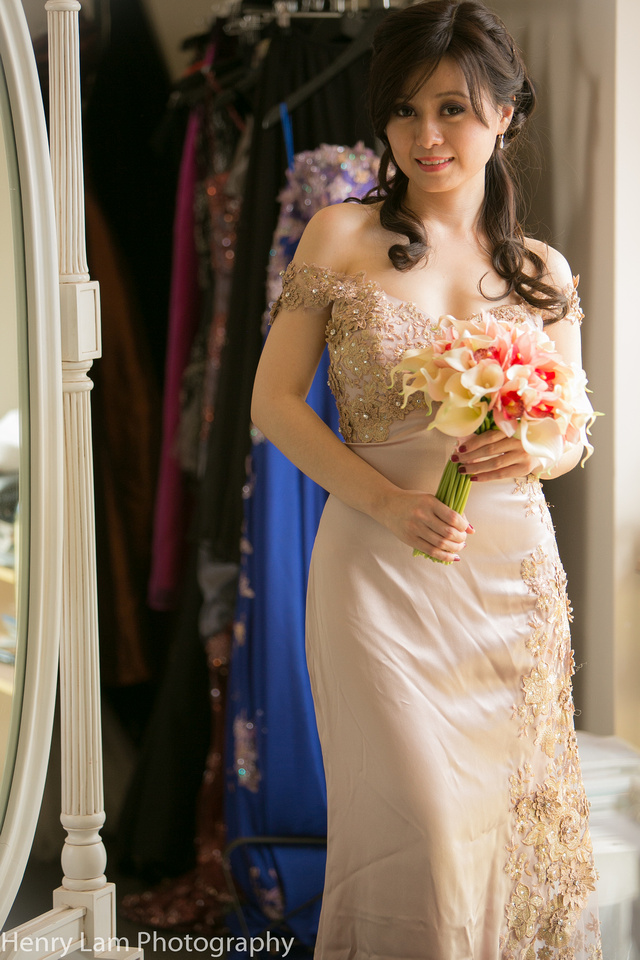
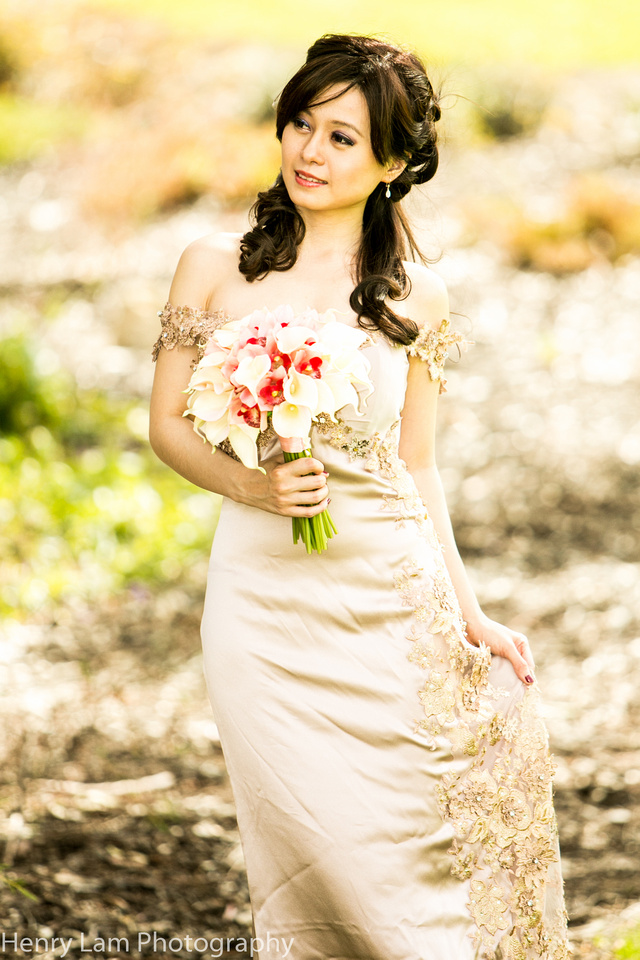
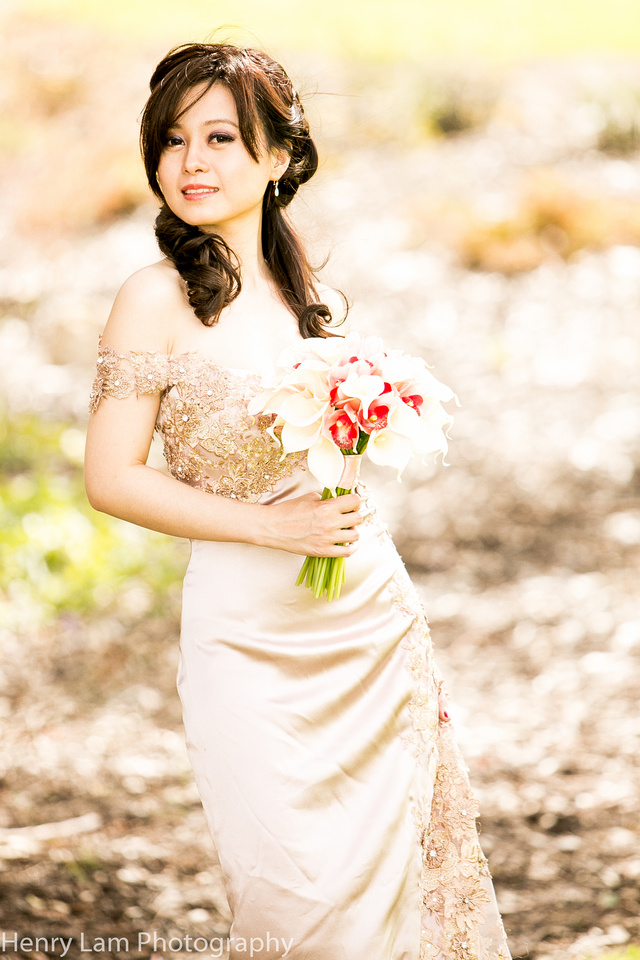
Another unique photo assignment was done on last Sunday 6th of October. This time it was with my friend, make up and Hair stylist Khaterine Cai. She was modelling dresses that were designed and tailored by Julie from Jewel Designs.
The photo shoot was done in Julie's house. The room was really well set up for a photo shoot. It had high ceilings and large windows for natural indirect sunlight to enter. It was not essential to use additional lighting equipment because the room itself provided that. I used a mirror lots as a reflectors for bouncing light to fill in the shadow areas.
Shooting inside a house is generally more comfortable for all members of the shoot. It allows for privacy and access to areas with little restrictions. Things to look out for are, large empty rooms with lots of ambient light. Large windows with opaque curtin are very useful for light sources. Houses also provide comfortable changing areas for the models.
Wide angle lenses are used more often due to the space restrictions, however if you can find yourself a hallway or passage way, don't be afraid to use your long zoom for some great background to subject blur.
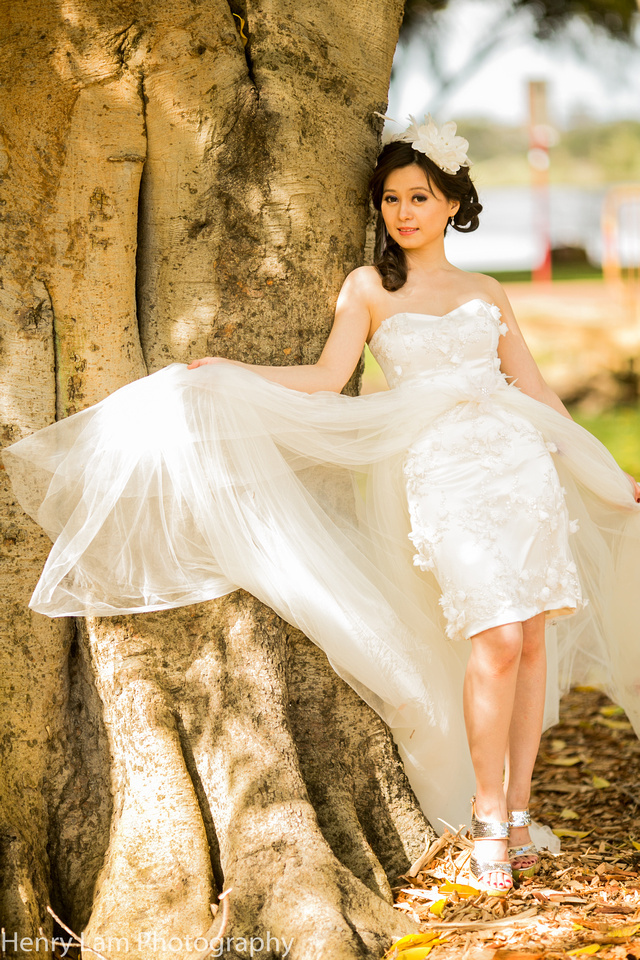
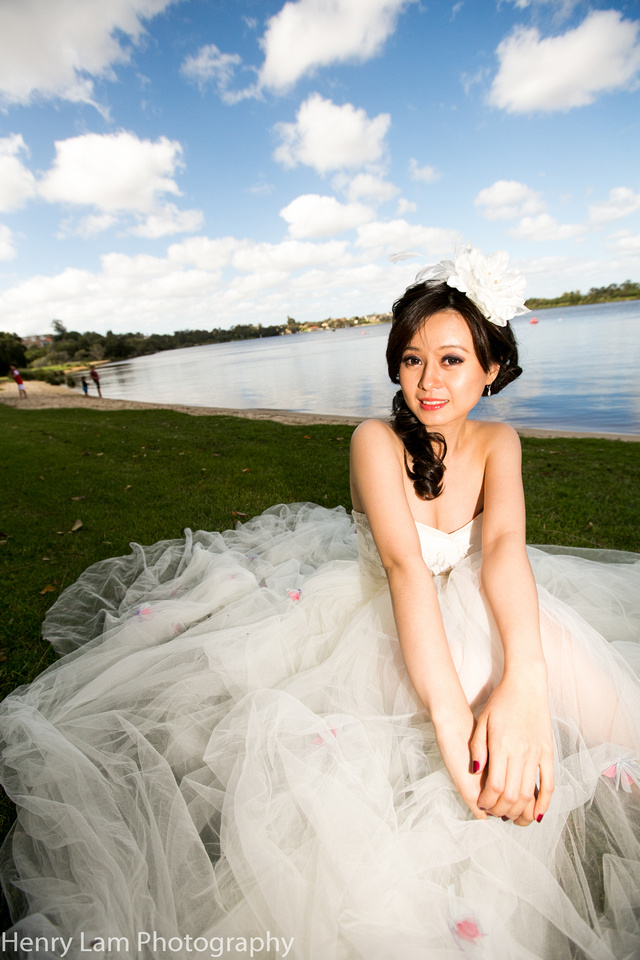
Once we were done with the inside we took the opportunity to photograph outside as well for some extra variety in the photos.
]]>
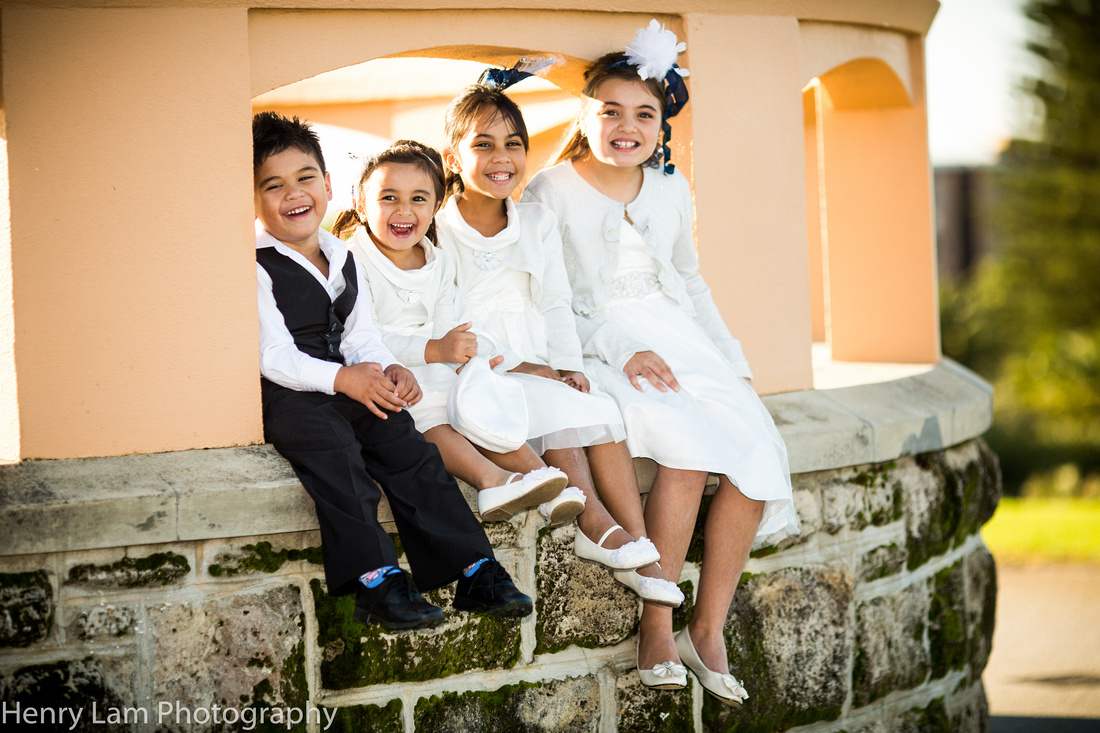
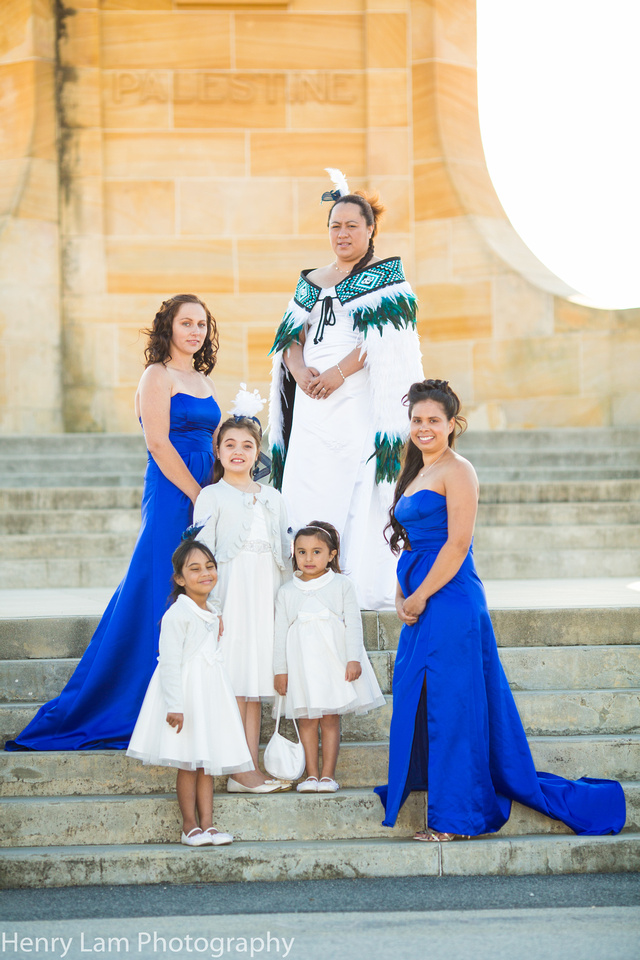
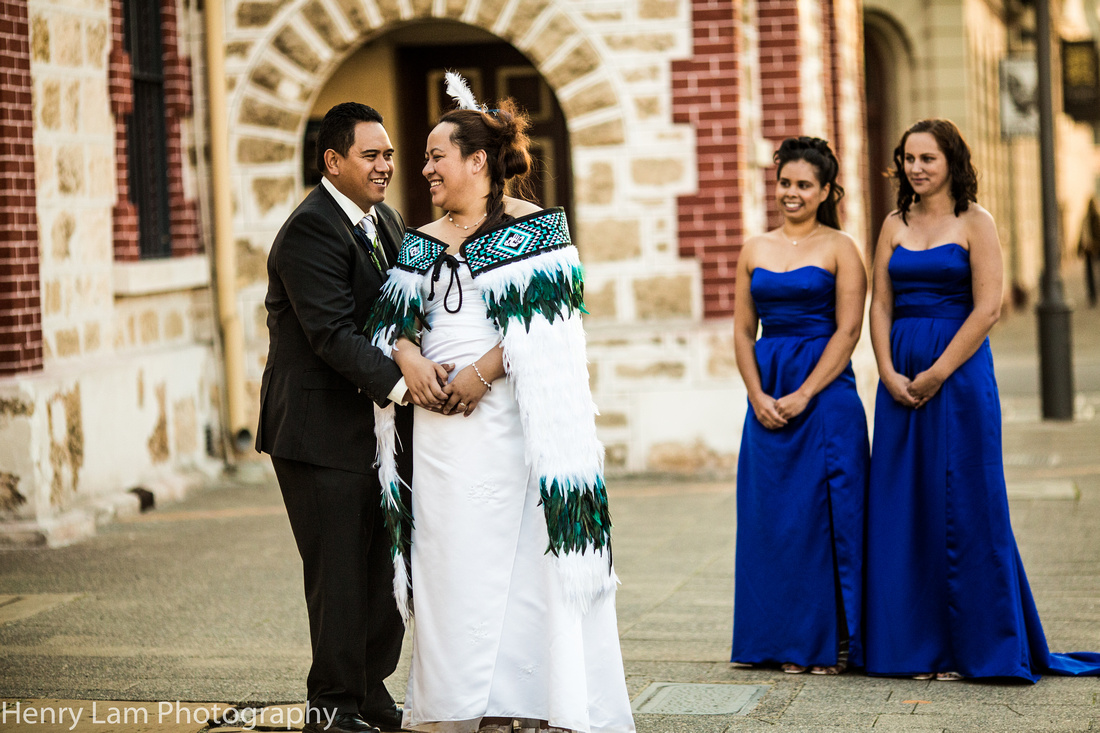
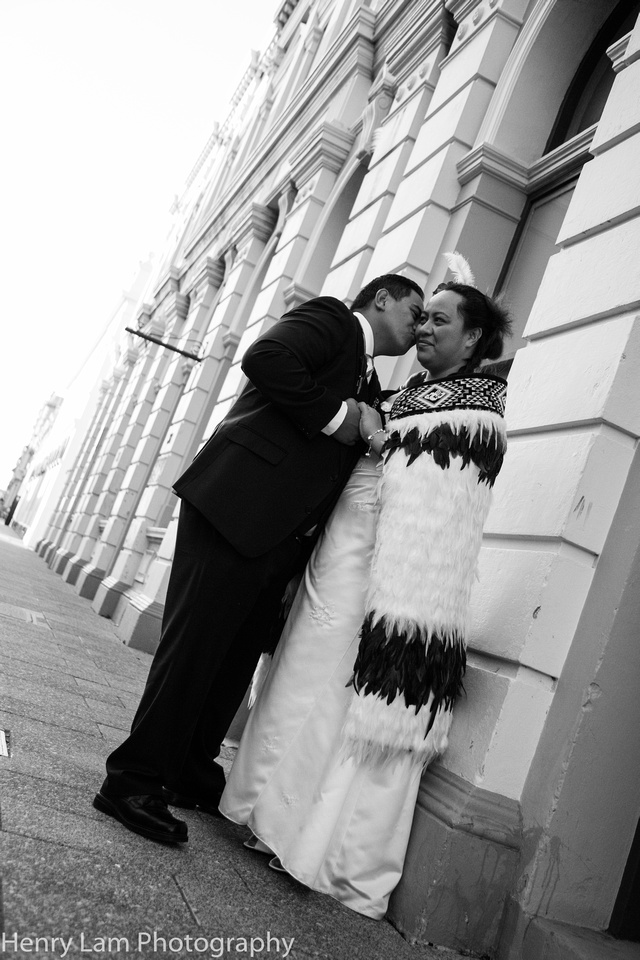
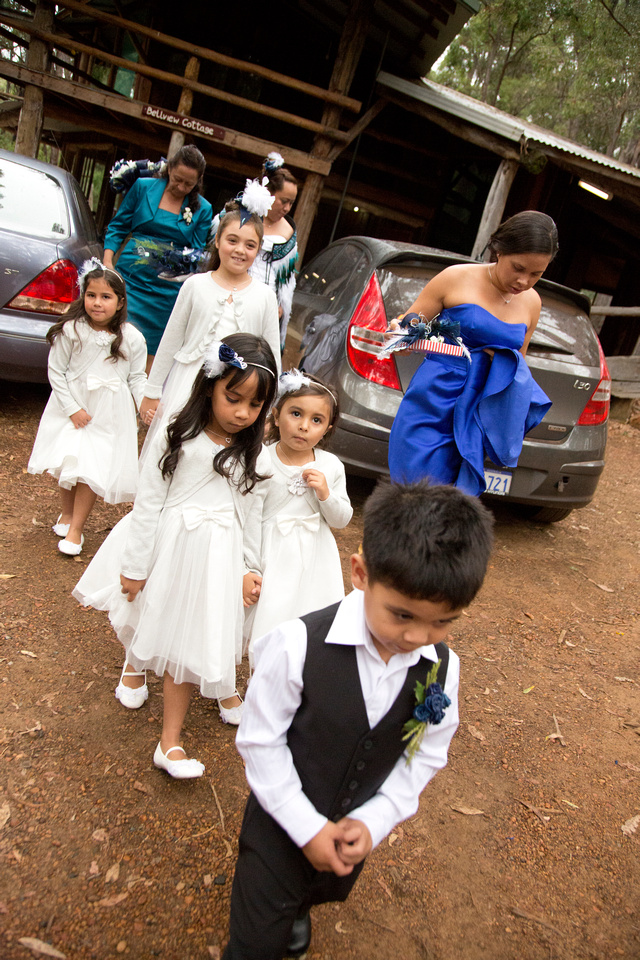
On the long weekend of June 2013, The newly wedded Carroll couple had their formal location shoot. Their wedding day was Earlier on in the year on April 27th in Nanga Bushcamp down in the rural country side of Western Australia. The wedding day was quite hectic with a tight schedule and not much time for formal pictures thus the wedding party and I agreed to take the formal pictures at a later date, That way it allowed for less stress to get all the images in 1 day, and allowed Anthony and Renee spend more time with their family, friends and loved ones.
The day was quite interesting, starting off with Anthony kindly hiring a 11 seater bus and taking the entire crew around the Perth area for pictures. The weather for the day wasn't too bad, the sun was darting in between cloud cover and blue skies and the shoot started around 2pm.
The first location we arrived to was a memorial area on a hill just outside of Fremantle. It provided a nice open area and a structure that provided some interest in the pictures. Following that location we moved into the quiet streets of Fremantle and finally finishing off near a shoreline back towards Perth.
Here are some images taken from that day.
]]>
As the much anticipated photo album and video comes to its final draft processes.
I was so excited today to watch a short footage of the video, and it almost brought a tear to my own eyes. The team from Rah Studios have really worked tirelessly on the production of the video. Great job. I can't wait for the final touches to be in place, and finally, the passing over to Anthony and Renee.
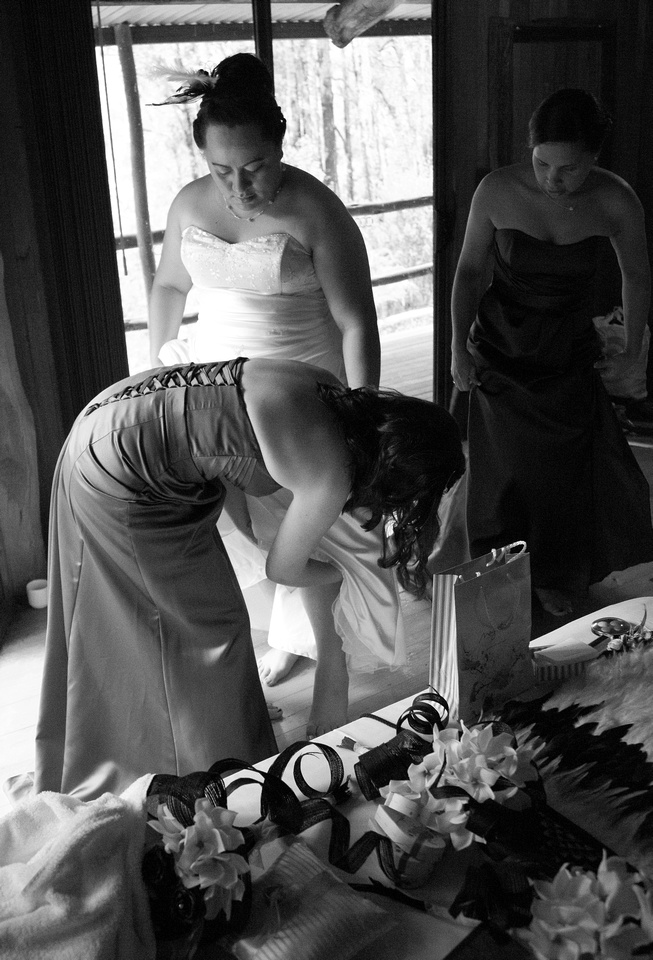
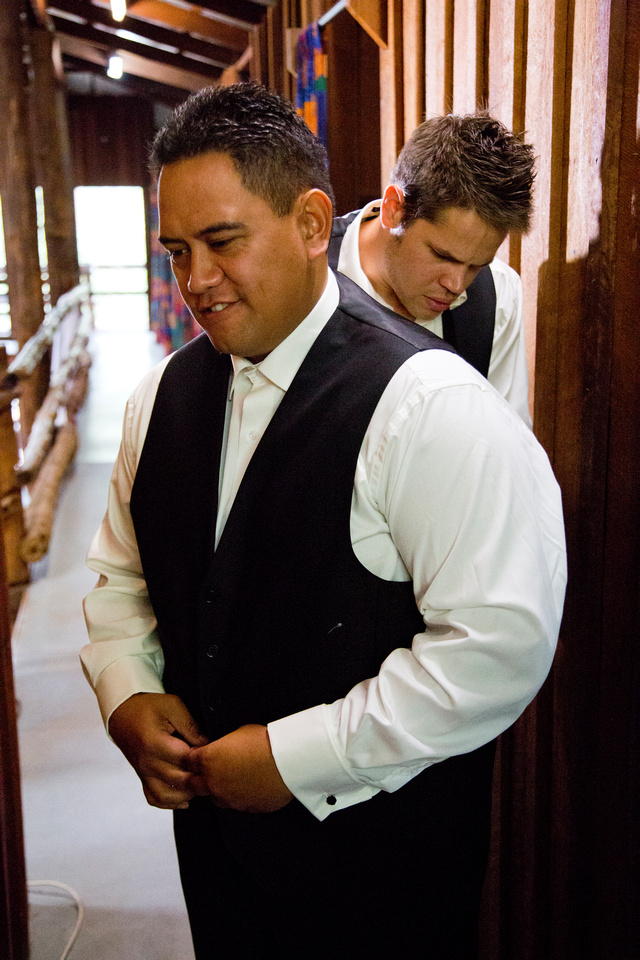
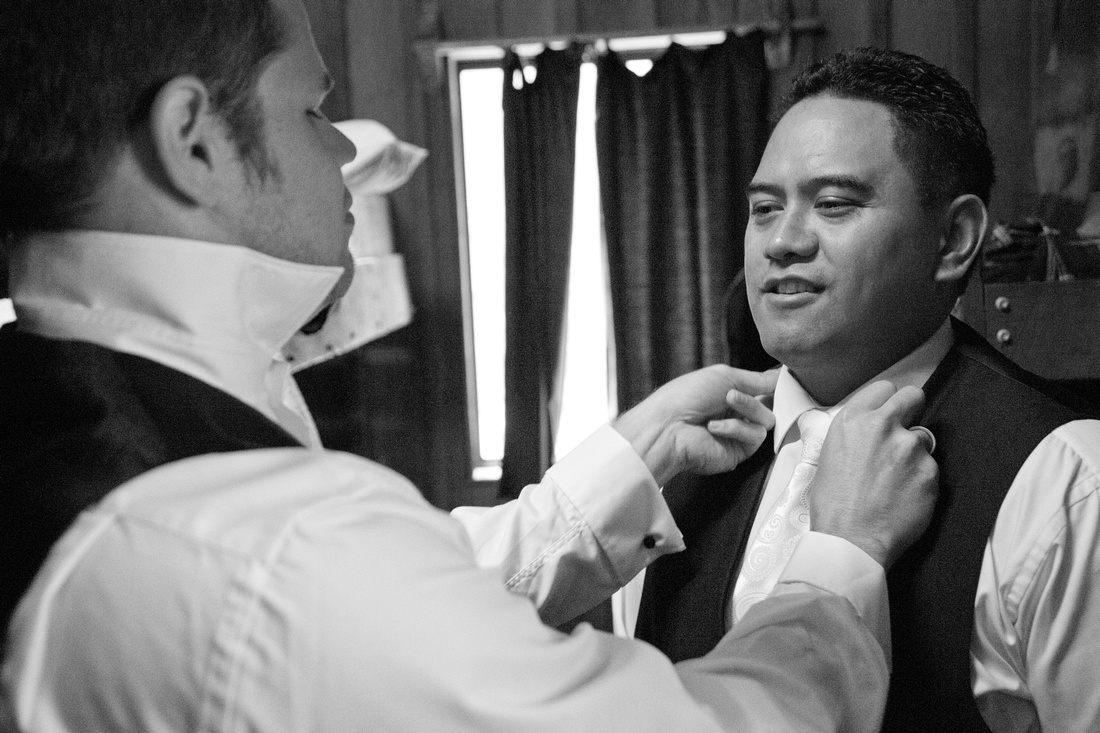
Whilst I spend my cold nights putting the final pieces to the album, I would like to share for the meantime some of the photo I have taken during their wedding ceremony. Please enjoy.
Till next time, warmest love from your photographer, Henry Lam
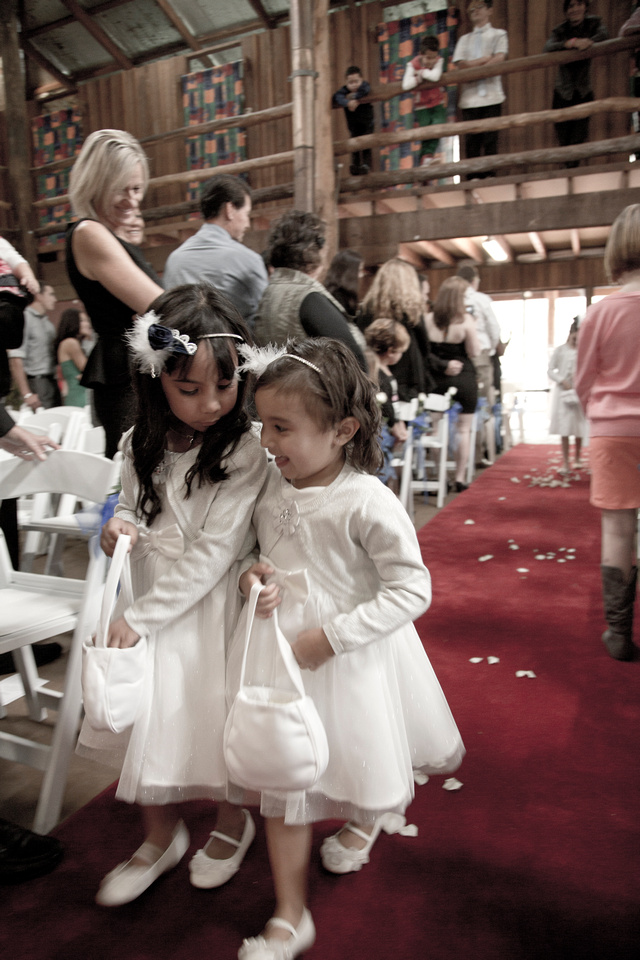
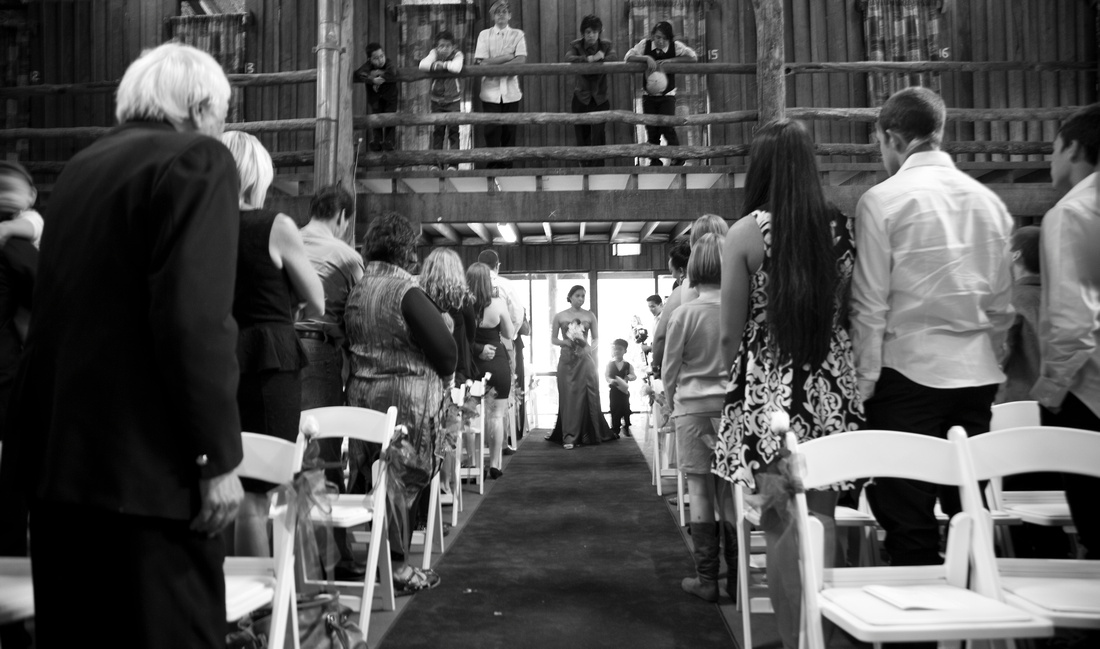


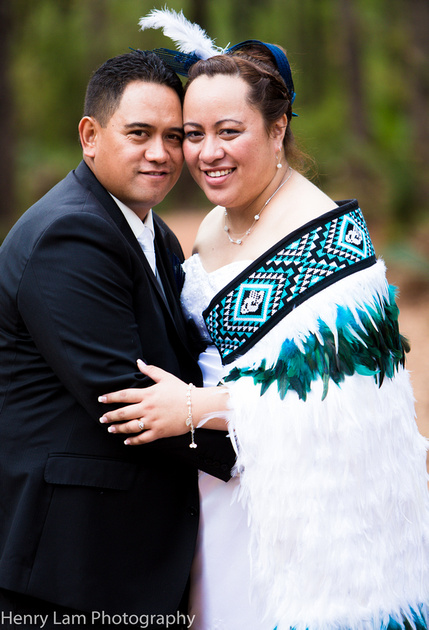
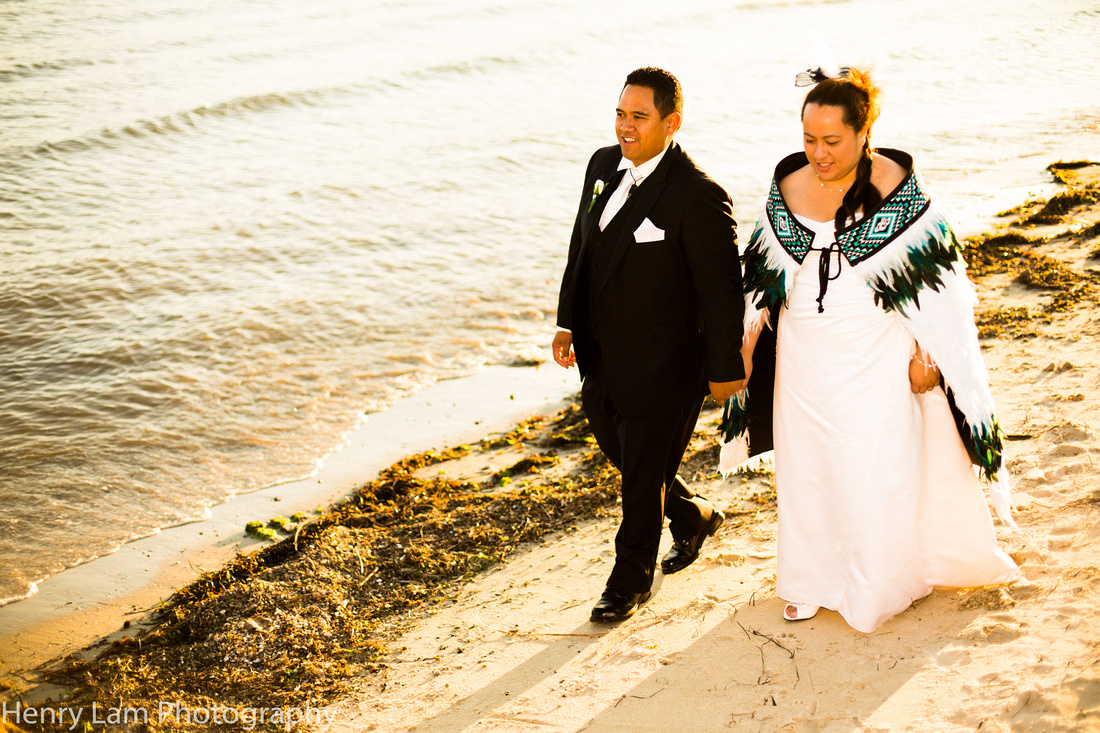
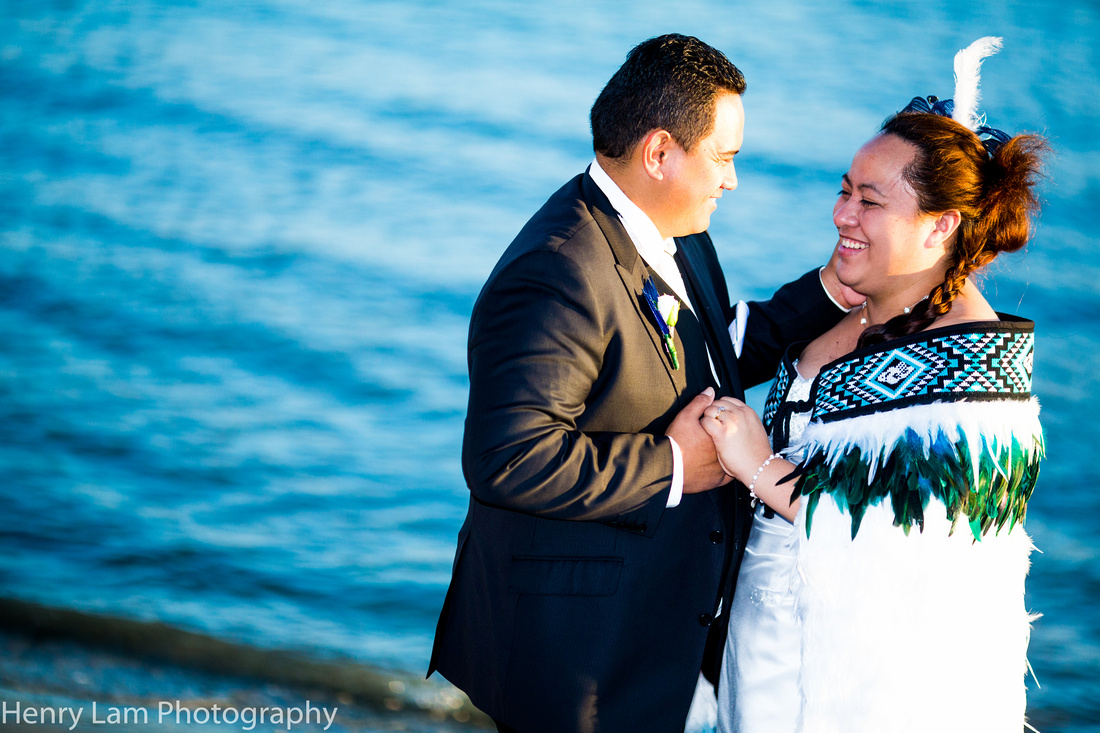
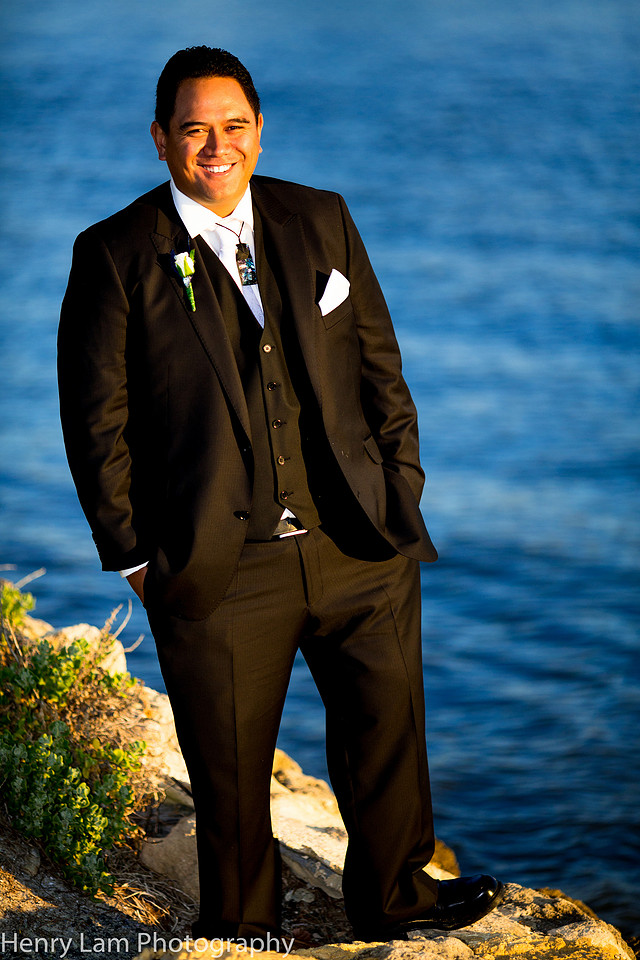
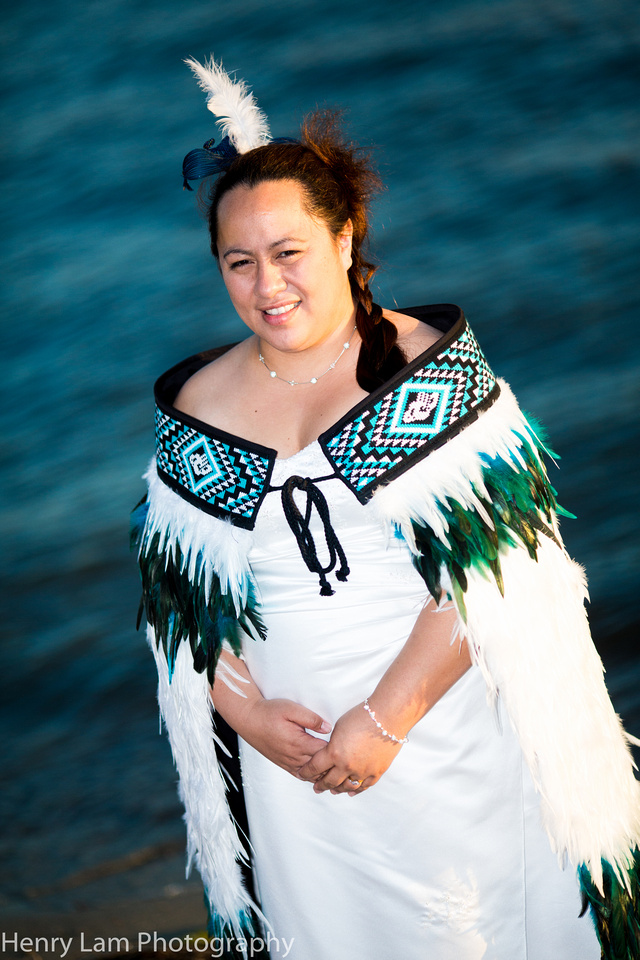
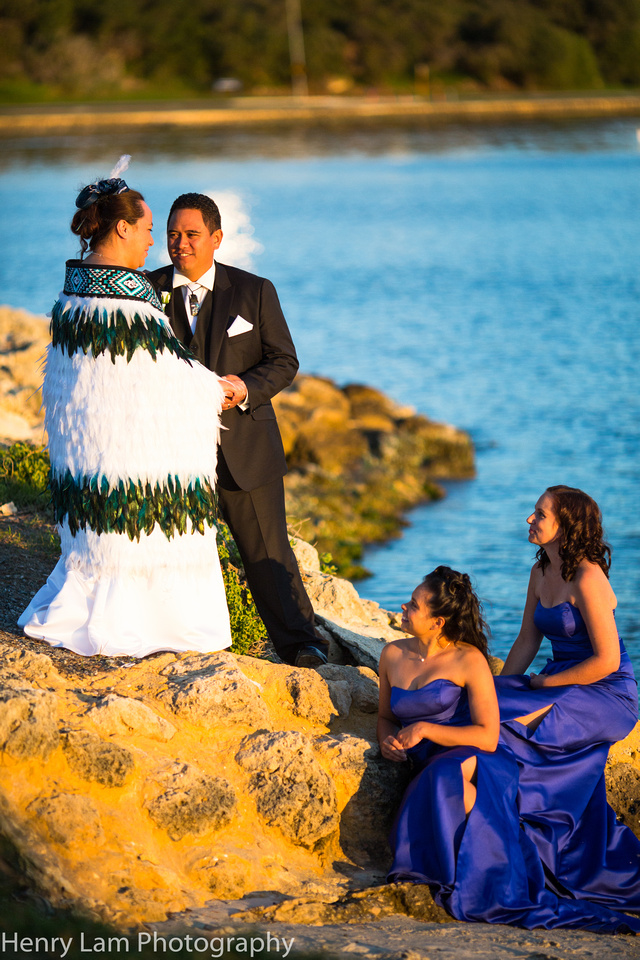
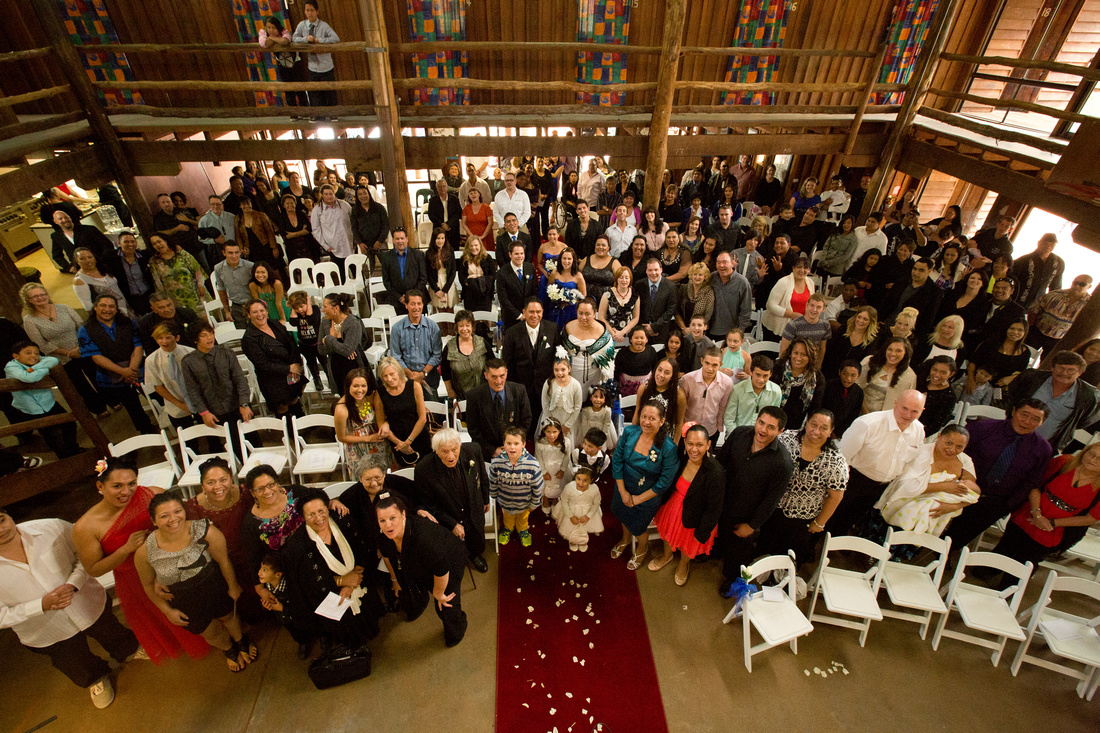
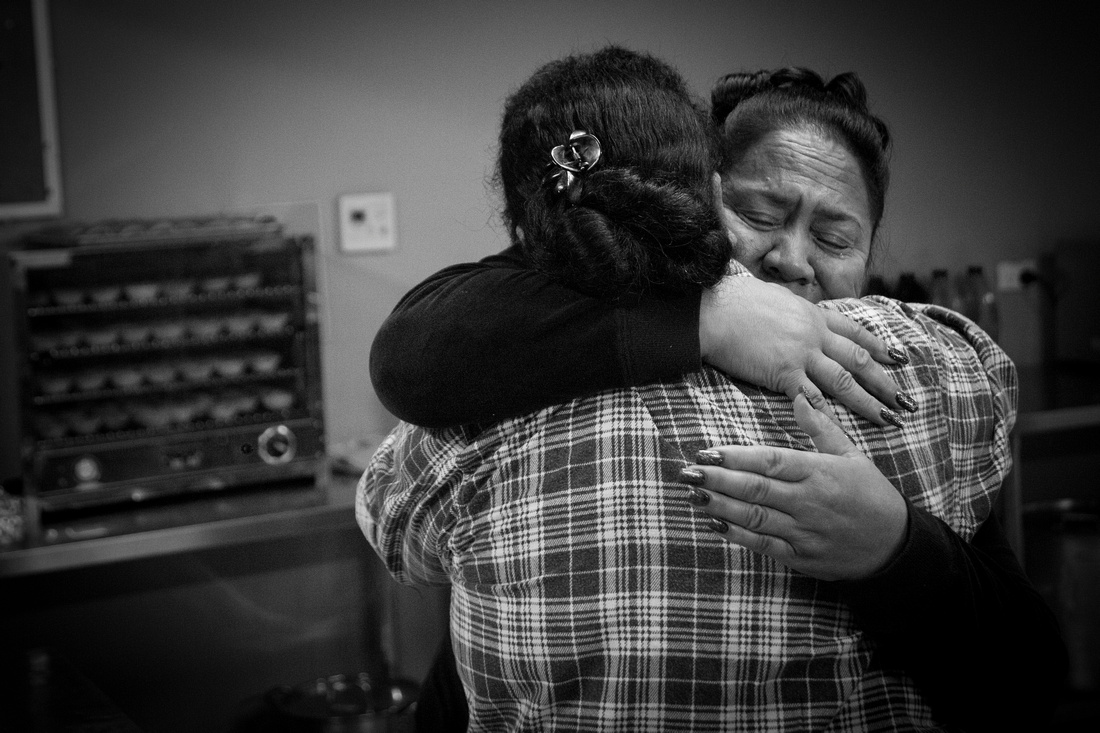
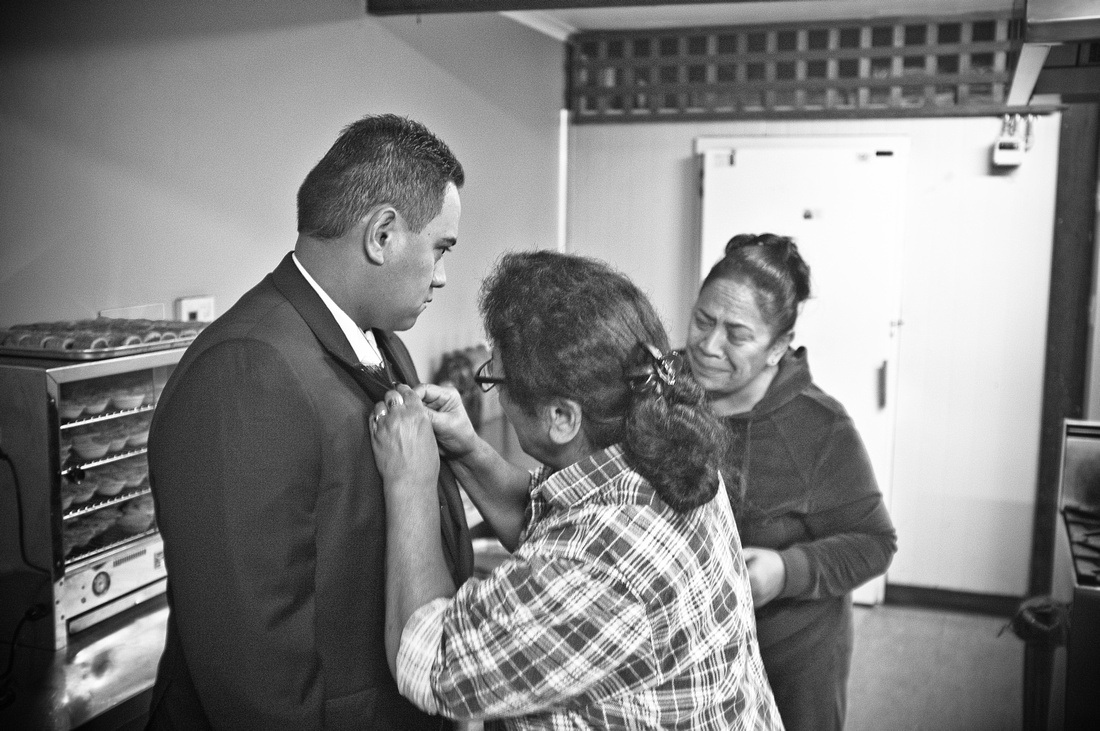
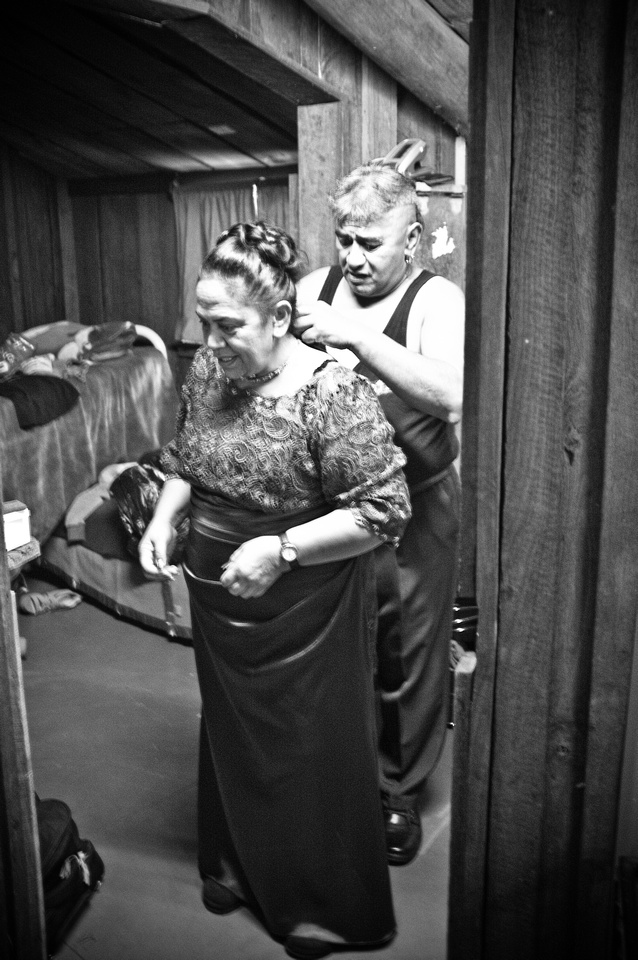
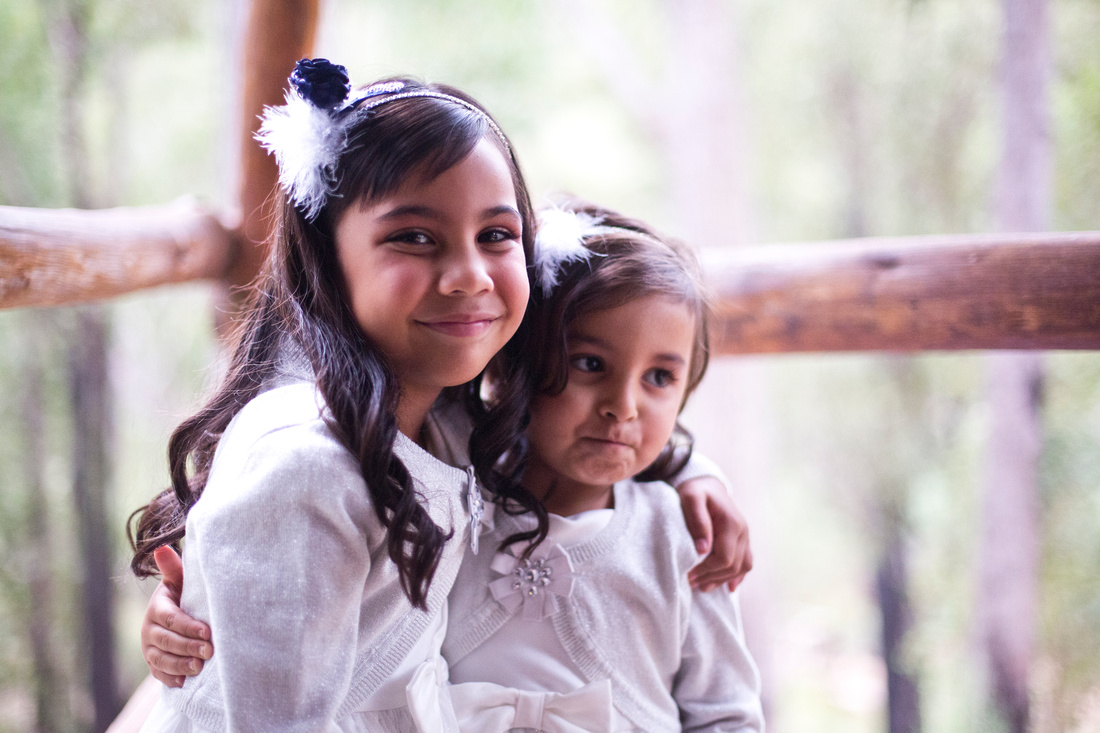
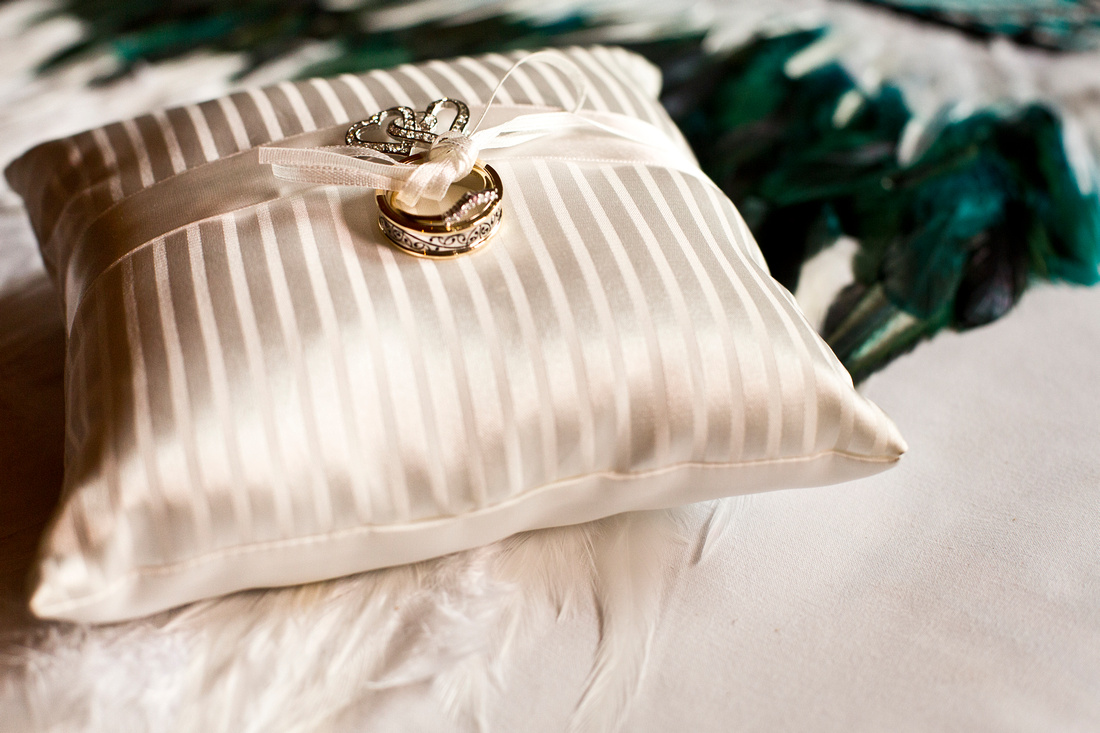
Saturday April 27th 2013 marked the special day for both Anthony and Renee Carroll. Nanga Bushcamp was enchanted with the joy and love for the lovely couple as they celebrated their traditional wedding in the heart of Western Australia's bush land in Dwellingup. Over 100's of close guests and friend's travelled to the quiet area to witness their special day.
A big special thanks to my team of Alain and Darren Quah (Rah Studios) who were the gurus of video capture, Khaterine Darmawi (Power of Makeup) on hairstyling and good friend William Tao, as my photo assistant for the day. The products that we came out with could not have happened without all your talent.
Below is just a handful of some of the highlights captured during the day. Many more action and emotion packed images will come during the following days, and a good likihood of another exciting and fun shoot of the lovely couple in Perth with the bridal and groom party
Please enjoy the images I have to show, the next blog which will be in the next few days will showcase from the wedding ceremony.
Warmest regard
Henry Lam
Photographer.


 Coming soon, images from the ceremony.
In less than one week, the small country town of Dwellingup will host the most special day of both Anthony and Renee's lives. Their long-awaited wedding day. The set date of Saturday 27th of April is coming ever so close, and everyone is filling up with the emotions of joy, pressure and plenty of excitement. To start of the scene, here are a few photographs taken of the lovely couple about 1 month prior of their wedding date.

]]>
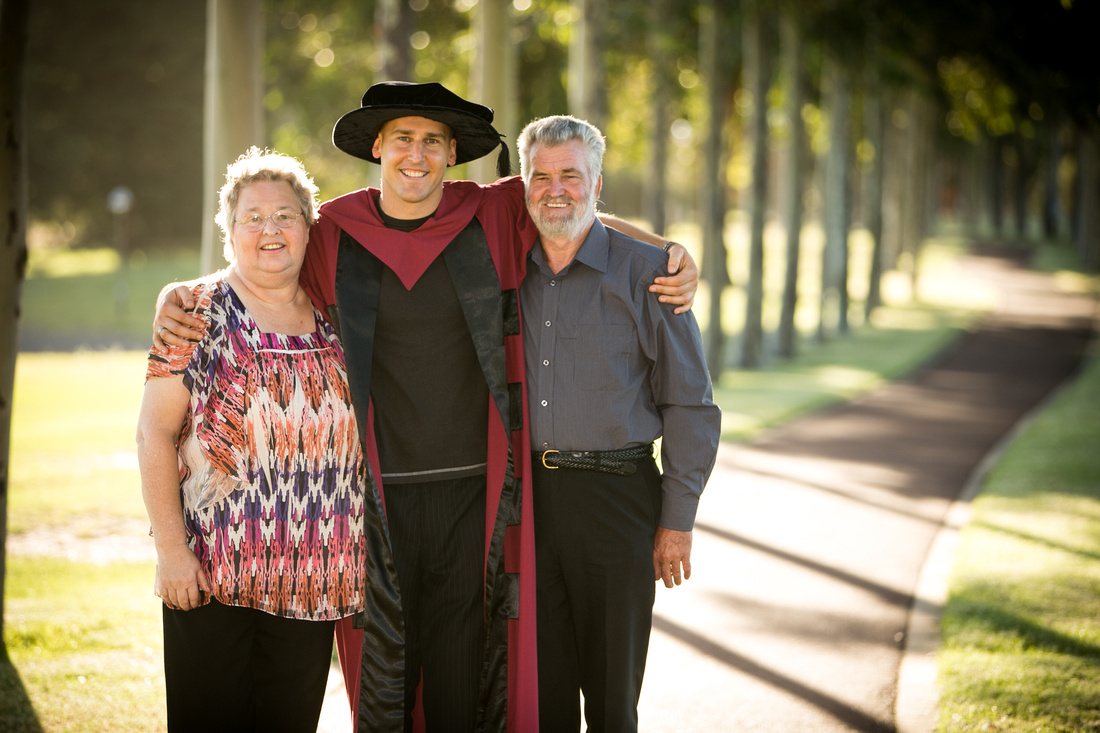
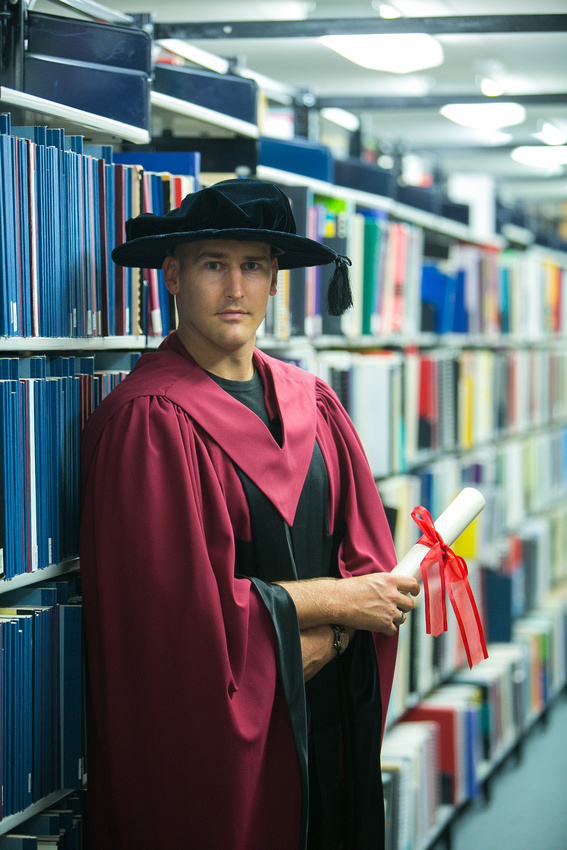
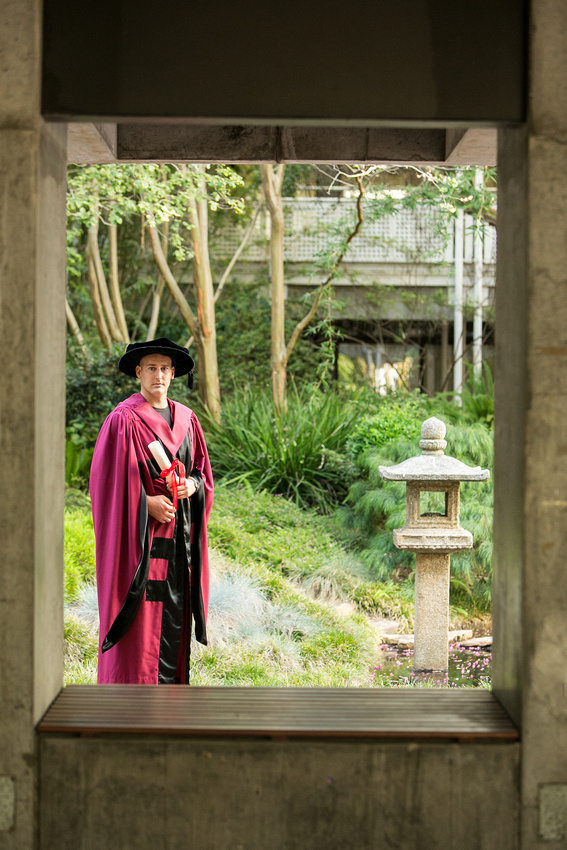
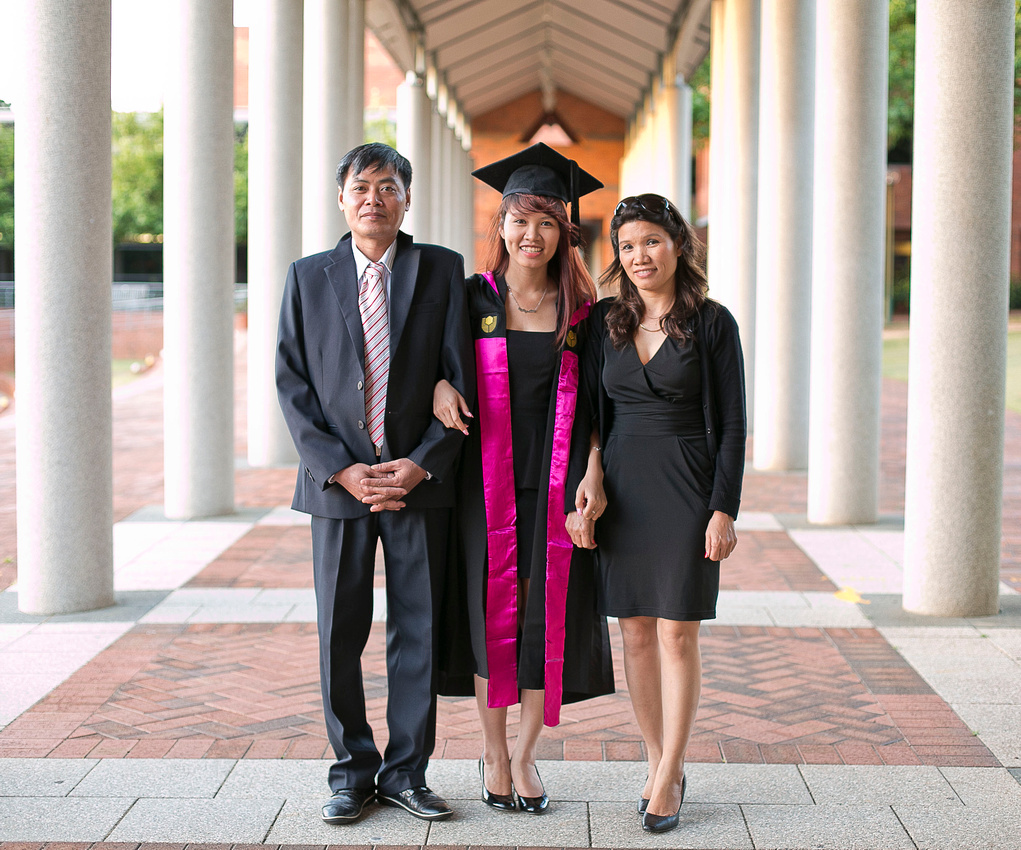
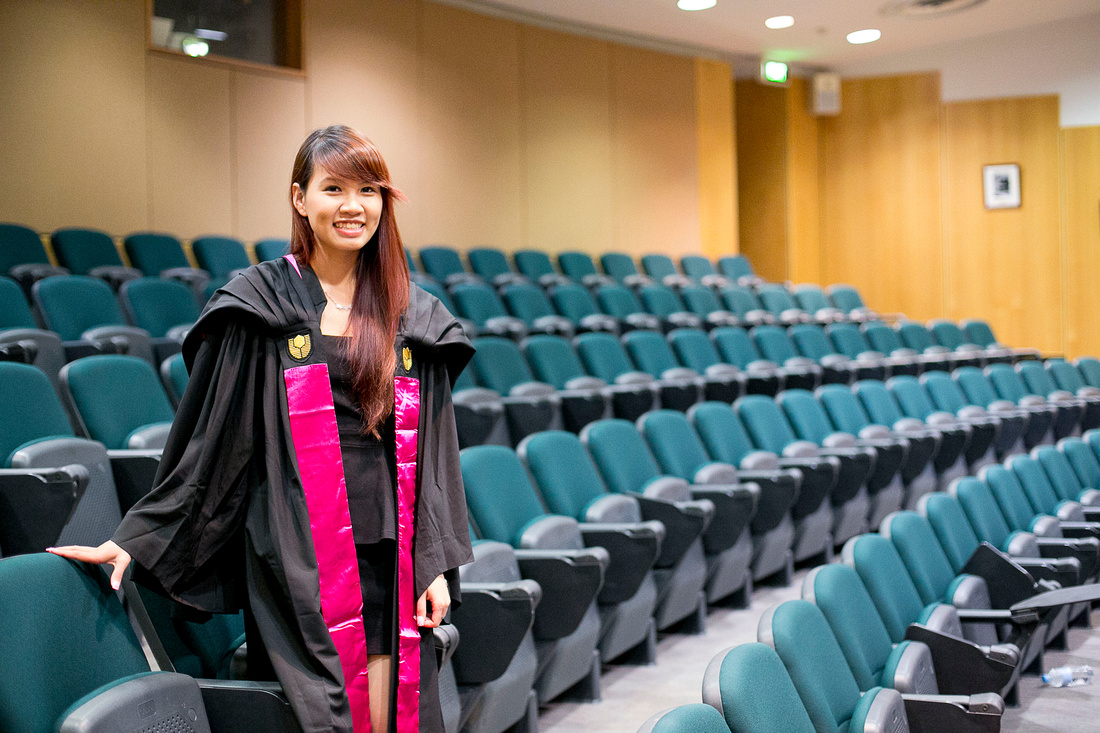
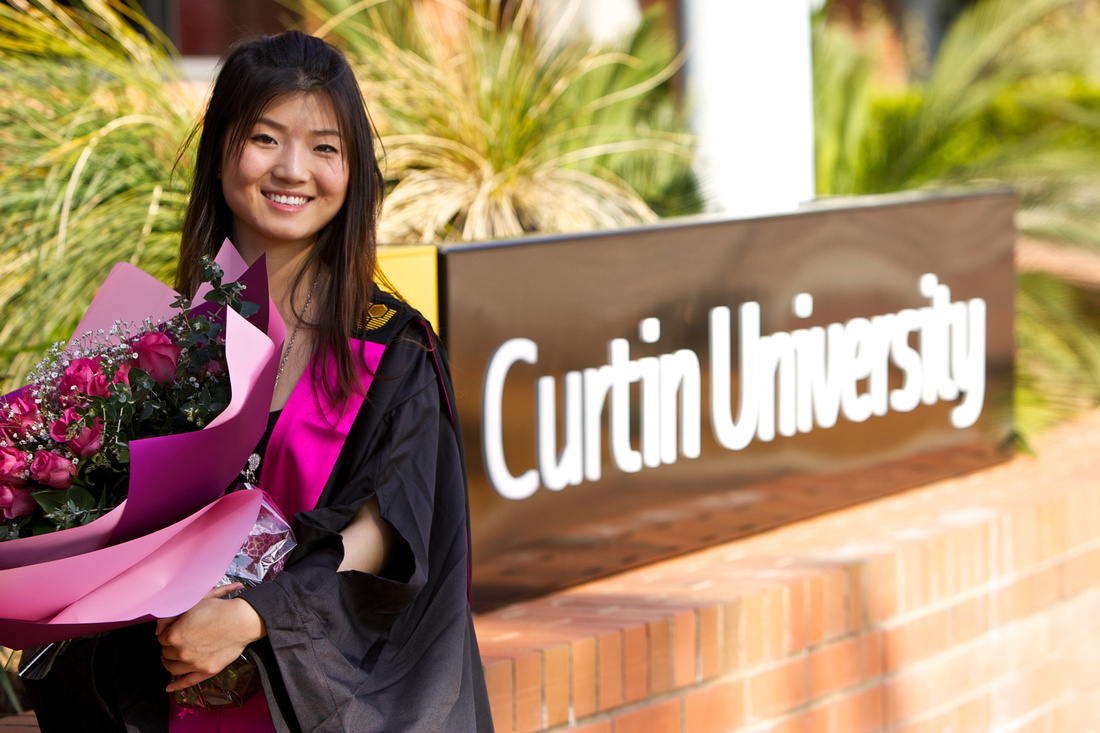
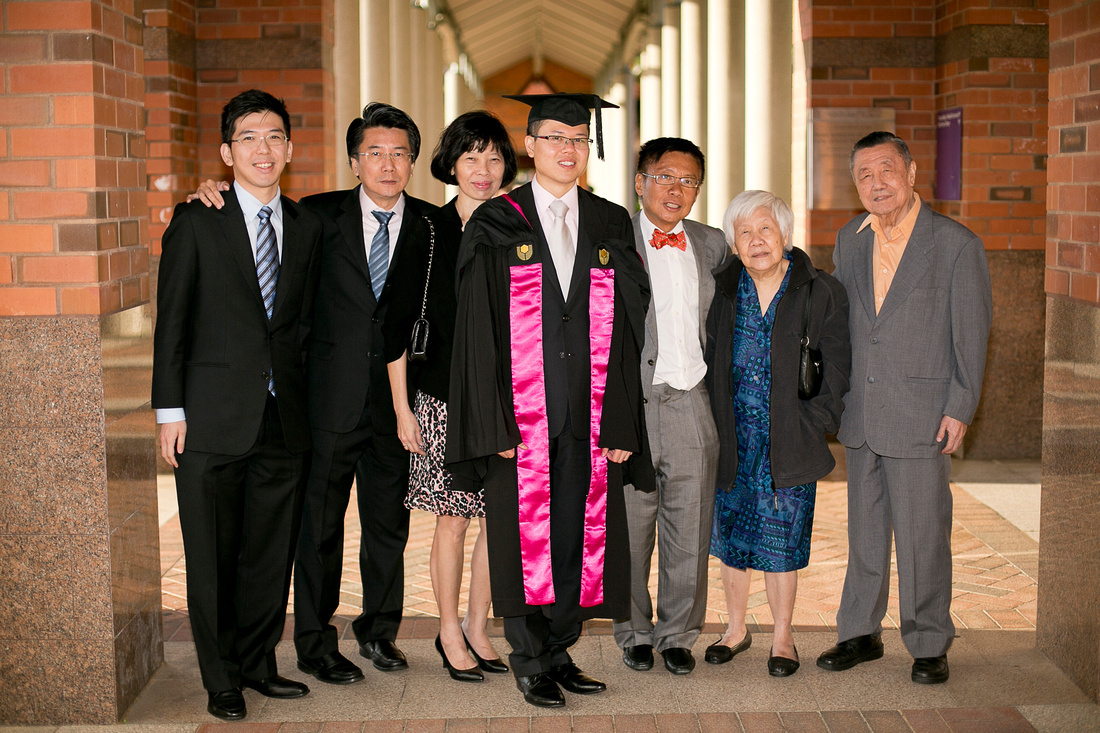
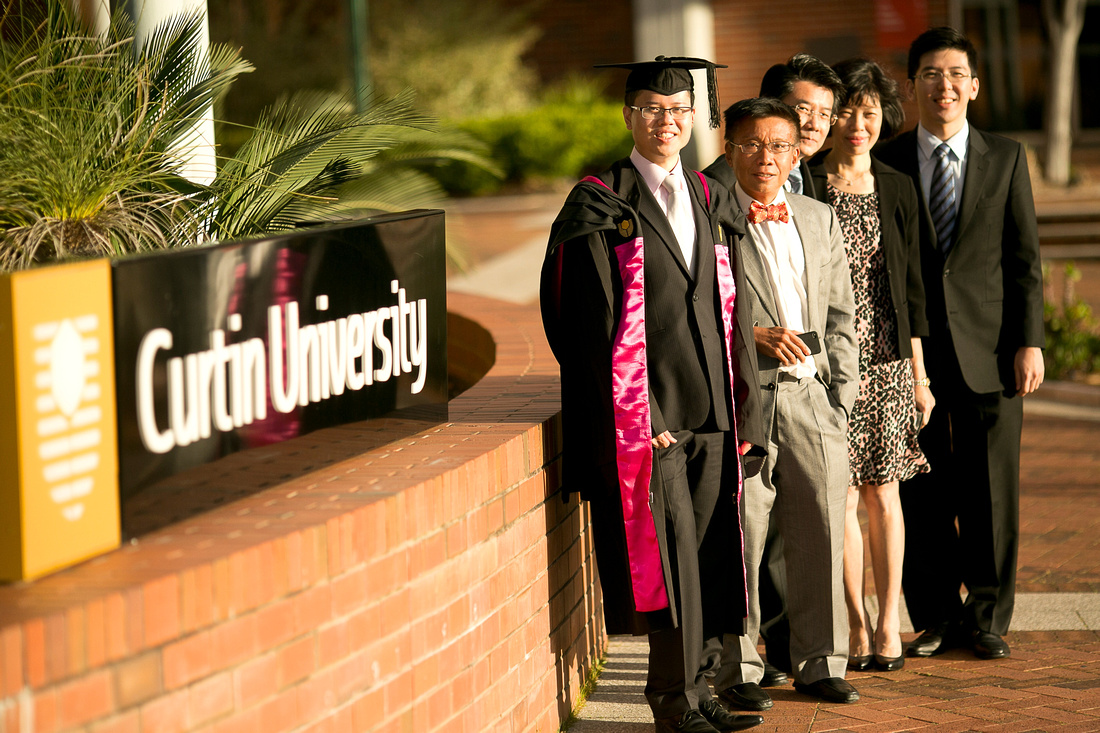
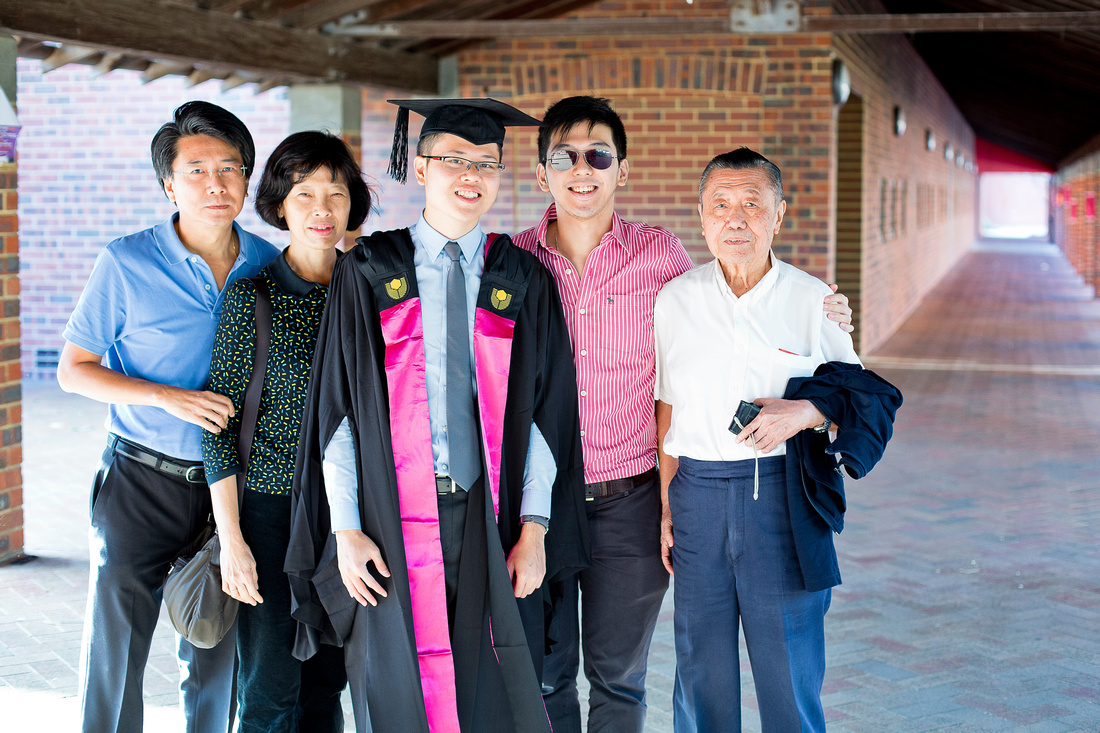
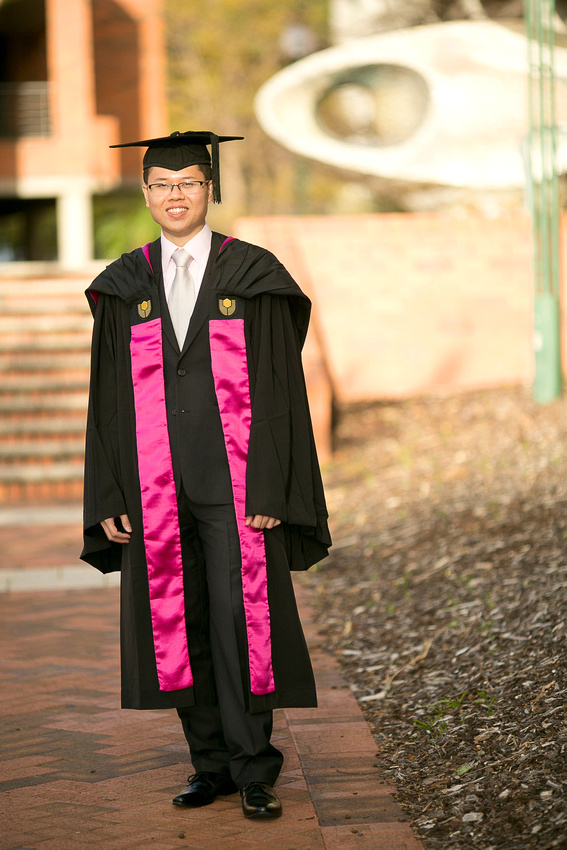
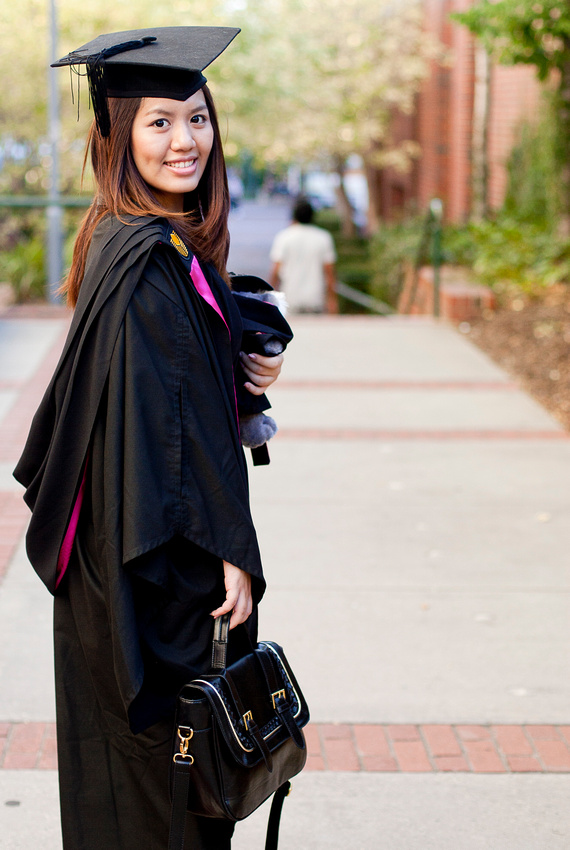
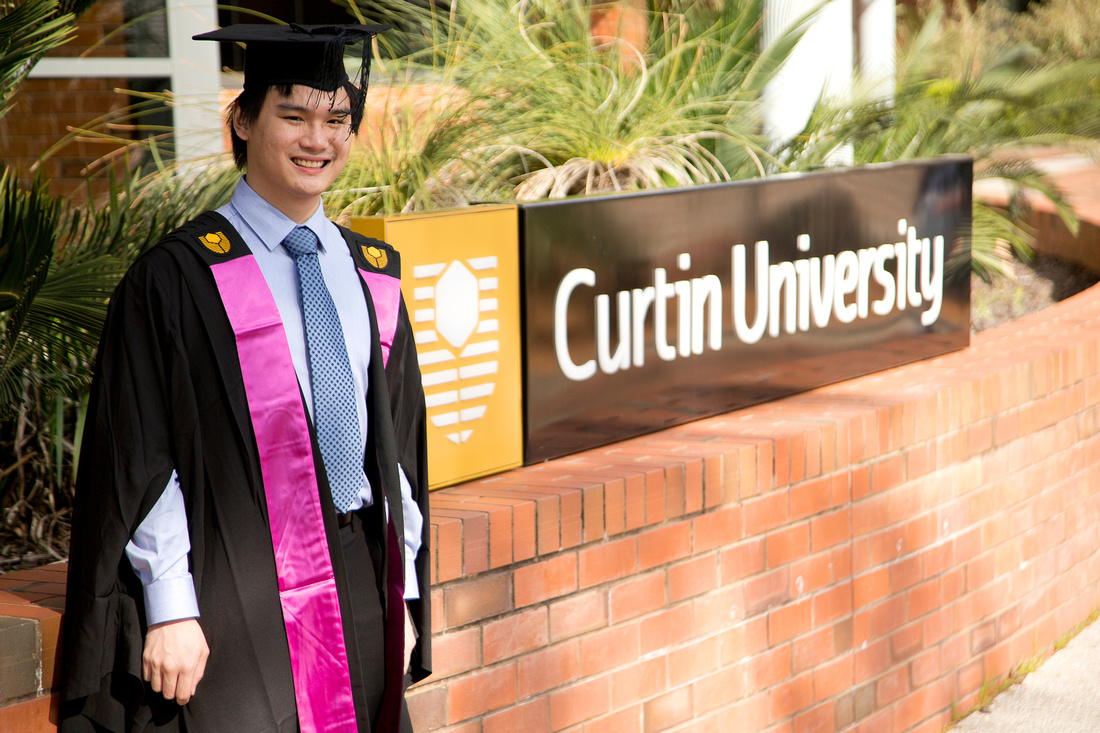
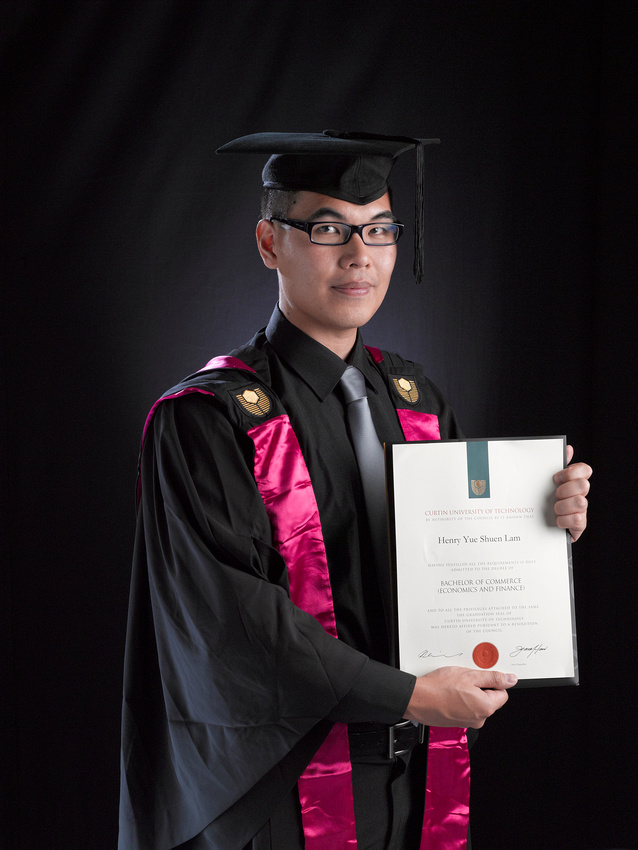
For most, graduating out of university is the end of the person's education life and possibly the foundational step prior to starting their professional life. People spend a good proportion of their lives learning and obtaining the skills they need to be in the career or lifestyle of their dreams. Hence it is always a precious moment in their lives, and is always worth photographing.
Photographing for graduations to me is a combination of portraiture and event style photography. More-so portraiture for me personally. Its all about capturing the student in their regalia gowns, the companionships that were made during the journey, the family support and capturing the institute where they studied.
My tips for photographing graduating portraits:
1) Make sure that the regalia is tidy and is worn properly
2) Carry safety pins to pin down gowns during windy conditions
3) Advise students with long hair to carry a hairbrush because some pictures you may want the motarboard(hat) and some you may not
4) Include images of just the student and their friends and family in every scene
5) Somehow include the name of the institute of where the student is graduating from, if you can not find a suitable sign, use an iconic landmark instead.
6) Make them happy, because they all worked very hard to finish their education.
"A thrombo what?????"
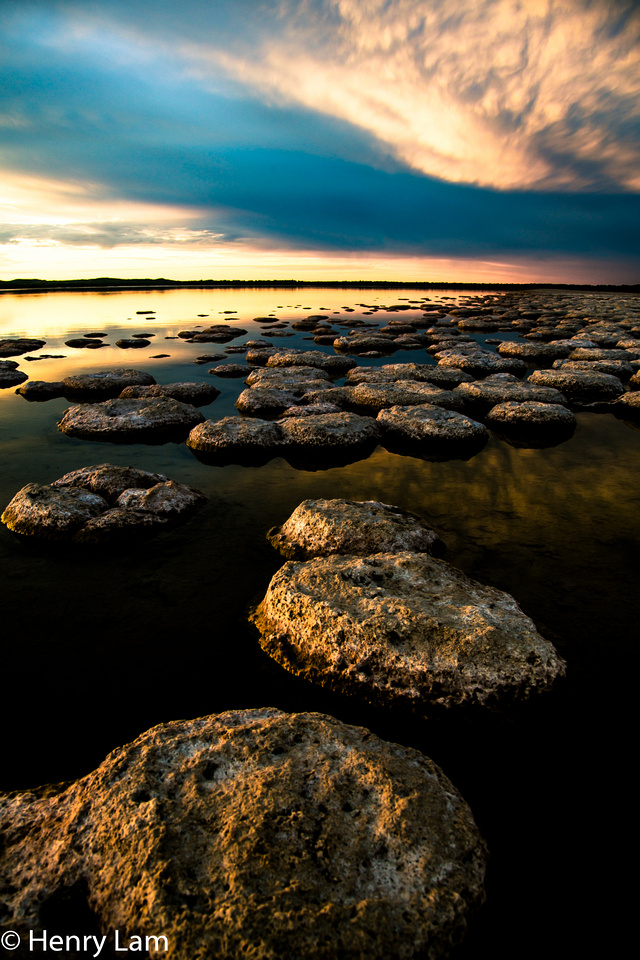
On February 11 my photographic enthusiast/ good friend Alain Quah (Rah Studios) and I embarked on a 1/2 day trip down towards Mandurah (80km south of Perth) to take our cameras for some adventures down south. Mandurah proved to be rather unenlightening during that particular day. The scenery wasn't really appealing and there wasn't much happening in terms of photographic life in the small city. When Alain suggested to go visit the thrombolites in Lake Clifton, I was a bit struck, I've never heard of such a word and didn't have the slightest clue of what it was. At first I thought it was some sort of nature light or something. He asked me to search it up on google and locate where it was on the GPS so we could get there. I was like what the heck is a thromba light??? :S I recall typing in the search bar. "Throma lights," and that obviously came up with nothing.
It was until i auto-corrected the search term and then realised learnt that 'thrombolites' are actually rock-like formations formed by micro organisms. When these micro-organisms are combined with light, process known as photosynthesize, they somehow turn into a limestone, dome like thing. Read more about thrombolites: on this site http://www.lifeonperth.com/thrombolites.htm
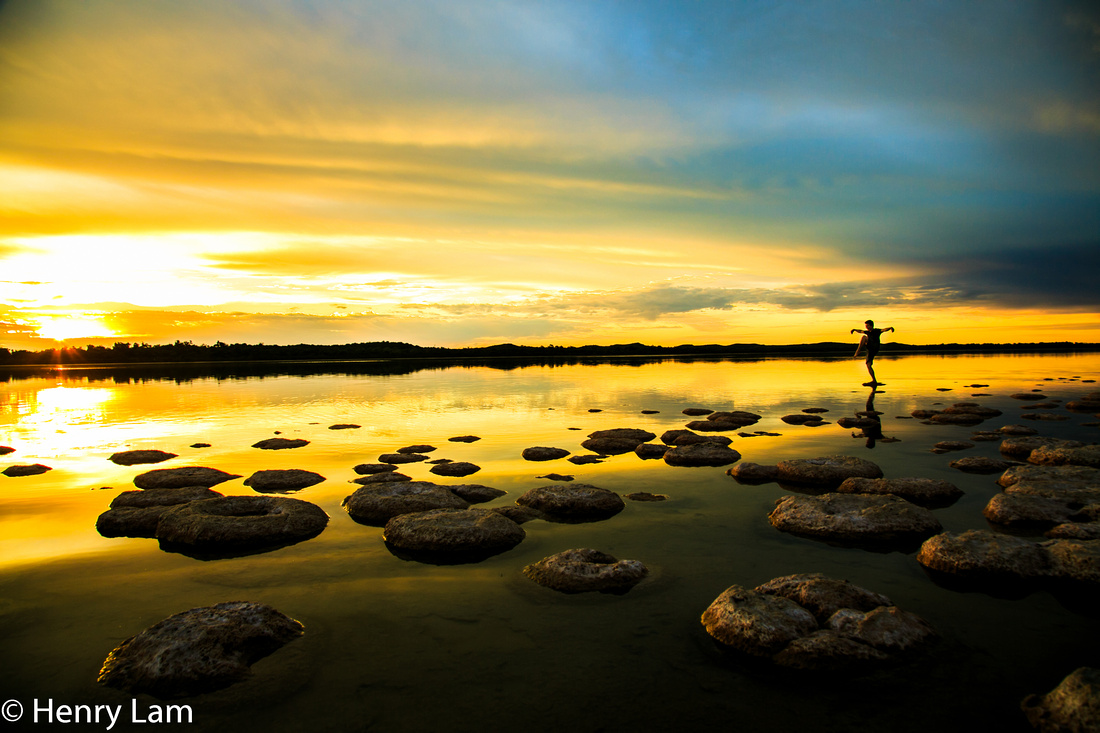
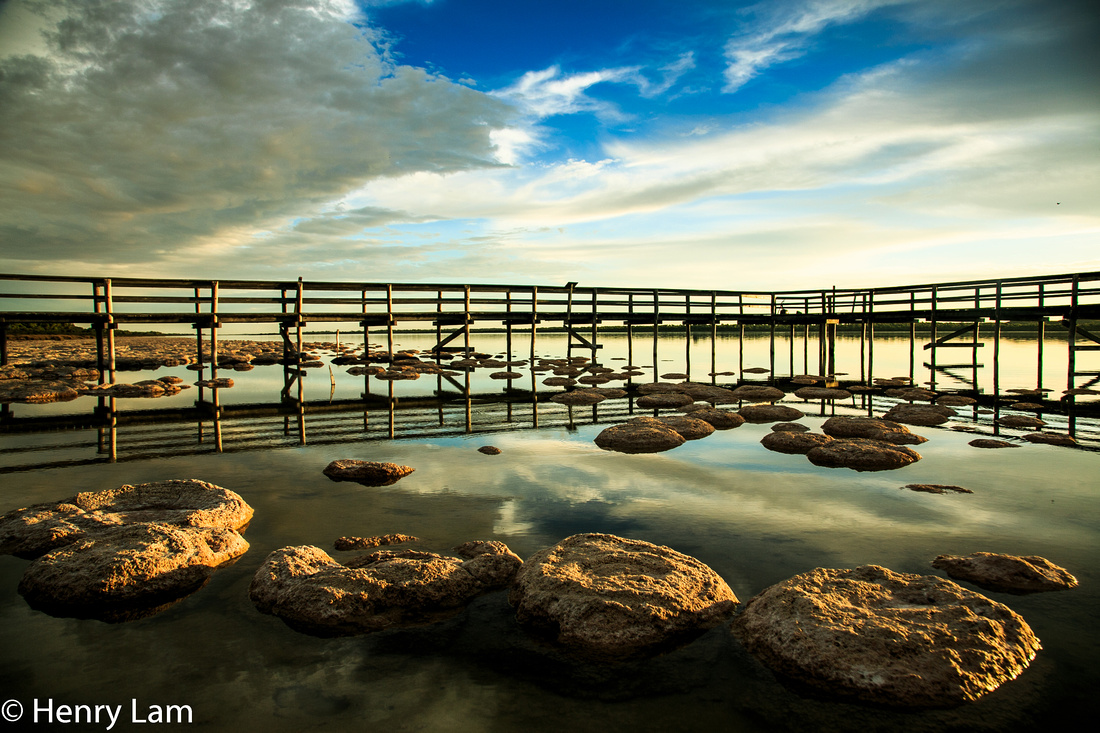
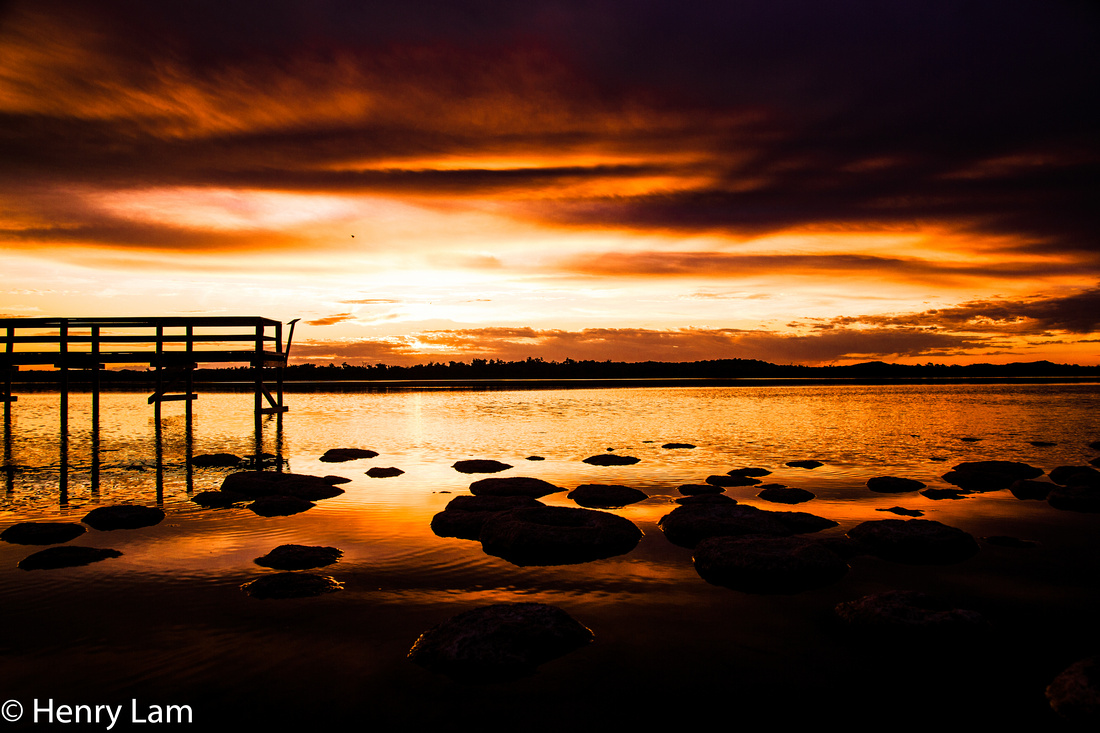
Once when we arrived at Lake Clifton we were greeted with a vast scenic view of the lake an a constructed walk-way for tourists to come visit. The area is actually quite peaceful and tranquil. When we arrived the thrombolites were at their prime. Alain mentioned that if the tide was high, the thrombolites may be submerged under the lake, thus not making much photo fun. That day it we had perfect luck. We had good water levels and a great sky for potentially good sunset.
We both stayed at the lake till around 7:15pm (just after sunset) so that would have been about a good 2 solid hours of shooting rock like features. I took about 135 snaps and only came out with 3 images that I decided to final process. Alain came up with a great idea of next time we'll bring a deck of cards, to amuses us whilst we wait for the summer sun to set.
Anyway to some photographic speak. I used my Canon EOS 5D mark 3 for these images, and only had the Canon 24-105 F4 IS lens attached. I didn't have any filters on the camera and shot all the images in Raw. When I come across a vast scenery of rock-like things on the ground. I automatically know that the camera point of view is going to be low. That's right get the camera down nice and low, and that requires me twisting my back, getting a sore bum and maybe get my feet wet. I didn't use my tripod for these images because that would have restricted the height. I think its really important that the camera gets the closest to the perspective of the thrombolites as possible. Even if the camera was a few inches higher than optimal, the whole picture's perspective changes. The subjects (Thrombolites in this case) would lose its impact.
I shot all the images on ISO 200 and using F8 on the lens. F8 gives me optimal image quality from the lens and good solid depth in the image. I mainly used exposure compensation on the camera to dial it up or down, depending if I wanted the image to be brighter or darker. having a brighter images would ensure that all the detail of the thrombolite would be captured in the photograph. By having a lower exposure compensation, would ensure that I have good drama in the sky and not blow out the setting sun. Conventional rules would tell you to have the camera fixed onto a tripod. I didn't chose to use my tripod in this instance for several reasons. 1:the ground wasn't very stable and most of it was wet with salt water, so stability and cleanliness was an issue 2: restricts camera movement and compositional adjustments and the most important factor 3: I'm Lazy. Alain was good, he used his tripod :)
When it comes to processing the image, I went for a dramatic look. I will admit that I did boost the colours of the sunset in order to enhance the image, although these colours do look glorifying, it wasn't really that dramatic in real life. However the challenge with processing images in my opinion is to enhance your images yet still preserving a sense of realism in the image. Finding that balance is always a challenge. I like cranking out the warm colours in sunsets by moving the white-balance to a warmer setting. If you shoot in Jpeg mode, perhaps you can force your white balance to be one of the warmer presets, such as cloudy or shade. This would make the reds in the scene really stand out. However you should experiment with the cooler tones as well, just to do something slightly different.
]]>
This is a useful blog for anyone who is thinking of travelling to Bali for the first time, The topics that will be discussed are as followed:
1: Visa
2: Changing money to IDR
3: Changing money in Kuta
4: Taxi
5: Avoid street food
6: Drink Bottled water
7: Where to stay
8: Personal Driver
1: VISA
If you are travelling from Australia, be aware that VISA is required for entering and exiting Bali (2012). The visa cost me US$30 to enter and US$30 to exit Bali. The VISA can be purchased as you pass through Immigration at the airport. They have currency converters there so you need not have to worry about exchanging your money prior to entering Bali
2: Changing money to IDR at the Airport?
Every time I enter a foreign country, money exchange is always a big thing for me. I always want to know the most efficient and safest way to exchange my currency.
You will not be short of money changers in Bali. Just after you have collected your luggage you will be greated with a HALLWAY lined up with money Changers. I didn't count them, but I think there was about 30 stores adjacent to one another. I guarantee that you will not miss it. There will be traders shouting, calling, trying to pull you into to change your money. It can be a little bit of a culture shock if you are not prepared for it. I'd be weary changing large sums of cash with these exchanges, because the airport can be crowded with people. At the time I did change about AU$200 at first. Now coming to think about it, that was EXCESSIVE. If I had known, I would have only exchanged about AU$50. Just enough to comfortably get me on a taxi to my hotel in Kuta. The Taxi ride to KUTA was about AU$10 and the time can vary from 15 minutes to 45 minutes depending on the traffic. The rates are better outside of the airport.
3: Money Changing in Kuta
There are many money changers in Kuta. I was told from friendly local tour guides that there are good places and not so good places. The good places are the banks, and the money changers with a dedicated shop front or 'building.' below is a photograph of a 'GOOD' money changer.
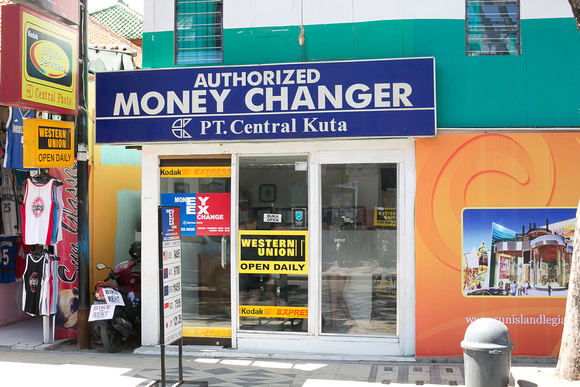
This exchange in somewhere near the middle of Jalan Legian (Main street of KUTA). You see what I mean by having a store front. This is a dedicated money exchange shop, it has a main door and its sole business is to exchange foreign currency. They will have monitors in the store and you can see them exchange the money, SLOWLY. By having a door behind you it also makes me as a traveller feel more safe with putting my money away.
Now for the not so good money exchangers. I'll refer them to 'RISKY' exchangers and should be AVOIDED. First take a look at the images below.
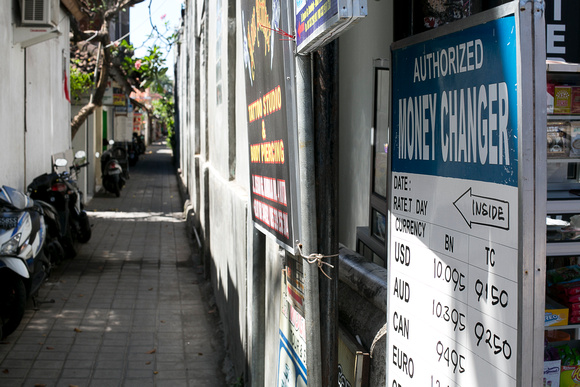
You will be walking along the path and you will come across a whiteboard displaying the rates. You should be aware that when they write it on the whiteboard it isn't as official as one that is being updated by an authorised exchanged-monitor. Also, don't let the fact that when they display "Authorised Money Changer" as an assurance that it is genuine, All money changers say that.....
They often have their shops hidden away from the main streets. Their shops will be about 20 meters from the main road. The 2nd image above is obviously taken during broad daylight... You can image it to be worse later in the dark. This alone should send warning signals to you.
Local tour guides have told me stories about how these traders trick the naive traveller. You will notice the rates on the whiteboard to be very attractive. (Much better rates than the official changers) they do this to lure the traveller towards their shop, Making them walk the extra distance.
They will calculate the money with their intended rate, and they may even use 'real money' in exchange. However, these sneaky traders are often crafty with their sleight of hand, they are often quick to sift through the money and can sometimes undercut you for the amount they give. They may calculate say $100 worth of money, but really their fingers slide the money away whilst counting, and can leave you with only about $80 worth of money. (You've been cheated for $20). I wonder sometimes, why they have to be in such a hurry to count and sift through the money, they do literally have ALL DAY with nothing else to do.
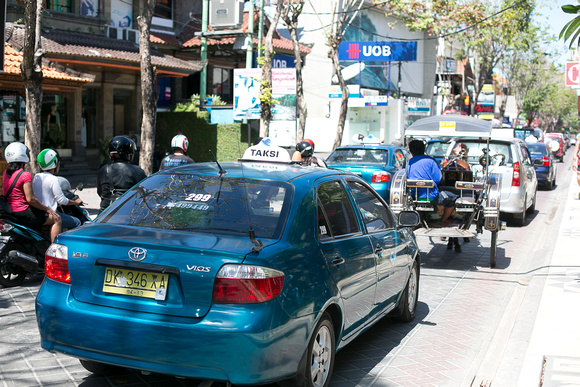
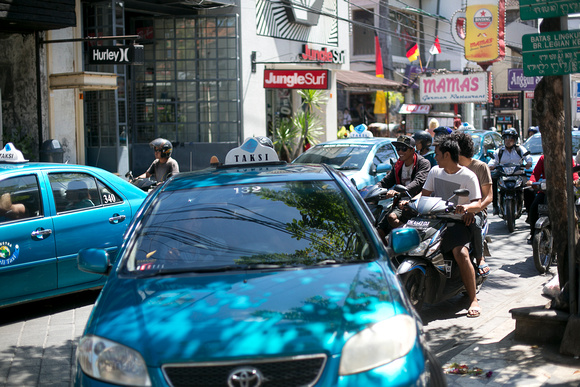
4: How to select a TAXI
There are many types of taxis in Bali, and they all look very much the same. The good ones are those with a meter installed that is clearly visible to the passenger. There are taxis there that have tiny meters that are probably fake and do not function properly. The reliable company of taxi is known as "BLUE BIRD TAXI' they can be recognised from their labels displayed on the front windscreen.
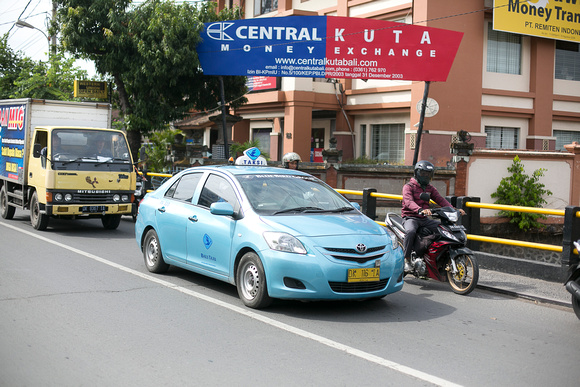
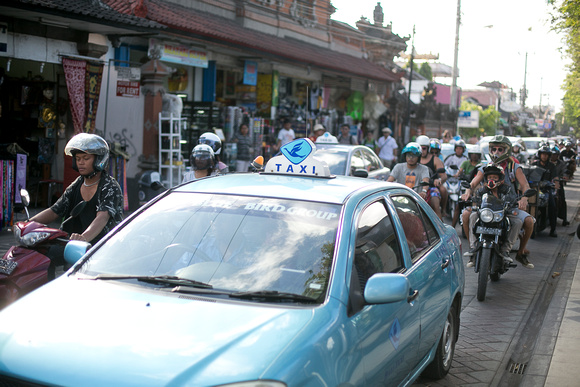
Be mindful that the other taxis look very similar they even have the same blue bird logo on their taxi signs and the cars are of similar colour, below is an example of a non-blue bird taxi. Notice the similarities. I'm not saying to Avoid these taxis altogether. I'm just letting you know that you have to negotiate at price for their service. Sometimes you can be overpriced. If you know where you are going, and know how much the cost should be, and you get a similar price. Then its all good.
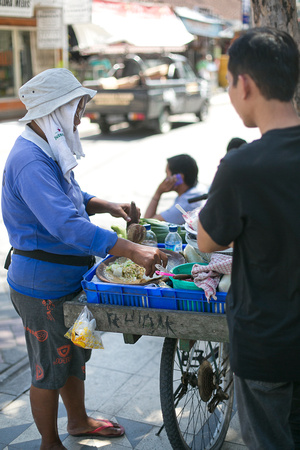
5 Avoid Street Food
Foreigners should avoid eating the foods that are found on the back of bicycles and being sold on the side of the street. These foods are commonly associated with the Bali-belly, which sends travellers to more trips to the toilet than what is normally comfortable. Its to do with their hygiene standards and cleanliness of the foods. The locals can handle this food without a problem. Its best to seek food from hospitality outlets such as cafes, bars, restaurants and hotels. After all its all very cheap.
6: Drink bottled water only
In my hotel there were labels on the bathroom saying, Not suitable for drinking. The water in Bali have a funny smell to it and should not be drunk as water, I wouldn't even try purifying it with boiling. Just stay safe and drink water from secured bottles. They are cheap and readily available.
7: Where to Stay
If your interested in entertainment, street side shopping, night life and restaurants then Kuta and Legian is your best bet. This place usually operates from 10am and stays open to 3am in some places. There are plenty of Hotels and the beach is about 15 minutes walking time away.
If you don't like crowded areas and want to do lots of tours and culture events. Then Kuta is NOT for you. Mainly because getting in and out of Kuta can be very sluggish on the traffic. During peak periods it can take up to 1 hour just to leave the very small Kuta area.
For a local culture experience, Ubud is a good area to be in. If you like water-activities then Nusa Dua is good. A good balance of ease of access and amenities Seminyak is a good choice. Don't be discouraged about the distance from suburbs, they are all relatively close by and easily accessible via taxi. So long as you don't have to go thru Kuta, everything is fine and close together. Within 30minutes driving.
8: Personal Driver
I highly recommend hiring a driver at least once during your trip. You can hire them by the a set number of hours and you pay them before you embark. I think it cost me IDR350 000 for 5 hours. You can divide that number if you are travelling as a group. The drivers I had were great, they were all friendly, they also doubled up as your tour guides and are super patient. If you want to go to a park or eat somewhere, they are happy to stay and wait for you till you are done (so long as its within the hours paid) they won't fuss. They can go just about anywhere in Bali and they are usually very knowledgeable of the area.
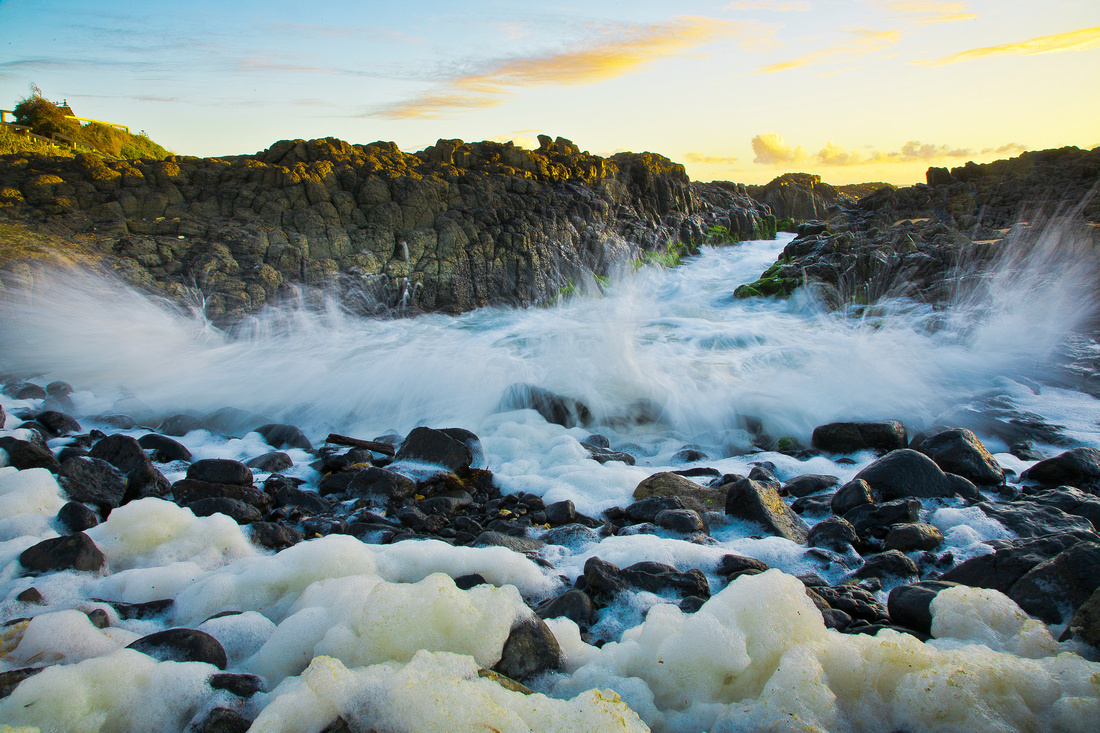
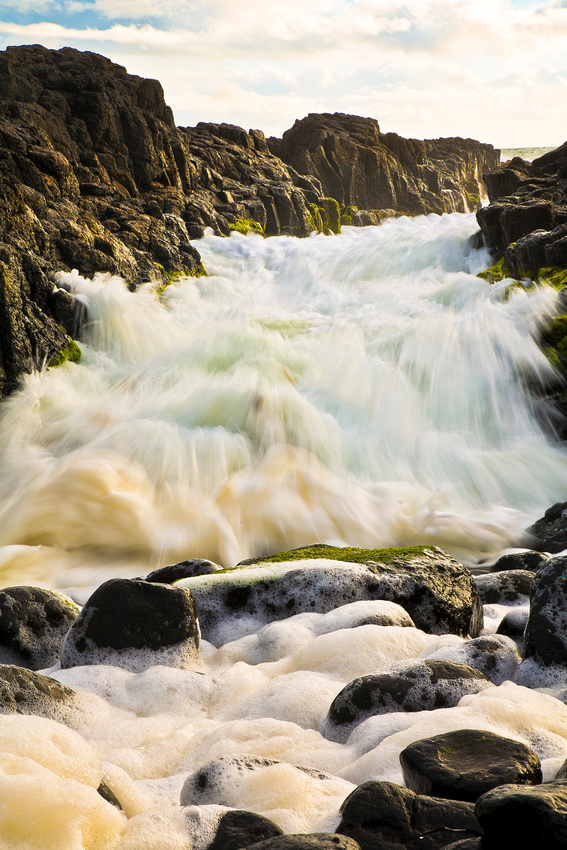
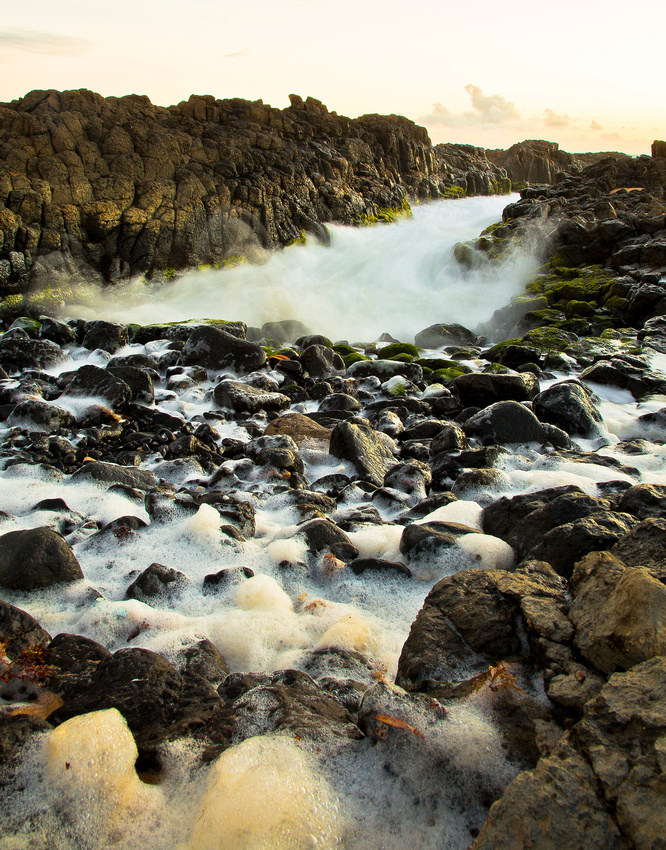
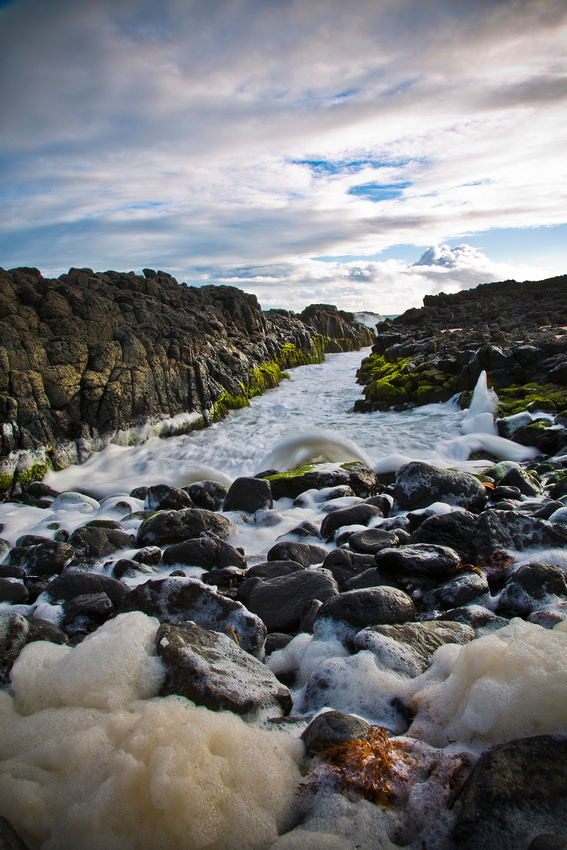
Although I consider myself more of a people photographer, I will never deny a good opportunity for some fantastic landscape imagery. Whilst I was on an unplanned trip down to Bunbury, I stopped down at the local beach for some sunset images. The time was just before 5pm and the sun still had about 1 hour before sunset. The clouds were looking really good and the water was just amazing.
It is always a good idea to arrive with good time before sunset. The remaining light allows you to scout your locations without rushing for time. It is also a safety thing as well, because often I would stay to shoot late into dusk and the light would be almost gone,
I can always predict good sunset light when there is a small break of clouds along the horizon. Whilst playing around with my camera with some random photographs, I waited patiently for the right light to hit my viewfinder.
There are two challenges with this type of scenery. The first is capturing the movement of the flowing water and the second is the dynamic range in the scene.
The first challenge was to capture the flowing water. It is generally good to photograph with a slower shutter speed. A slower shutter speed will allow the movement of the water to appear as a ethereal silky look. By having a slower shutter speed, the camera needs to be mounted a static and sturdy tripod to eliminate camera movement. To achieve a slower shutter speed, you will need to decrease your ISO to the lowest setting and have the aperture closed down to the smallest value. To get the small aperture, you set the aperture to the highest F stop value, refer to your lens specifications for information about your aperture range.
The second challenge is the dynamic range. The dynamic range is the range between the darkest part of the scene to the lightest part of the scene. The dynamic range in this scene has bright tones in the sky darker tones on the rocks below. It is difficult to get a good exposure for both scenes as a single exposure would either have good exposure in the sky with a very dark foreground, or vice versa: A good exposure of the foreground rocks and water, but with a totally washed out sky.
There are a couple of ways around these challenge:
1: The easiest is to wait for the correct moment, as the sun goes down, the sky will eventually become darker. There will be a window of time where the sky and foregound is of the similar brightness as the sky. At this time it would be the golden opportunity to capture the image. I always set my camera setting on Manual exposure at this time, and gradually lengthen the shutter speed as the scene gets darker. As the scene gets darker, it allows for the water to become more silky without over burning the image.
2: Using Neutral graduated filters
Neutral graduated filters are filters that you place in the front of the lens. They come in different brands and shapes, but the general idea is that it has a darker half and a clear half. When using one of these filters, you would want to place the darker portion of the filter over the brighter part of the scene which is usually the sky and the clear part of the filter over the darker part of the scene. The idea behind this filter is to reduce the brighter part of the scene to match it closer towards the darker part of the scene. Graduated neutral density filters usually comes in a variety of strengths and is measured in Fstops.
3: HDR mode (High Dynamic Range)
HDR is a popular way of photographing in this digital photography age. The idea of this technique is to capture a series of images of a particular scene in different exposures. Each exposure is aimed to capture the detail in the highlights, mid tones and shadows. Once the images are taken, they are processed in a software where all images are merged together to form an image with details in all areas. When this technique is done properly, it has the potential to look really good. However, I won't always soley rely on it as it takes practice to perfect.
Down below are some of the images taken from the day.
For more images, check out my photo portfolio at www.henrylam.zenfolio.com
]]>
Bali is a great holiday destination for the traveller who seeks to get away from their normal day-2-day lifestyle. Although it is a small island of Indonesia, It is filled with many things to rejuvenate the mind, body and soul. Whether your calling is for adventure, shopping, entertainment or just lazing out in the sun. Bali has plenty of amenities to cater even the demanding of travellers.
This blog is going to be split into two sections. The first is going to be focused 'no pun intended' on the photographic aspect of my trip. If you are a photo enthusiast you may find the first part interesting as it has some of the reasoning and explanation behind my images. If you're not a photographer, you may still learn a thing or two and if it starts to get too geeky, feel free to breeze through the text and just appreciate the images :)
The second part will be a general post for the prospective Bali visitor. The second part will comprise of tips that I have for the 1st time traveller. I'll talk about money exchange, things to be aware of and things your should experience.
Photographing Bali
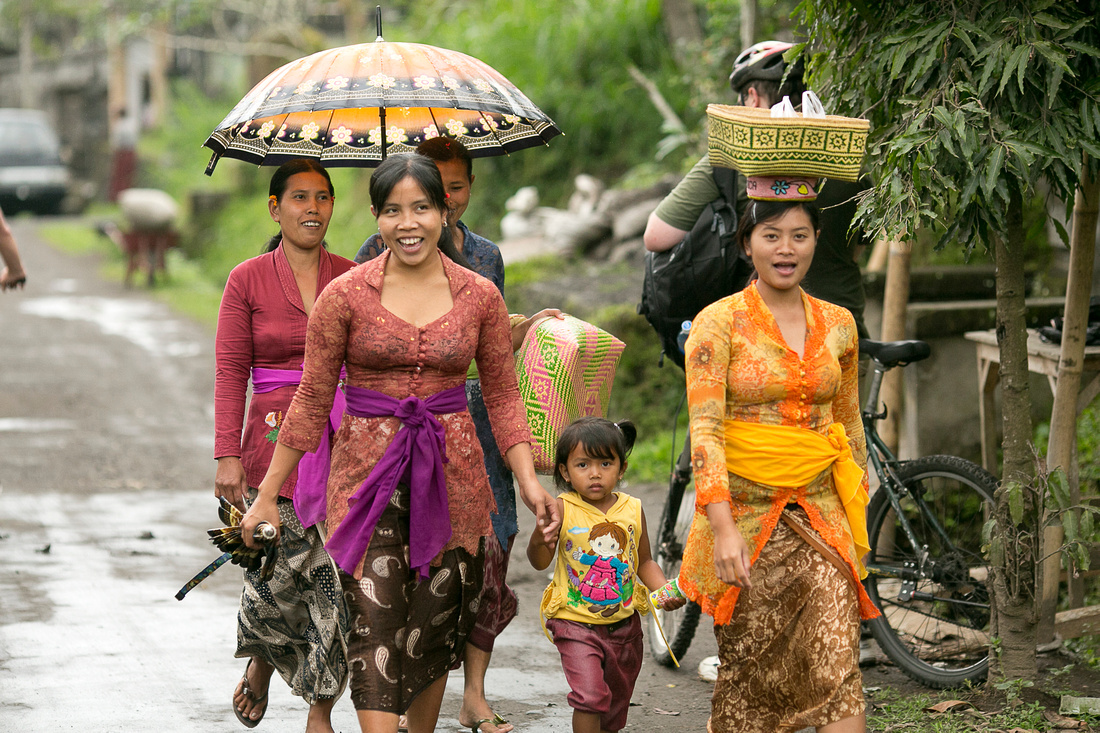
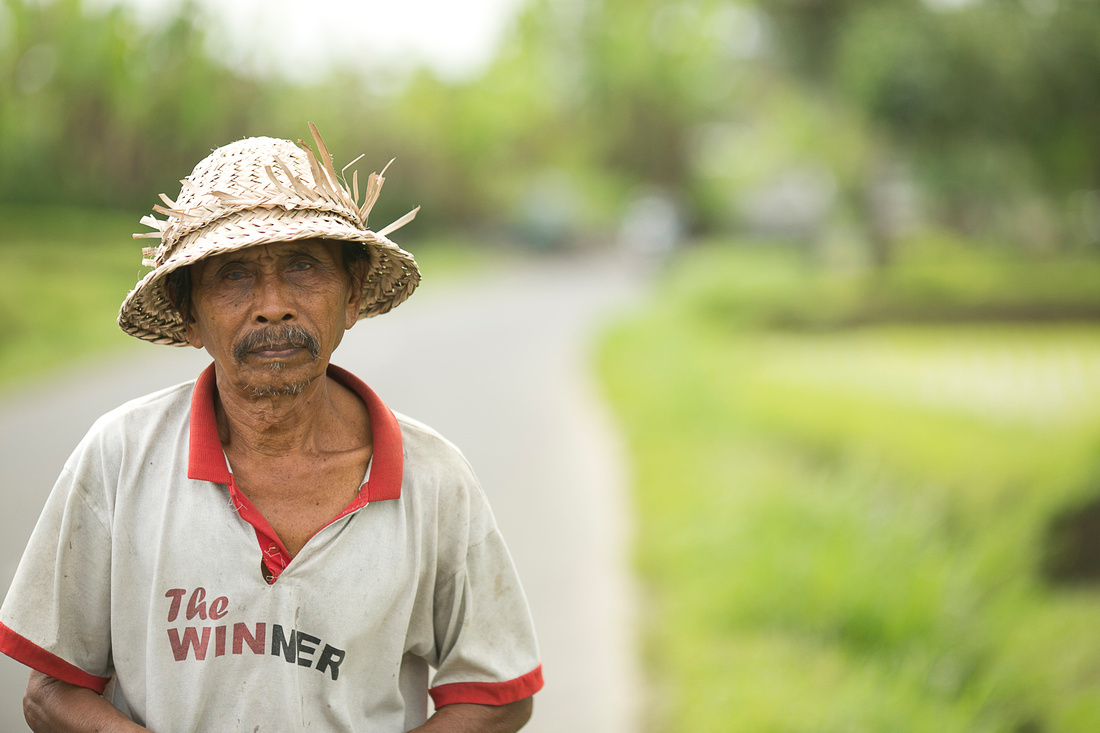
Whenever I think of travel, I instantly think of photo opportunities. I want to capture the people, culture, environment and the way the lights interacts to the foreign land. Bali in my opinion has plenty in terms of camera candy. The people are friendly, the culture is unique and the scenery is beautiful and the weather is great all year round.
My choice of camera body for this trip was my recently acquired Canon EOS 5D Mark III with a trio of high quality lenses. (24-105 F4 IS L Lens, 135mm F2 L Lens and 50mm 1.4 Lens.) This camera performed flawlessly for me. With its new high ISO performance and upgraded Autofocus system, it gave me the ability to keep shooting quality images in some of the most mundane and photo challenging places. I carried most of the equipment in a Tamrac Expedition 5 Backpack. A backpack was my choice of storage, When traversing though Bali, I found myself walking long distances, at times more than 30 minutes without rest and cycling up to 25km on a tours. The backpack provided me the comfortability and storage space I needed.
As a back up camera I had my Canon Powershot G10. It is a good idea to carry a small point and shoot camera to complement the DSLR. By having a smaller camera it allows me to get pictures in areas where I normally would not be practical with the DSLR. Point and shoot camera also comes in handy when you need a friendly stranger to take an image for you. Most people nowadays know how to operate a point and shoot camera. They are generally all similar in function. You can set it to Automatic, have the screen visible for the person and then just instruct them to point and shoot. Its that Simple :)
I also packed my 580EX Speedlite, although seldom used it, it does have the ability to 'save my photo backside in the most random occasions, ie when the subject is backlit or they are wearing head gear that is obscuring their faces.") I also packed my Carbon Fibre Manfrotto 190CXPRO3. The tripod didn't get used once. Although I'm not much of a scenery shooter, I always pack it just in case.
Below are some examples of the pictures I took on my trip:
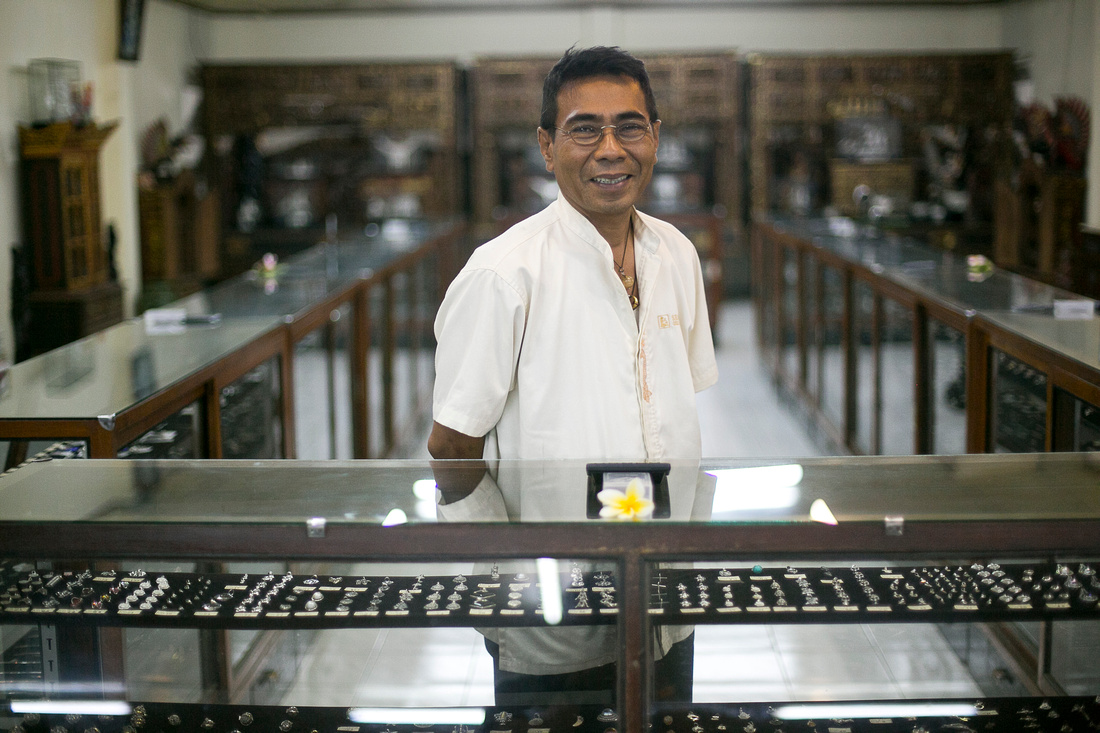
I will admit there is NO greater sense of joy as a photographer, than hearing the compliance of a person who is willing to have their photograph taken in their own environment. This picture was taken in one of the silver smith shop+workshop. In this image I asked the store owner to stand in front of his show case. I wanted to capture an image with himself being prominent in the photograph alongside with his wares. By placing him in the centre of the image I was able to give equal importance to both the owner and the shop environment. I love the symmetry and harmony in this image, and the smile from the owner reflects his welcoming and friendly character.
For this image, I had my 50mm 1.4 on my 5D Mark III. I shot this image at F1.4 ISO 1000 with 1/640 of a shutter speed. The image was lit only with ambient lighting. I always try to shoot at wide aperture as oppose to increasing ISO. in my opinion, the lens was purchased for the larger apertures, so why not use it. Sure image quality is increased when the lens is stopped down, however, I always believe it won't be degraded as much as increasing ISO. Also when you are able to get the focus 'right on' the image is rewarded with a beautiful separation of the main subject and the background.
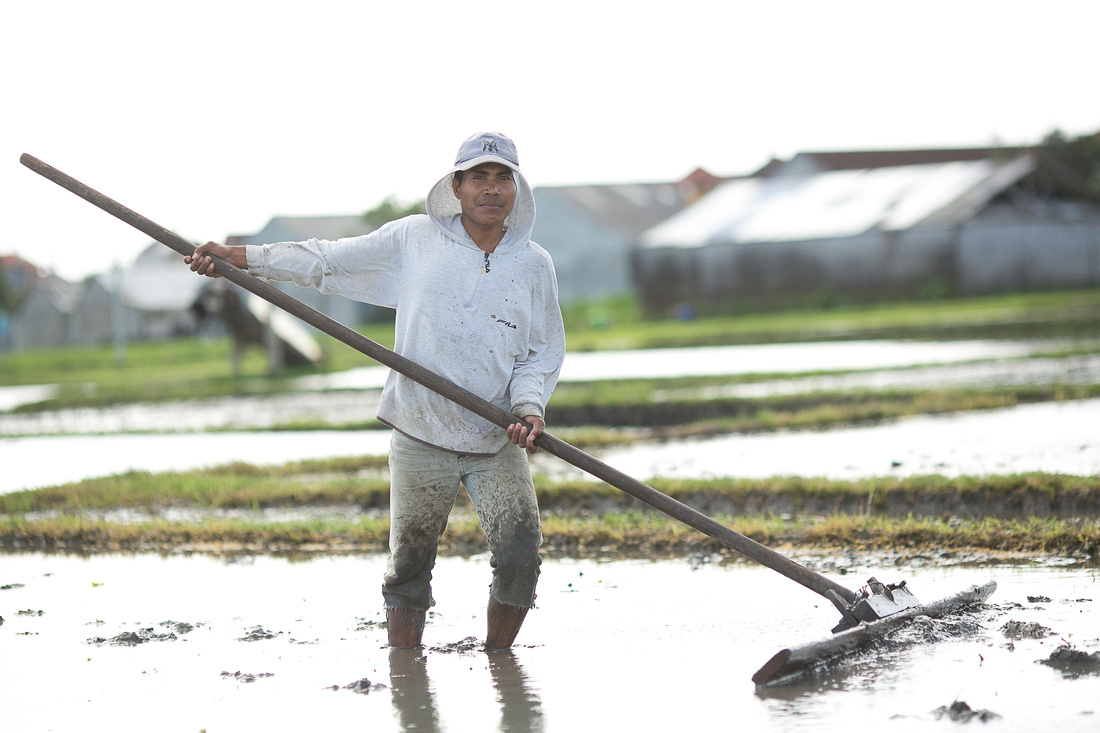 Here is a classic example where a Fill-Flash was necessary. When I walked about 25m through the narrow trench of the rice fields, I was facing towards the sun and the subject was back lit. I had on my camera my 580EXII and had that set to ETTL +1 and on High sync mode. ETTL is the flash's auto exposure setting. I used ETTL because I didn't have the luxury of time to fiddle with manual adjustments. I was blessed with the farmer being compliant with me, I didn't want to wear out his patience. ETTL does a good job most of the time, so took my chances with those favouring odds. I have it at +1 because its always to have too much power than to be underpowered. It is much easier to dial back down from a over flashed shot, than an under-flashed shot. The High Speed Sync mode was necessary because the background was very bright. Most cameras have a limited sync shutter speed of 1/250th of a second. Normally at 1/250th of a second I would require a smaller aperture to limit the amount of light entering the lens. This creates a disadvantage of excessive focus of the background (distractions away from the main subject) and also it puts lots of strain on the flash unit. Speed of 1/250th second is often too slow for a bright day when the aperture is near F2.8. By having High sync mode activated, it allows your camera to use its full range of shutter speeds. This mode comes as the expense of a weaker 'full-powered' flash.
I also couldn't get too close to the subject so I needed my longer 135mm F2 lens. By having a longer focal length lens. It allows me to frame the subject so it appears larger in the frame.
This image was shot at F2.5 1/3200sec at ISO 400
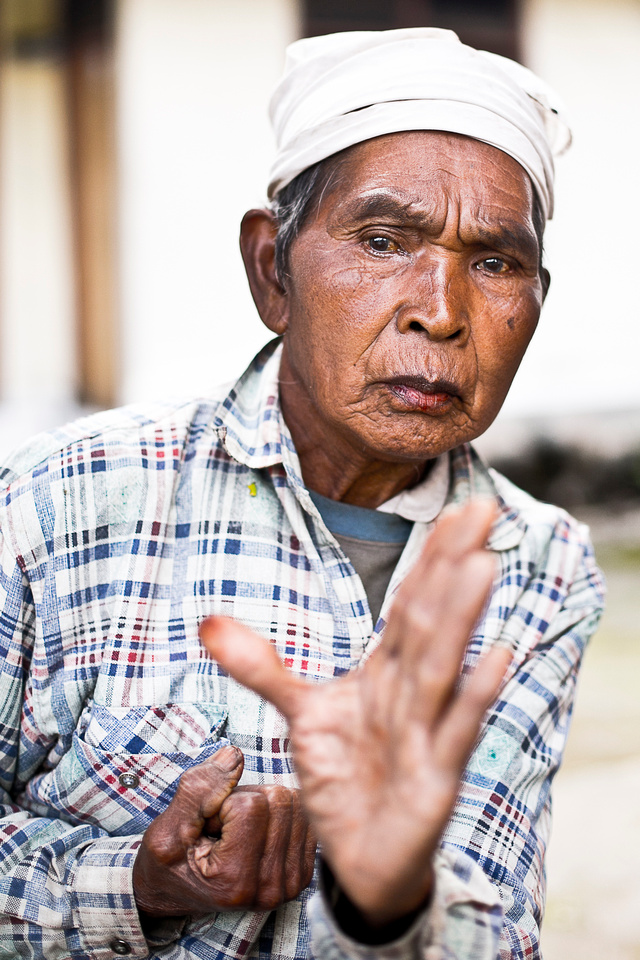 'Get in nice and close' is always great advice for photography and taking portraits is no exception. It is recommended to fill the frame with the subject. By filling the frame you maximise impact and minimise distraction. When focusing on people, a general rule is to always have the eyes in focus. This can be fine tuned when you manually select an appropriate Autofocus point on your camera. Some photographers use what I consider a lazier technique , where they focus first then they recompose the camera to suit the framing. Although this technique may be faster. It does leave itself for a shaky image if done poorly, due to the moving of the camera.
I was able to gain the acceptance of a photograph from this man, so there was no need for me to rush the camera. I had my 50mm 1.4 lens attached at the time. So i carefully recomposed the framing to suit, and set my AF point for his eyes. Once the lock was confirmed. I fired a few frames.
F2 1/1250th at ISO 500
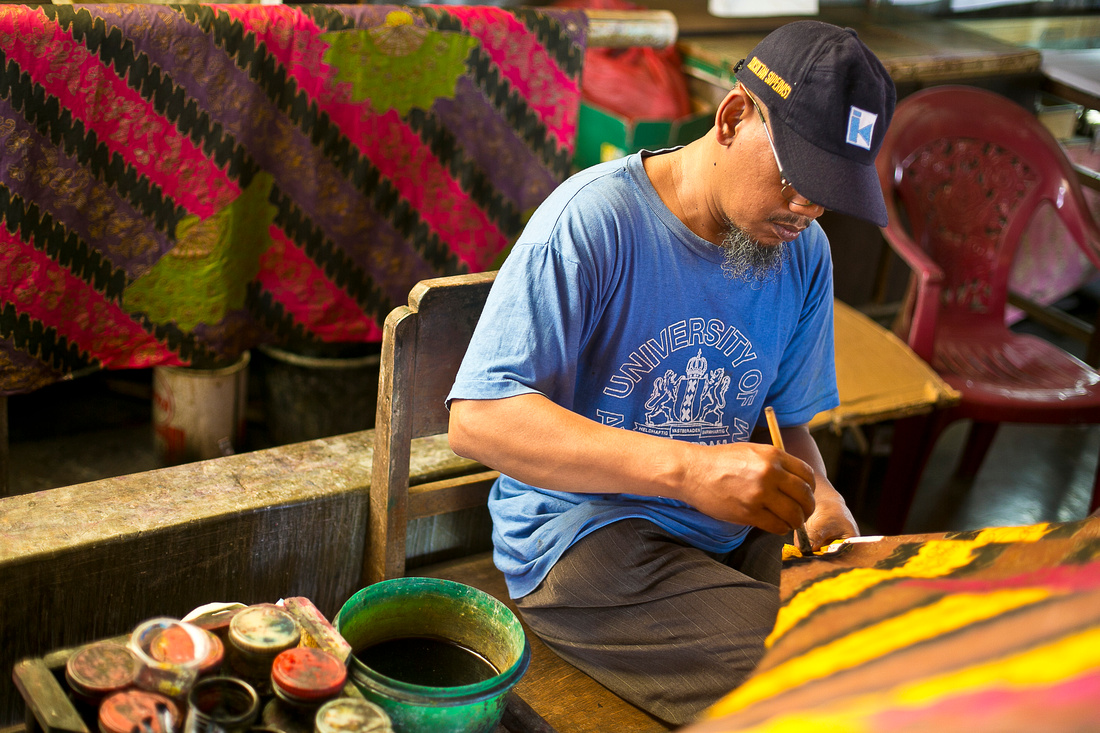 When capturing a portrait I always love having elements of the subject's lifestyle to help personalise the final image. Here I have an image of a man working on Batik (A Balinese type of cloth). I find it important to have the hands tell the story for the photograph. Always have the subject holding or doing what they do in the image. This helps convey what is actually happening in the photograph.
When framing this image, I noticed that the cloth was triangular shaped and that the tailor was holding onto it. This created a great leading shape into the image. So i was able to stand in front of the tailor and position the cloth so it leads the eye straight to the tailor. The main focus here is his hands. Alongside the image I have lots of colour and elements such as the paint and bottles on the side.
50mm 1.4
F2 1/50th ISO 400
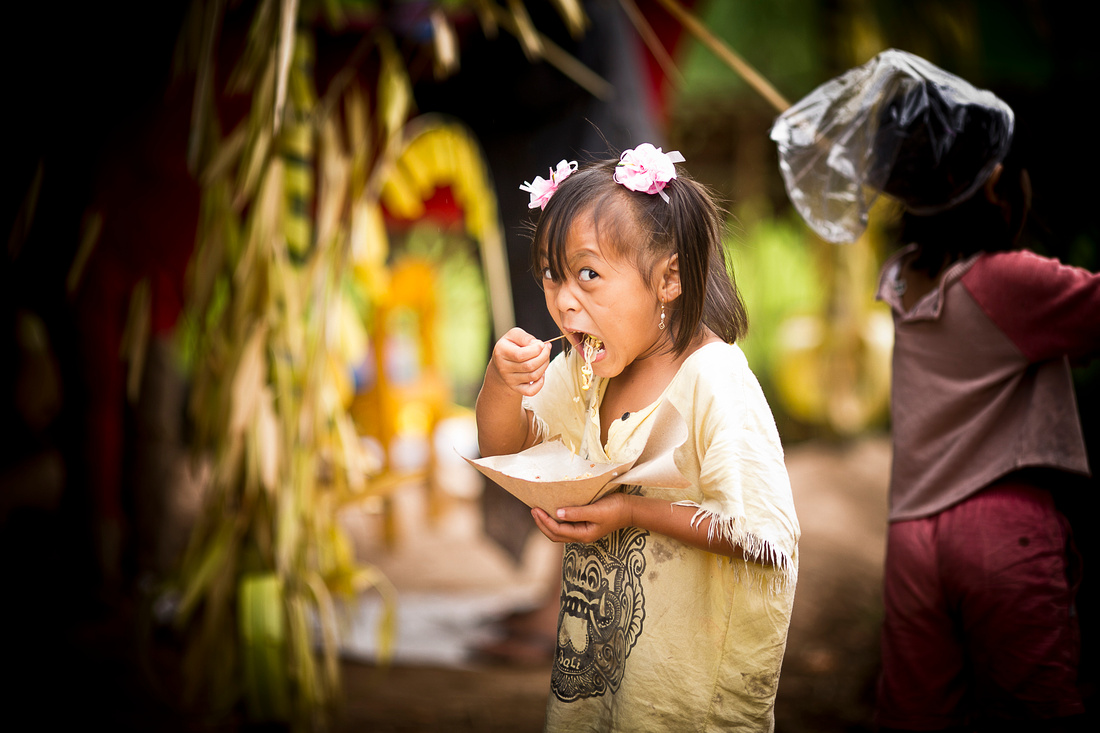 Children are always a good subject to photograph. I find them always spontaneous and full of expression. I'm always respectful when it comes to photographing children because you never know if it may give off the wrong impression to those around you. Once you have the all clear from them and those around them. Then I'd suggest let the shutter button do the rest.
The children in Bali are very cute in my opinion, beware sometimes they may try and make you buy things from their stalls. I'm always happy to give them a small tip. maybe like 10 000 - 20 000 IDR for acceptance of a picture. That is only like AUD$2. We both benefit, they get a bit of reward, and I come out with great images.
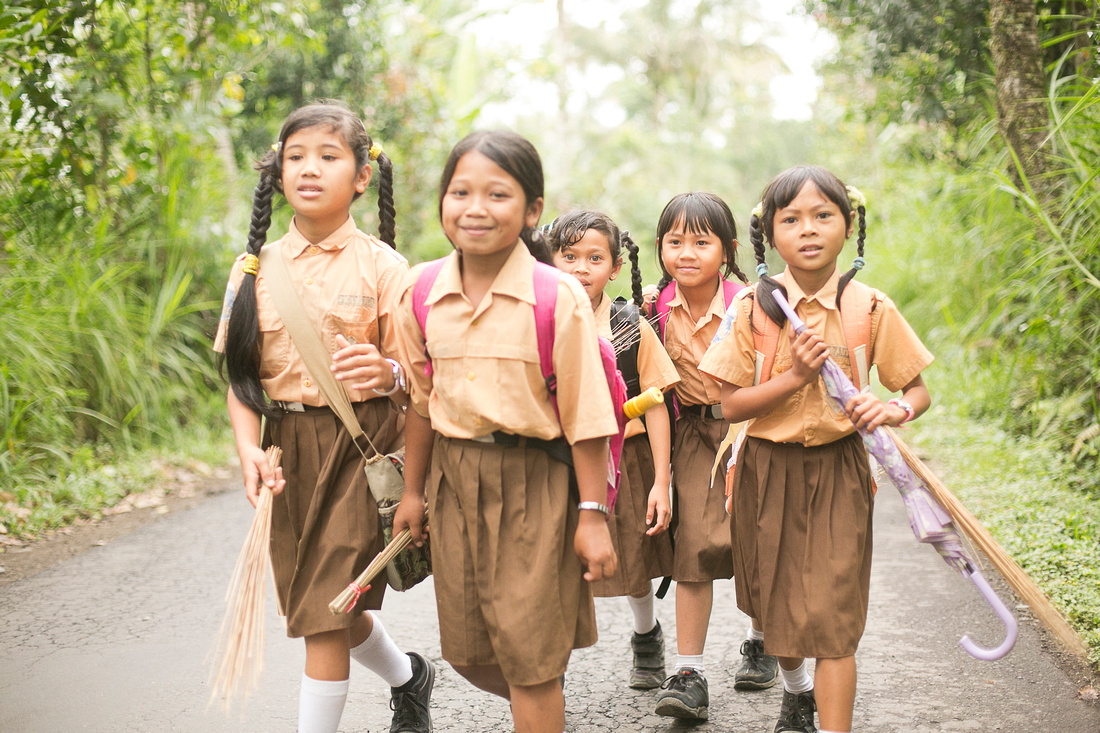


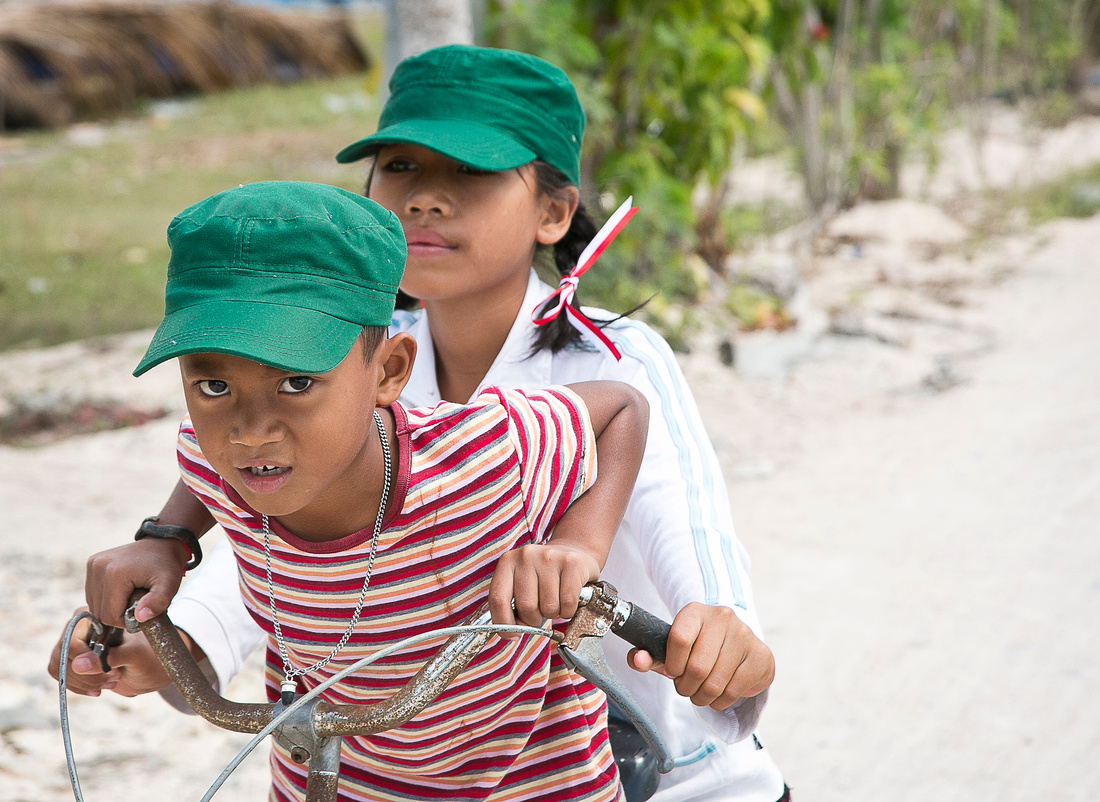
To view the photos go to:
http://henrylam.zenfolio.com/bali
Part 2: Tips for travelling to Bali
1: VISA
If you are travelling from Australia, be aware that VISA is required for entering and exiting Bali (2012). It cost me US$30 to enter and US$30 to exit Bali. The VISA can be purchased as you pass through Immigration at the airport. They have currency converters there so you need not have to worry about exchanging your money prior to entering Bali
2: Changing money to IDR at the Airport?
This was a big one for me. As when I always enter a foreign country, I always want to know the most efficient way to exchange my currency. As you collect your luggage from the airport. You will be greeted with a HALLWAY lined up with money Changers. I didn't count them, but I think there was about 20 stores adjacent to one another You will not miss it. There will be traders shouting, calling, trying to pull you into to change your money. It can be a little bit of a culture shock if you are not prepared for it. I'd be weary changing large sums of cash with these exchanges, because the airport can be crowded with people. I did change about AU$200 at first. Now coming to think about it, that was EXCESSIVE. If I had known, I would have only exchanged about AU$20. Just enough to comfortably get me on a taxi to my hotel in Kuta. The Taxi ride to KUTA was about AU$10 and the time can vary from 15 minutes to 45 minutes depending on the traffic. The rates are better outside of the airport.
3: Money Changing in Kuta
There are many money changers in Kuta. I was told from friendly local tour guides that there are good places and not so good places. The good places are either the banks, and the money changers with a 'building.' below is an photograph of a 'GOOD' money changer.
This exchange in somewhere near the middle of Jalan Legian (Main street of KUTA). You see what I mean by having a store front. This is a dedicated money exchange shop, it has a main door and its sole business is to exchange foreign currency. They will have offical monitors in the store and you can see them exchange the money, SLOWLY. By having a door behind you it also makes me as a traveller feel more safe with putting my money away.
Now for the not so good money exchangers. I'll refer them to 'RISKY' exchangers and should be AVOIDED. First take a look at the images below. 
You will be walking along the path and you will come across a whiteboard displaying the rates. You should be aware that when they write it on the whiteboard it isn't as official as one that is being updated by an authorised exchanged-monitor. Oh also, don't let the fact that when they display "Authorised Money Changer" on their board, All money changers say that.....
They often have their shops hidden away from the main streets. There shops will be about 20 meters from the main road. The 2nd image above is obviously taken during broad daylight... You can image it to be worse later in the dark. This alone should send warning signals to you.
Local tour guides have told me stories about how these traders trick the naive traveller. You will notice the rates on the whiteboard to be very attractive. (Much better rates than the official changers) they do this to lure the traveller towards their shop, Making them walk the extra distance.
They will calculate the money with their intended rate, and they may even use 'real money' in exchange. However, these sneaky traders are often crafty with their sleight of hand, they are often quick to sift through the money and can sometimes undercut you for the amount they give. They may calculate say $100 worth of money, but really their fingers slide the money away whilst counting, and can leave you with only about $80 worth of money. (You've been cheated for $20). I wonder sometimes, why are they in such a hurry to count and sift through the money, they do literally have ALL DAY.
4: How to select a TAXI
There are many types of taxis in Bali, and they all look very much the same. The good ones are those with a meter installed that is clearly visible to the passenger. There are taxis there that have tiny meters that are probably fake and do not function properly. The reliable company of taxi is known as "BLUE BIRD TAXI' they can be recognised from their labels displayed on the front windscreen.
Be mindful that the other taxis look very similar they even have the same blue bird logo on their taxi signs and the cars are of similar colour, below is an example of a non-blue bird taxi. Notice the similarities. I'm not saying to Avoid these taxis altogether. I'm just letting you know that you have to negotiate at price for their service. Sometimes you can be overpriced. If you know where you are going, and know how much the cost should be, and you get a similar price. Then its all good.
5 Avoid Street Food
Foreigners should avoid eating the foods that are found on the back of bicycles and being sold on the side of the street. These foods are commonly associated with the Bali-belly, which sends travellers to more trips to the toilet than what is normally comfortable. Its to do with their hygiene standards and cleanliness of the foods. The locals can handle this food without a problem. Its best to seek food from hospitality outlets such as cafes, bars, restaurants and hotels. After all its all very cheap.
6: Drink bottled water only
In my hotel there were labels on the bathroom saying, Not suitable for drinking. The water in Bali have a funny smell to it and should not be drunk as water, I wouldn't even try purifying it with boiling. Just stay safe and drink water from secured bottles. They are cheap and readily available.
7: Where to Stay
If your interested in entertainment, street side shopping, night life and restaurants then Kuta and Legian is your best bet. This place usually operates from 10am and stays open to 3am in some places. There are plenty of Hotels and the beach is about 15 minutes walking time away.
If you don't like crowded areas and want to do lots of tours and culture events. Then Kuta is NOT for you. Mainly because getting in and out of Kuta can be very sluggish on the traffic. During peak periods it can take up to 1 hour just to leave the very small Kuta area.
For a local culture experience, Ubud is a good area to be in. If you like water-activities then Nusa Dua is good. A good balance of ease of access and amenities Seminyak is a good choice. Don't be discouraged about the distance from suburbs, they are all relatively close by and easily accessible via taxi. So long as you don't have to go thru Kuta, everything is fine and close together. Within 30minutes driving.
]]>